So you turned on your PC to complete an important task online but are unable to connect to an internet connection because the Wi-Fi option is not showing up on Windows 11 PC(right side of the taskbar). This could be annoying, isn’t it?

The Wi-Fi option not showing up is a traditional issue that exists since the days of Windows 7, 8, & 10. Unfortunately, this network issue exists in Windows 11 as well.
Wi-Fi option showing up in Windows 11 means you won’t be able to connect to an internet connection as a result won’t be able to perform tasks that require internet.
Most of the time this issue occurs due to disabled network services, outdated network drivers, hardware being broken, and there could be other hidden reasons as well that no one knows.
How to Fix Wi-Fi Option Not Showing In Windows 11
In case, you reached this web page then it’s highly possible that Wi-Fi options not showing on your Windows 11 PC as well. Fortunately, there are possible ways that you can apply to fix the issue. Let’s start with:
Update/Reinstall Network Driver
The very first thing that you can try is updating network drivers and if required reinstalling drivers. Here’s how you can do that:
Open Start Menu and search for Device Manager. Open the Device Manager from the search results.
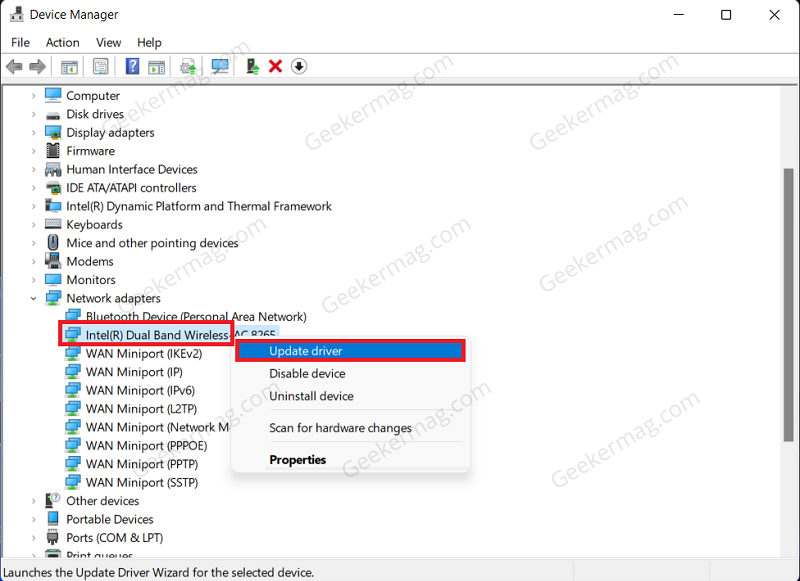
In Device manager windows, expand Network Adapters. Right-click on the network adapter and then click on Update Driver.
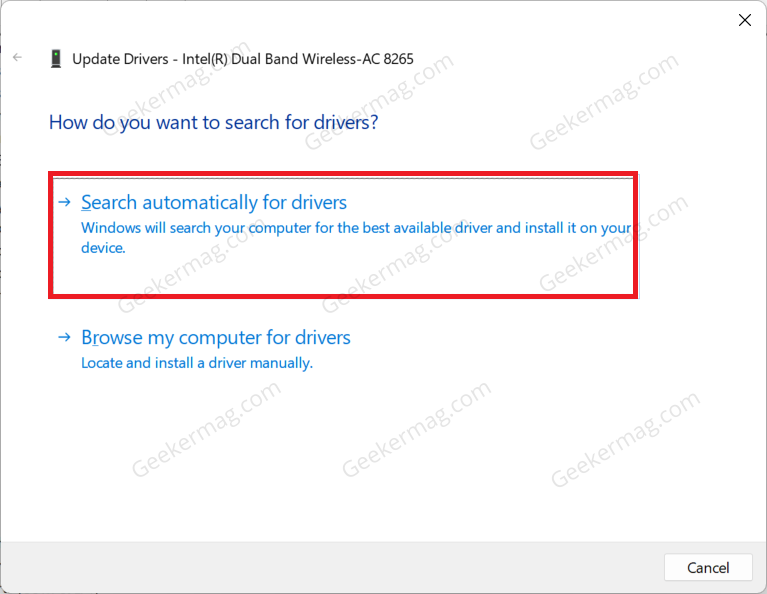
Now, click on Search automatically for drivers.
Once done, close the Device Manager, restart your PC and the issue should be fixed.
However, if updating the driver didn’t work out for you, then you should try reinstalling the network driver.
To do so, right-click on your network driver in the Device Manager and click on Uninstall Device.
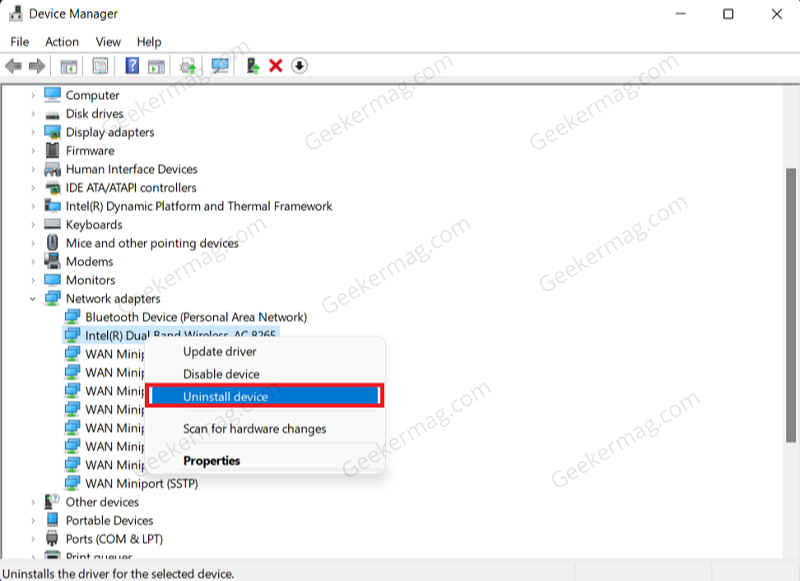
Confirm uninstalling the driver, and then restart your PC to reinstall it.
In case, this also fails to fix the issue, then head over to the manufacturing website and try to download the latest network driver for Windows PC and install it.
Restart WLAN Autoconfig Services
Another solution that helps in fixing the issue for various users is by restarting the WLAN Autoconfig services. To do so, follow the steps given below:
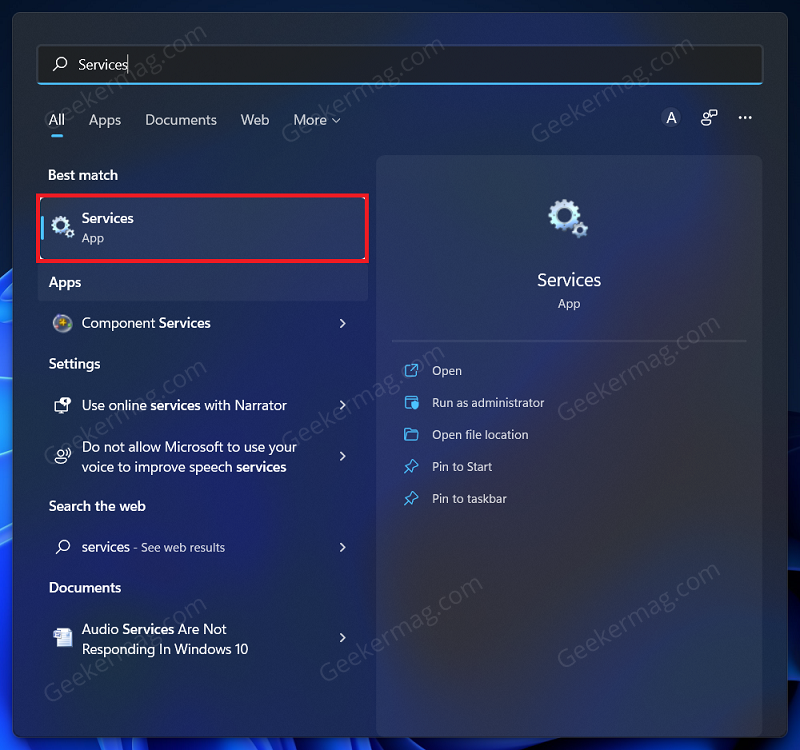
Press the Windows key on your keyboard, and in the Start Menu search for Services. Click on the very first option from the search result to open Services.
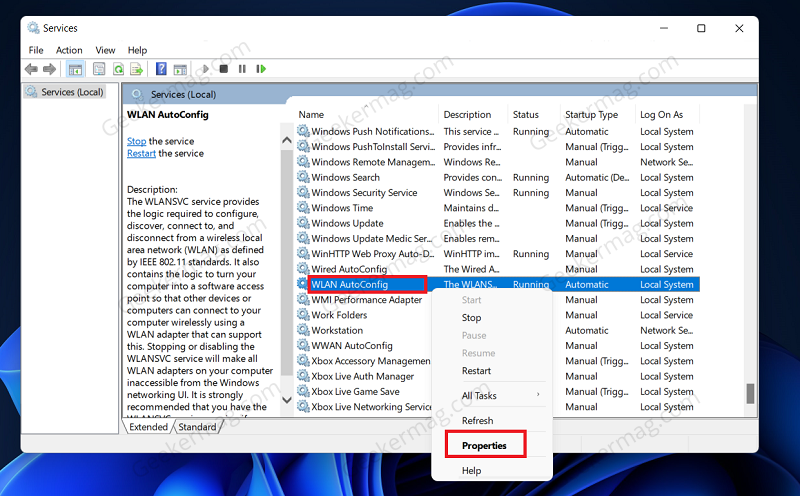
In the Services, right-click on the WLAN AutoConfig and then click on Properties.
In the Properties window, set the Startup type to Automatic and click on the Start button.
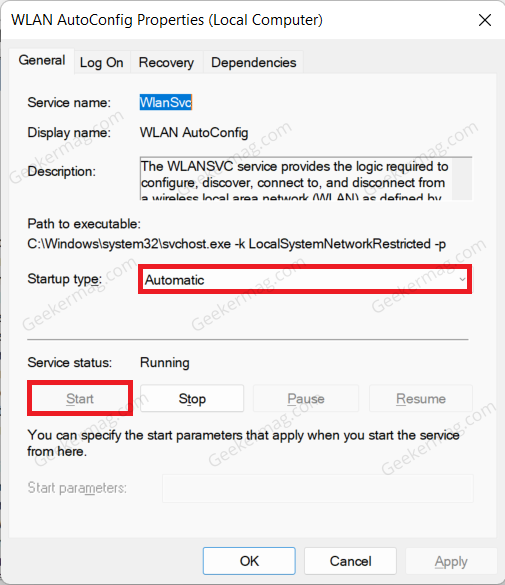
Click on Apply and then OK to save the changes and then close the Services window.
Set IP Assignment To Automatic In Settings
The very next thing that you can do is set the IP assignment to automatic in Settings. You can do so by following the steps given below-
Open the Settings app by pressing the Windows + I key combo.
Head to the Network & Internet section from the left sidebar, and then click on Wi-Fi on the right side.

Next, click on Hardware Properties.
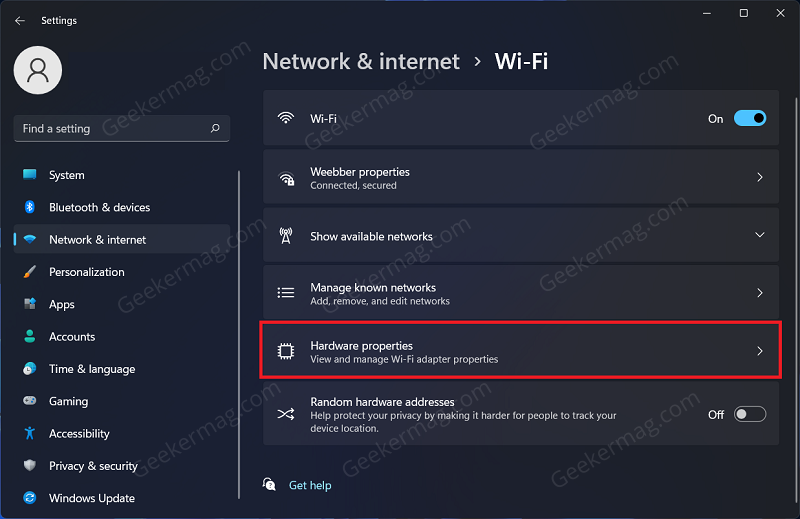
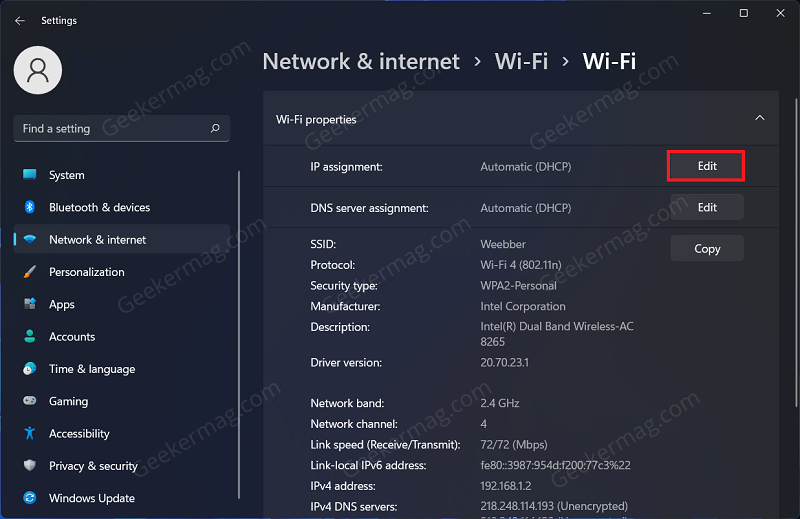
Now click on the Edit button right next to the IP assignment.
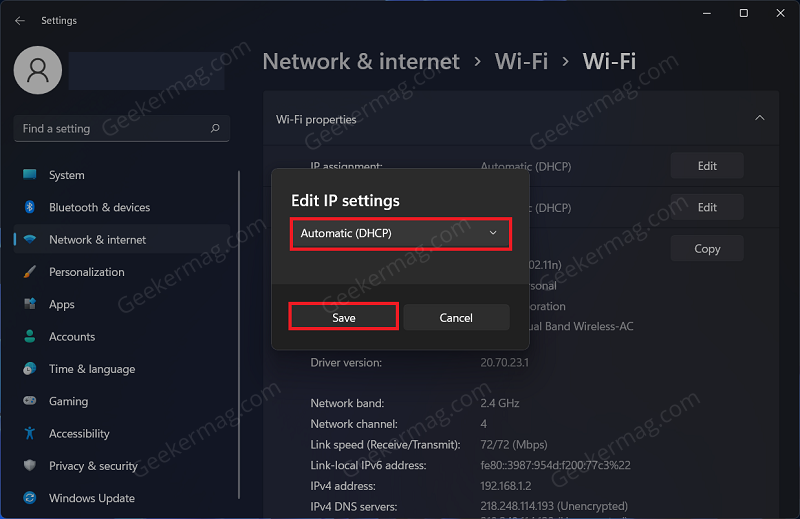
Select the Automatic (DHCP) from the drop-down menu, and click on Save.
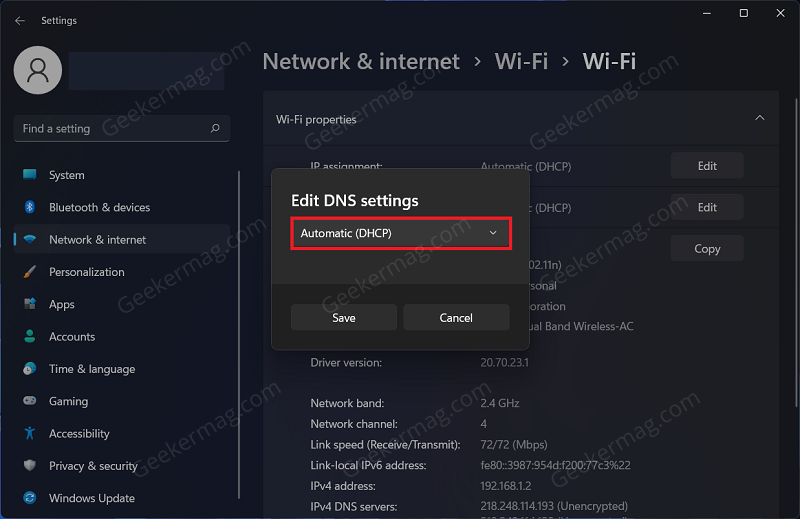
Click on the Edit button next to the DNS Server Assignment.
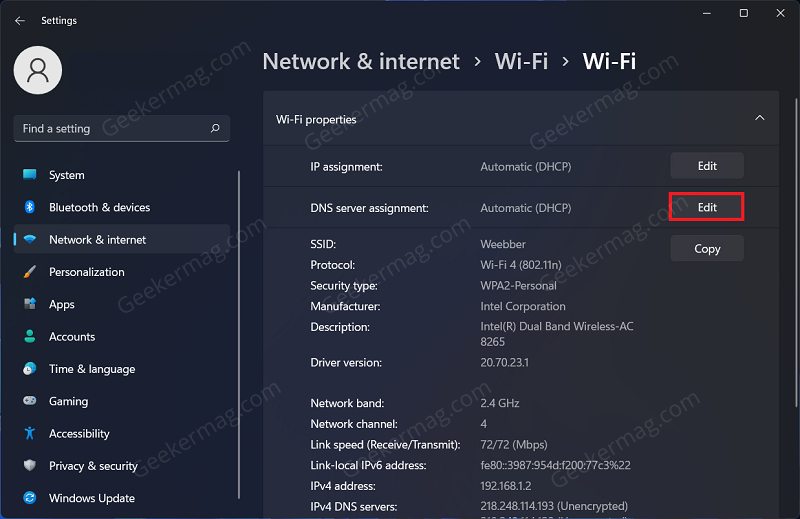
Select Automatic (DHCP) and click on Save.
Reset Network Adapater
If you still face the issue, then the last option for you will be to reset the network adapter in Windows 11. To do so, follow the steps given below-
Press Windows + I key to open the Settings app.
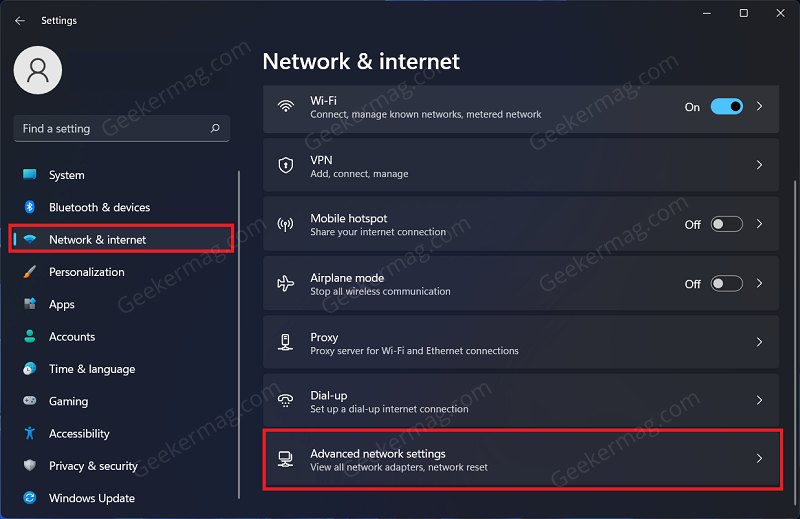
In the Settings app, head to Network & Internet, and then on the right side, click on Advanced Network Settings.
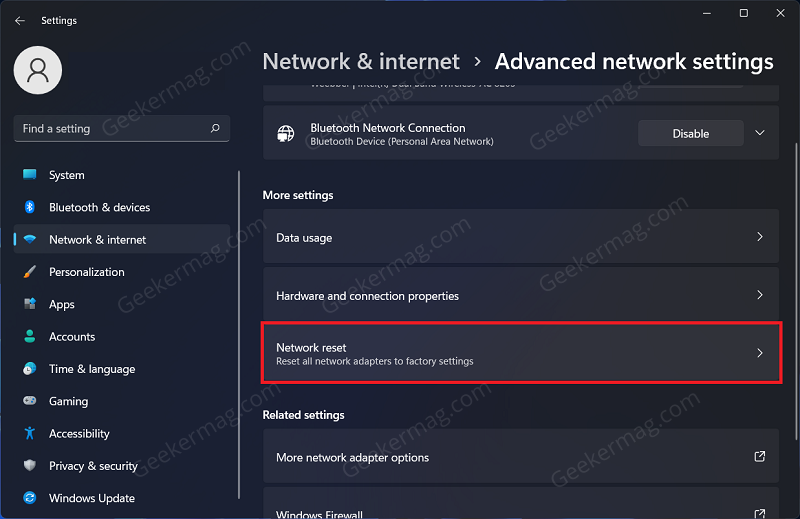
Now, click on Network Reset under the More Settings.
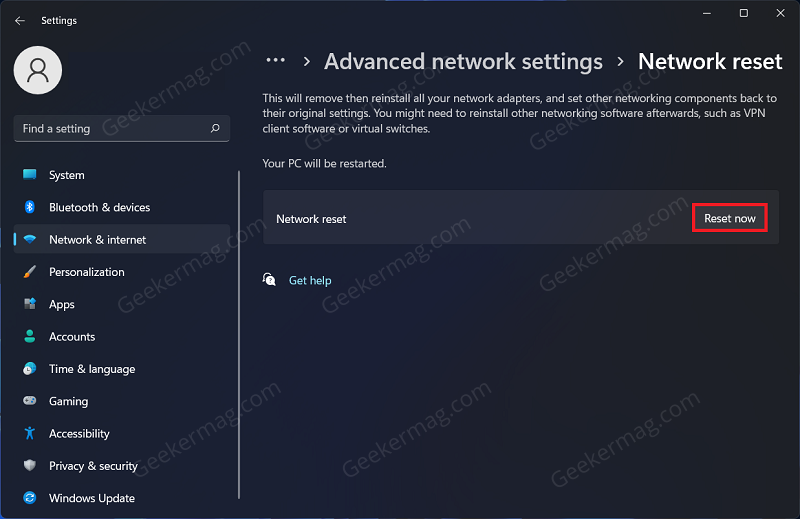
Click on Reset Now to reset the network, and the issue should be fixed.
So these are possible ways using which you can fix Wi-Fi option not showing in Windows 11. In case, you know any other solution that helps in fixing the issue and we fail to cover, then feel free to cover in the comments.


