Using a VPN makes your connection secure by connecting you to a private network. A VPN can be used to prevent data breaches and it also allows you to access geo-restricted content.
Major VPN services offer their desktop or mobile client that makes the process of setting up and configuring the VPN super-easy.
Fortunately, you don’t require an additional program to install and configure VPN in Windows 11 as Microsoft has already baked one into the operating system.
In Windows 11, you don’t need an additional program to install and configure VPN as it already has one baked inside the operating system.
You can also use a free VPN in Microsoft Edge to Surf Anonymously & Securely
How to Manually Setup or Connect (Free) VPN On Windows 11
In case, you’re planning to use a VPN on your Windows 11 PC, but don’t know how to set up and manually configure a VPN on Windows 11 PC, then below in this blog post, you will learn how to do that.
The process of configuring a VPN is similar to all major VPN services. Since we don’t have a subscription from a VPN provider, we will be using free VPN to demonstrate the process
Press Windows + I key combo, which will open the Settings app on your Windows 11 PC.
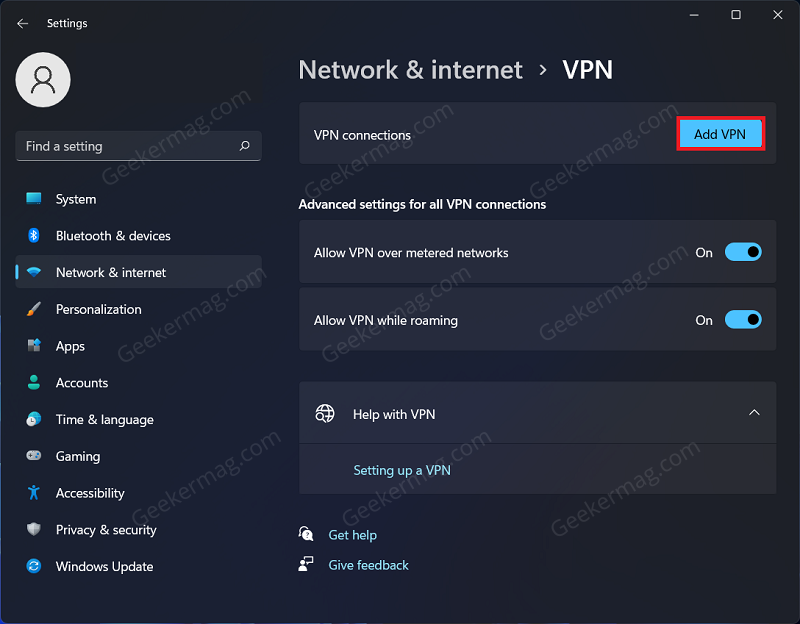
Here, head to the Network & internet section from the left sidebar and then click on VPN on the right side.

Now, click on Add VPN button.
On the next window that pops up, set the VPN provider as Windows (built-in).
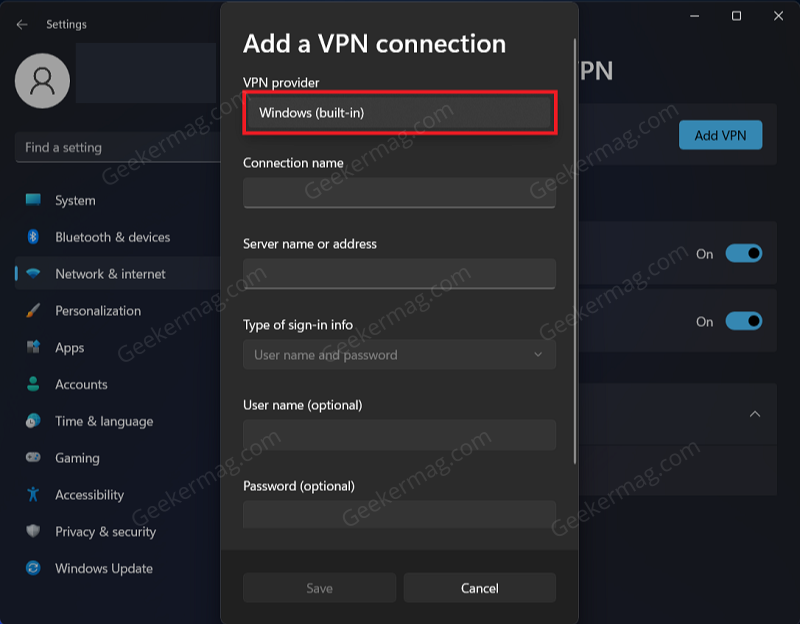
Next, type in the Connection Name. It could be anything.
Now, you need to type in Server Name or Address. To get that, follow the steps given below-
Open your browser and head to VPNBOOK website.
Here, click on the Free OpenVPN Account button.
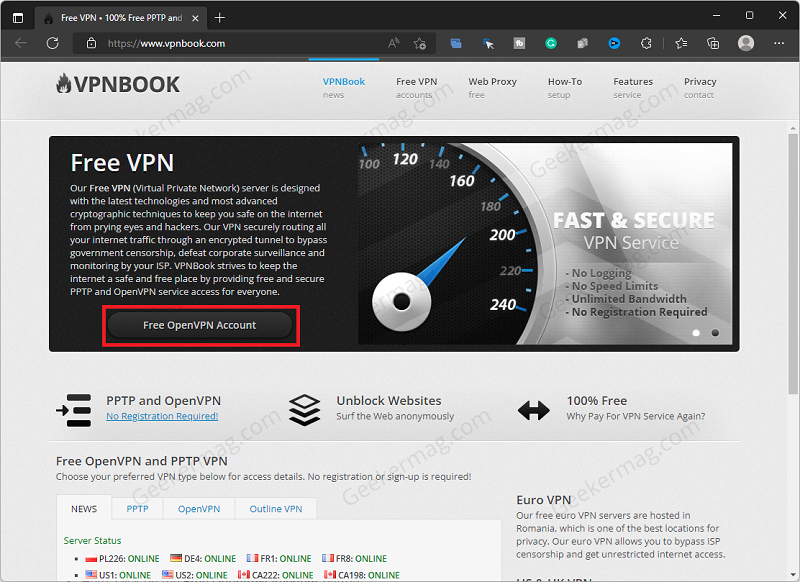
You will see a list of server names here; copy one of them. In my case, I have used this: PL226.vpnbook.com

Now, head back to the Settings and paste the name in the Server name field.
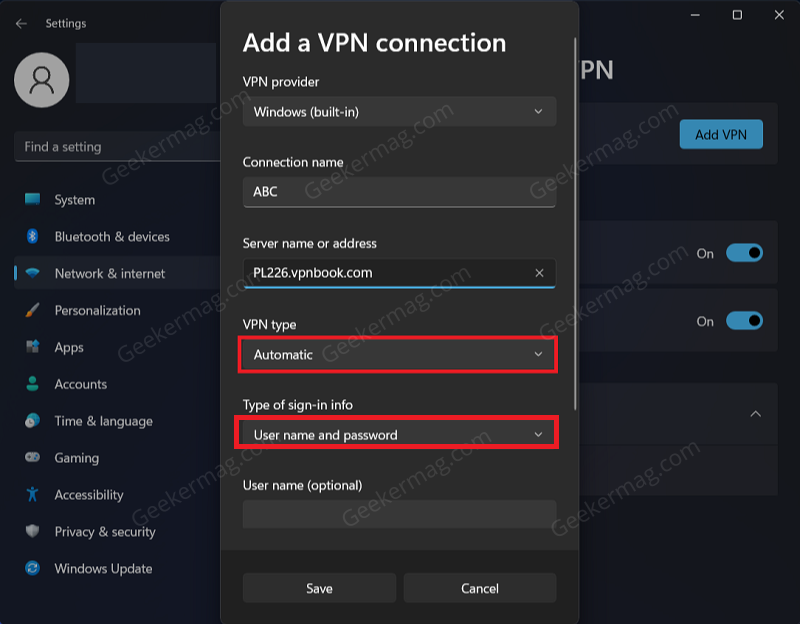
Let VPN Type remain automatic. Also, let the Type of Sign-in info be username and password.

Check the checkbox for Remember my sign-in info and click on Save.
Next, click on the Connect button.

You will be asked to enter the username and password. For that, head back to the VPNBOOK website, copy the username and password and Paste them into the required field.
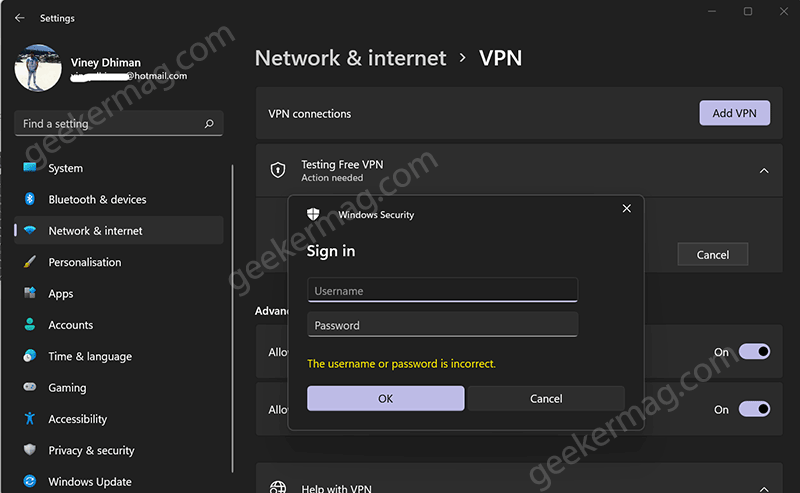
After entering the credentials, click on the OK button. Your sign-in details will be verified. The process will take a few seconds.
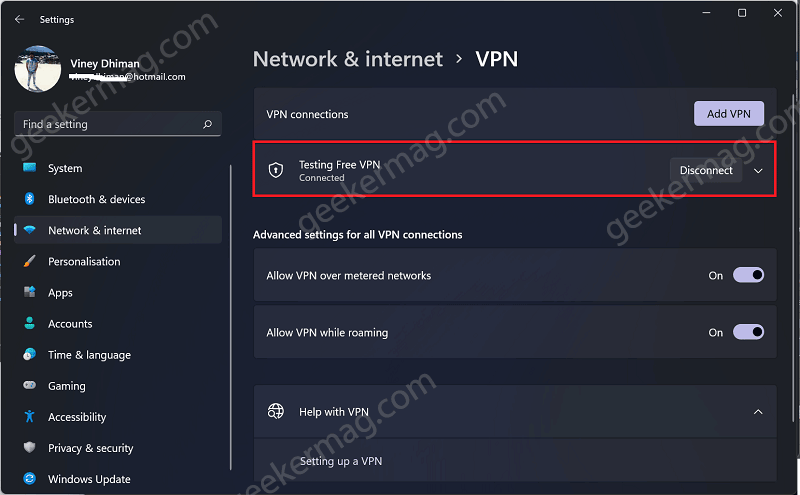
Once done, you will be connected to the VPN on your Windows 11 PC.
How to Check VPN Connection Properties in Windows 11
If you want to get about VPN connection, then you need to click on the down arrow available next to VPN connection, then select Advanced options.
You will see the following details like showing in the screenshot:
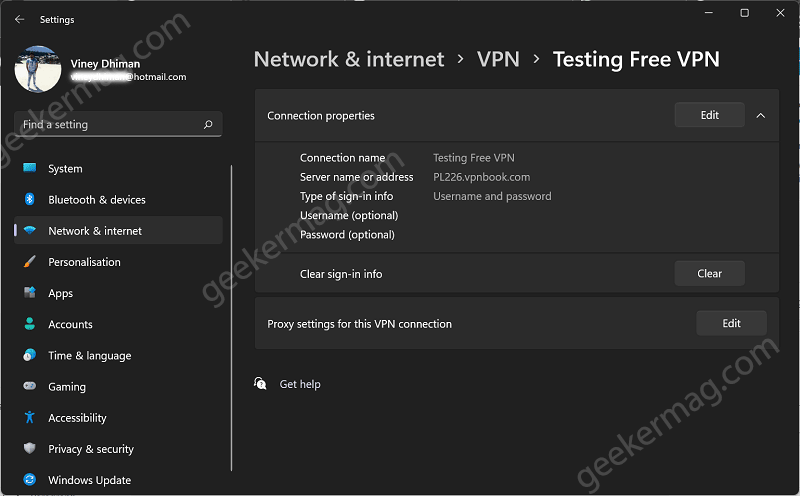
In case, you want to clear login credentials, then you can also do that. Click on the Clear button next to Clear sign-in info.
How to Disconnect VPN Connection on Windows 11 PC
At any point, you’re done using a VPN connection and now you want to disconnect it, then here’s how you can do that:
Go to Settings > Network & Internet > VPN > VPN Connections.

Here, click on the VPN connection you want to disconnect, then click on the Disconnect button.
How to Connect and Disconnect VPN from Taskbar
After you have set up a VPN connection in Windows 11 Settings app. You can connect to a VPN connection right from the Quick settings panel. Here’s how you can do that:
Use WIN + A key combo to launch the Quick Settings panel.
Click on the VPN option. In the flyout, you will find a list of VPN connections.
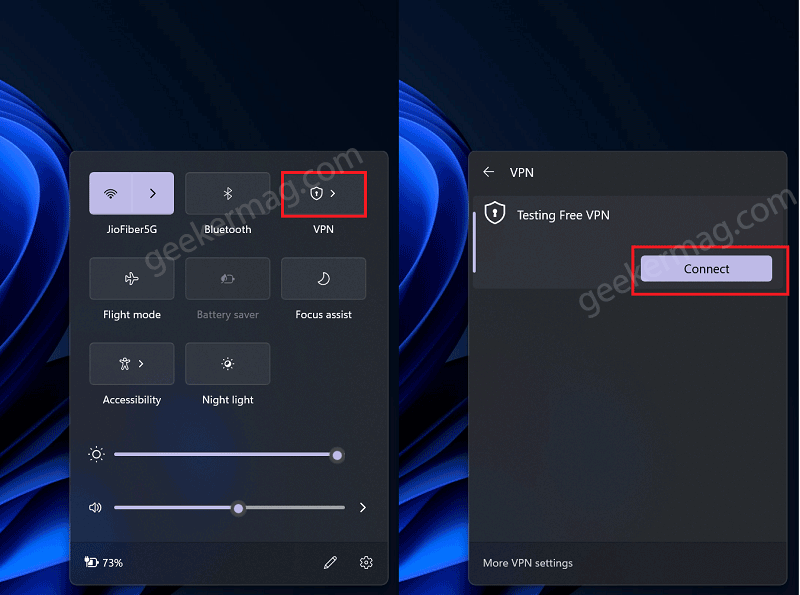
Click on the one you want to connect to and click connect. Again credential verification process will start and connect your PC with a VPN.
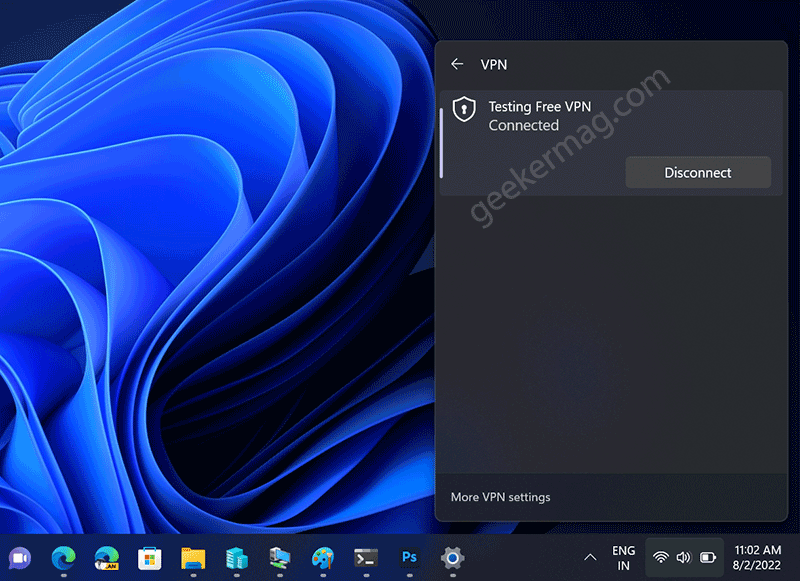
Again to disconnect the VPN, you just need to click on the VPN connection and then click the Disconnect button.
This is how you can manually set up, connect and disconnect VPN in Windows 11. If you’ve any queries about this tutorial or see any error message while following the instructions share with us in the comments.


