In my previous blog post, I cover How to Create Virtual Drive (VHD, VHDX) from Windows 11 Settings app. And in this post, you will learn how to create and set up a Dev drive in Windows 11.
Starting with Windows 11 build 23466 (In Dev channel) Microsoft has added a new ‘Disks & Volumes’ settings page. From there, you can create and manage virtual drives which include Dev Drive as well as VHD and VHDX on your PC.
Following the Classic Disk Management tool, the new settings page has a wizard to instruct you during the drive creation which includes creating and connecting the dev drive and selecting the size and file system.
Dev Drive lets you create storage volumes tailored for development tasks. It offers users the option to create a virtual drive using Resilient File System (ReFS) technology and contains file system optimization. As a result, empower developers to effectively manage performance and enhance security for their workloads.”
How to Create Dev Drive on Windows 11
In case, you’re running the same build and would like to learn how to Virtual Dev Drive in Windows 11, then check the step-by-step instructions discussed below.
Launch the Settings app in Windows 11 by pressing WIN + I key combination.

Switch to the System tab on the left. And then on the right side, scroll down and select Storage.
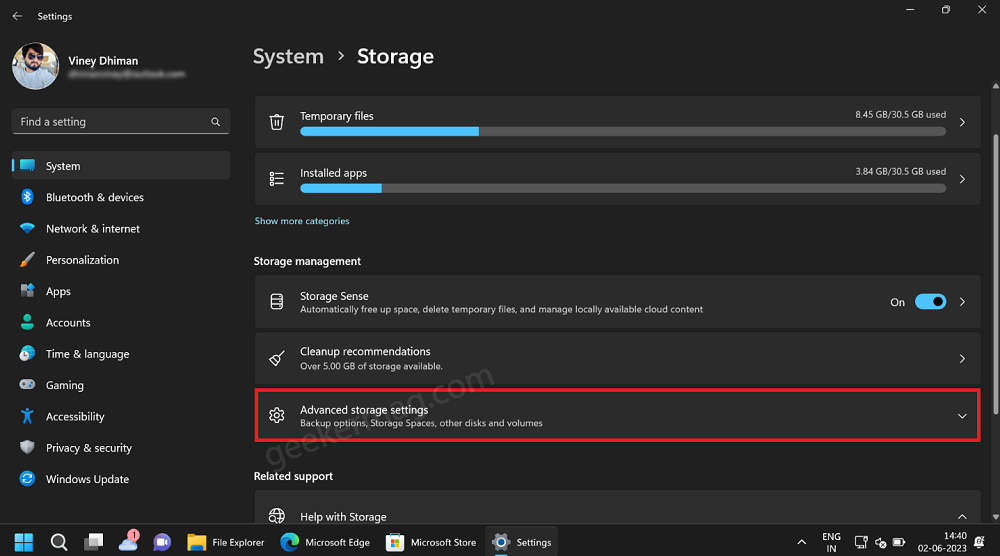
On the Storage settings page, navigate to the Storage management section, and select Advanced Storage settings.
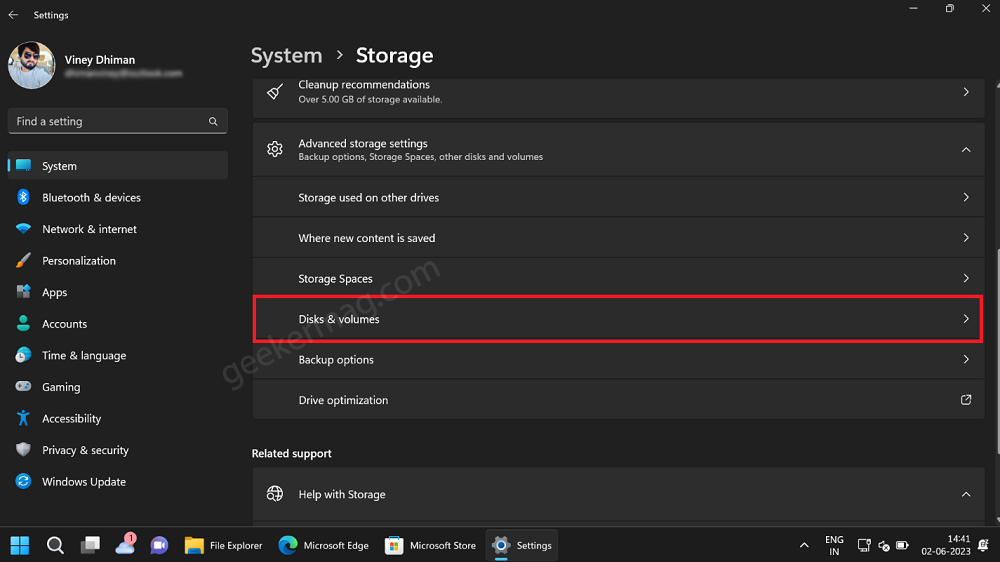
From the options that appear, select Disks & Volumes.
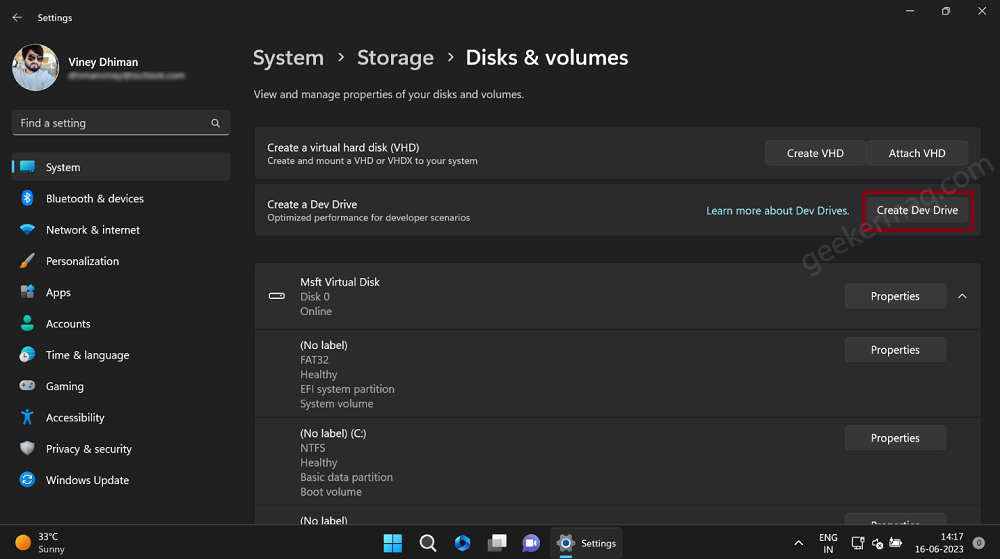
On the top of the page that opened, you will find an option named “Create Virtual hard disk (VHD)“. Under it, click on the Create Dev Drive button.
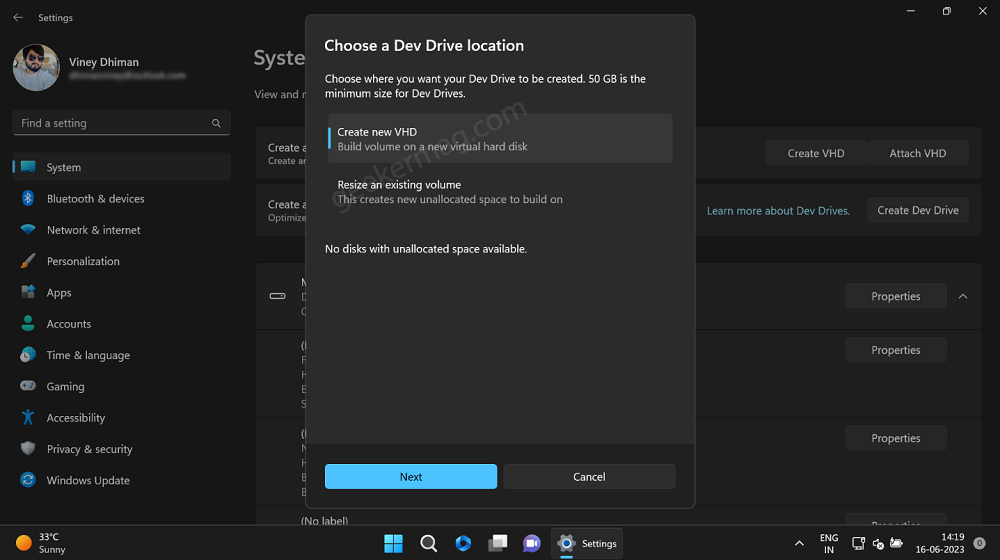
On the dialog box that opens, select Create a New Dev Drive and click the Next button.
Create and Connect Virtual hard disk dialog will open. Here, you need to give your drive a name, select the location where you want to create a drive, and select the virtual hard drive size (In MB, GB, and TB).
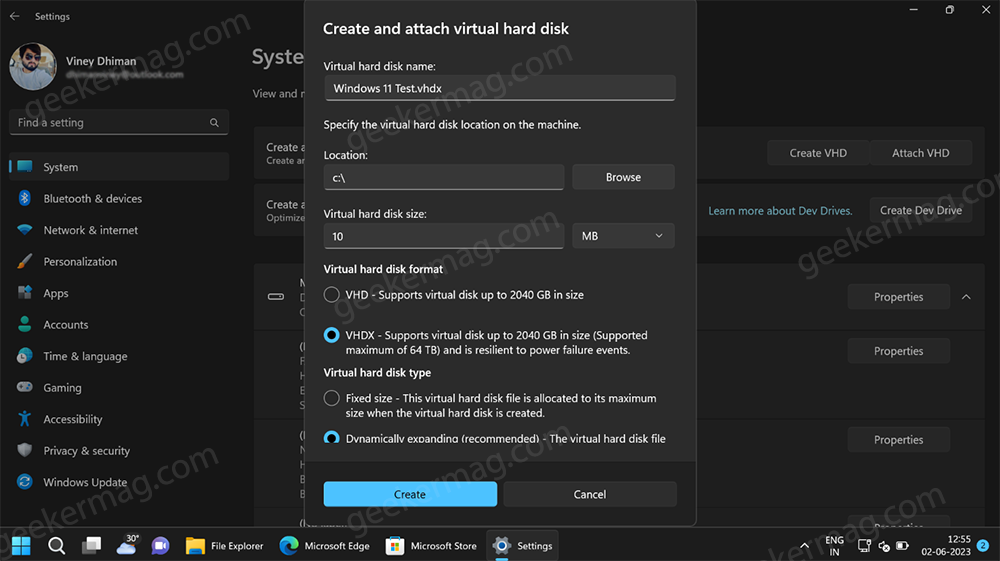
Under Virtual Hard Disk Format, select VHD or VHDX. Depending on your requirements. I recommend you select VHDX. Its because:
The “VHDX” option is a preferable choice over the “VHD” option due to its enhanced capabilities. Unlike VHD, VHDX supports larger drives, up to 64TB in size, making it suitable for handling extensive storage requirements. Additionally, VHDX demonstrates increased resilience against power failures, ensuring a more reliable storage solution.
Under Virtual Hard Drive type, you need to select the Fixed type or Dynamically expanding (Recommended)
Again, it’s your choice, but I recommend you go for Dynamically expanding.
Click on the Create button.
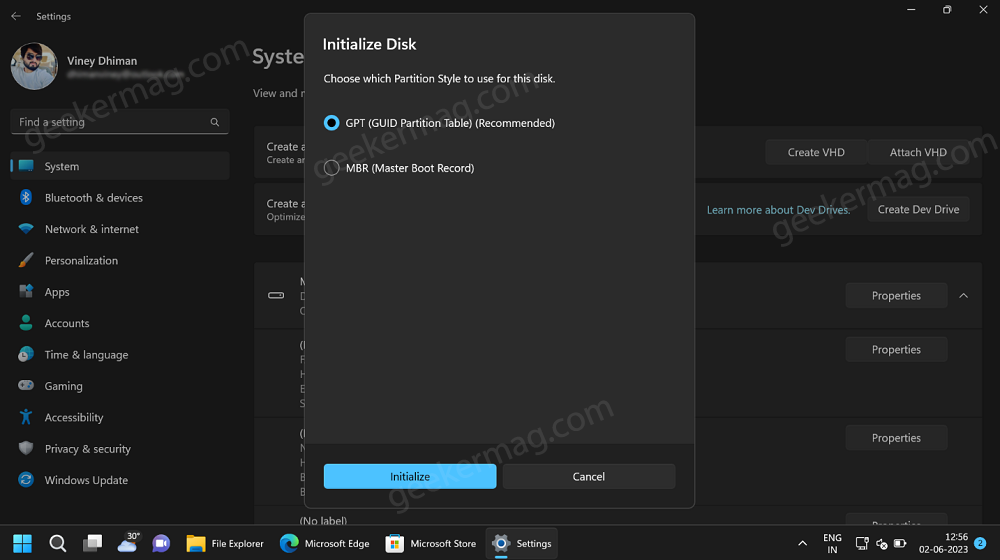
Next, you will see an Initialize Disk dialog. Here, you need to select GPT (Guided Partition Table) Recommend to assign partition type.
Click on the Initialize button.
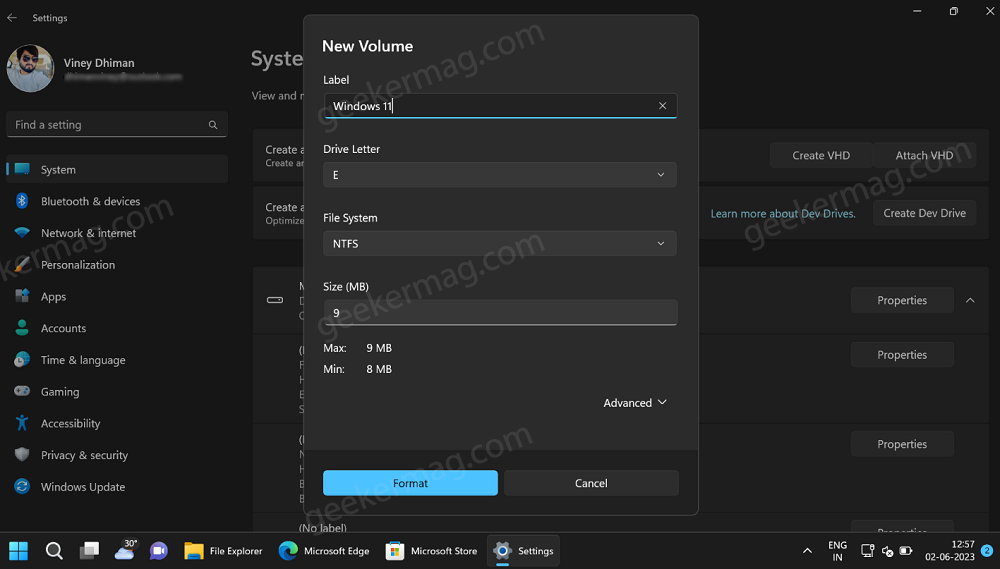
Next, you will see a New Volume dialog. Here, you need to type Label, Drive letter, select File system (NTFS, FAT32, and REFS), and size (go with default size).
Click on the Format button.
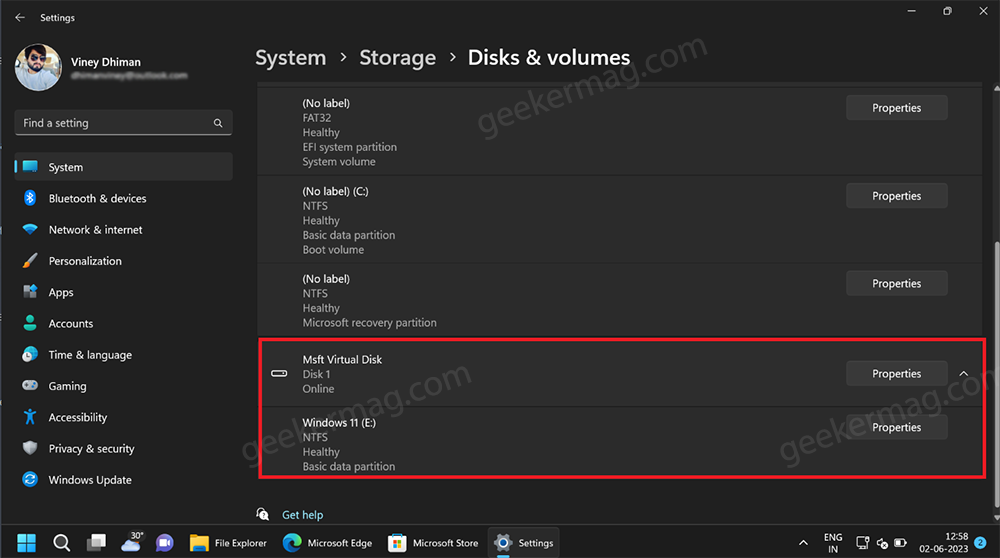
Now this will create the virtual drive and it will appear in the File Explorer as well as on the Disks and Volumes settings page.
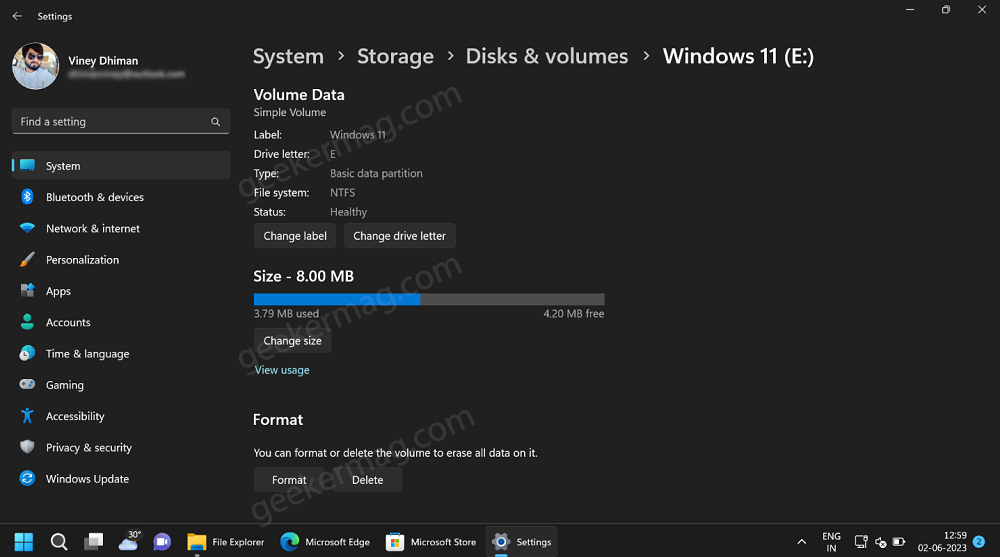
To check information about Virtual Drive, click on the Properties button. On this page, you can check information as well as manage or change Label, Drive Letter, and Size of the drive.
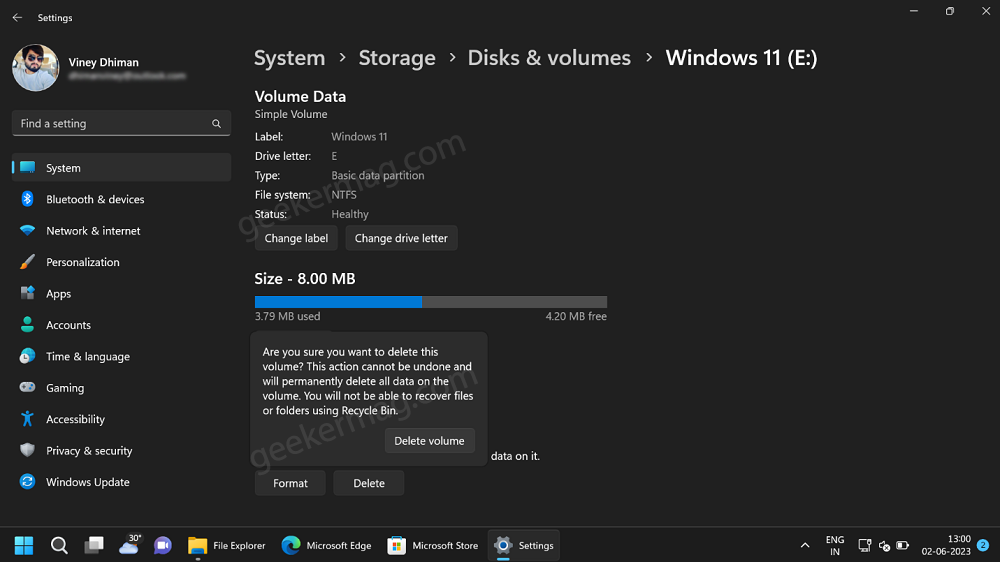
Apart from this, you can Format and Delete Virtual Drive as well.

