Microsoft when it released the first teaser of Windows 11 showcased that, the new version of Windows OS will come with support to run the Android app.
The company named it Project Latte, one of the most anticipated features of Windows 11.
When Windows 11 was released by Microsoft a few weeks ago, the same feature was missing its which broke the heart of many users.
In case, you’re the one who desperately wants to run an Android app in Windows 11, then there’s good news. The company has finally released Windows Subsystem for Android (Preview) in Windows 11 Insider Program.
Install Android Apps on Windows 11 (2021)
Although the Internet is full of tutorials using which users can install and run Android app on Windows 11, the process is a little technical. So we decided to cover this blog post featuring a tutorial with super easy steps.
Requirements:
- Your device needs to be running Windows 11 build 22000 or above.
- Virtualization should be enabled on your PC. For that, search Turn Windows features ON or OFF. When it appears in results, look for Windows Virtualzation feature, check box for it and click Install. Reboot your computer
- Your device needs to be running Microsoft Store v22110.14026.0 or above.
- Your PC region must be set to the United States
- Your PC must be in Windows 11 Beta Channel. You can enroll in Windows 11 Insider Program.
- You need to have a US-based Amazon account to install the app from the Amazon appstore.
- Must have 8GB RAM. We personally suggest 16GB ram for better work experience.
The above requirements are for those users who’re running Windows 11 in Beta build, belong to the United States, and own a US-based Amazon account.
Although, the purpose of this blog post is to offer steps that will work for all users without country restrictions and Windows Insider Program.
So without further, let’s start with the first step:
Get Installer Package for Windows Subsystem for Android for Windows 11
Although it is possible to download Windows Subsystem for Android from Microsoft Store, it’s not available for all users. So, here’s you can get it:
Head over to this site that helps in generating and downloading Installer Package from Microsoft Store is developed by @rgadguard.
Copy-paste URL or Windows Subsystem for Android app ID i.e. 9P3395VX91NR and hit enter.
Instantly, the tool will generate lots of tools, you need to click on the link to download the MSIX bundle for Windows Subsystem for Android, the one showcased in the screenshot.
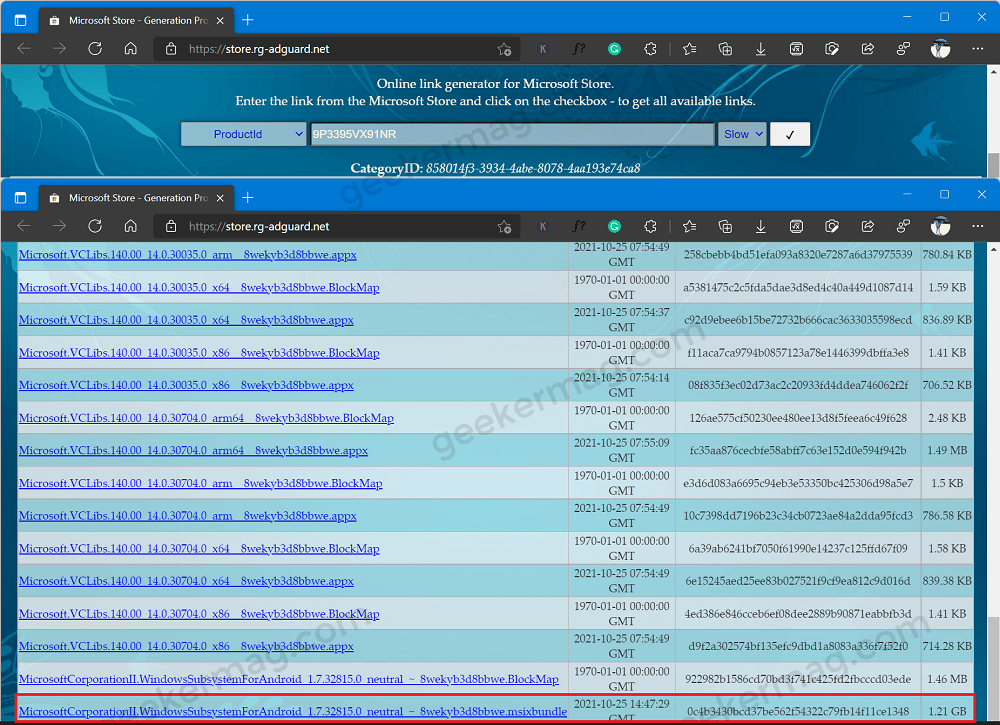
The latest build is this 1.7.32815.0 and it will be 1.21GB in size. If unable to find it, then you can use this mirror link to download it.
Install Windows Subsystem for Android on Windows 11
Launch Windows Terminal app on Windows 11. For that, right-click on the Start button and select Windows Terminal (Admin)
When the UAC dialog box appears, click Yes to continue.
Here, you need to execute the following command: Add-AppxPackage -Path [enter path of msix bundle]
To obtain the path of msix bundle, head over to the folder where you have downloaded the Windows Subsystem for Android, then right-click and select Copy as path.
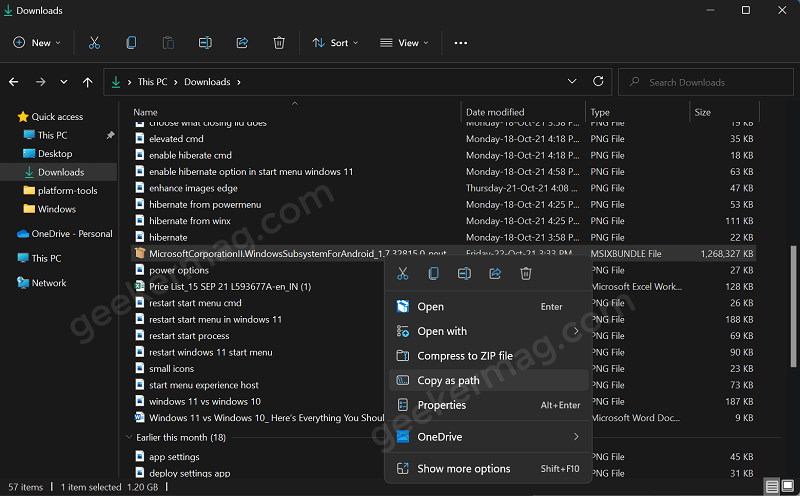
This will copy the path to the clipboard.
So your final command you need to execute will look like this: Add-AppxPackage -Path C:\Users\viney\Downloads\MicrosoftCorporationII.WindowsSubsystemForAndroid_1.7.32815.0_neutral___8wekyb3d8bbwe.Msixbundle"
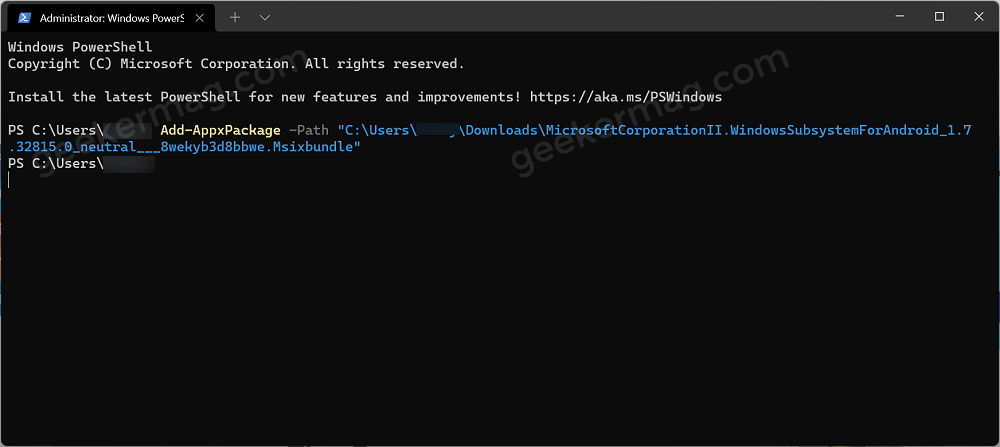
After you execute this command, the system will start the deployment of the Windows Subsystem for the Android app on your device.
Once installation is complete, the same app will start appearing in the recently installed app section of Windows 11 or you can directly search it.
Sideload Apps on Windows Subsystem for Android in Windows 11
This step will cover steps on how to configure Windows Subsystem for Android for sideloading apps. Here’s how you can do that:
When you reach this step we assume that you have already installed Windows Subsystem for Android using the steps discussed above
Download Android SDK Platform tools from Google’s website.
Extract the Android SDK Platform-tools zip file in the folder of your choice.
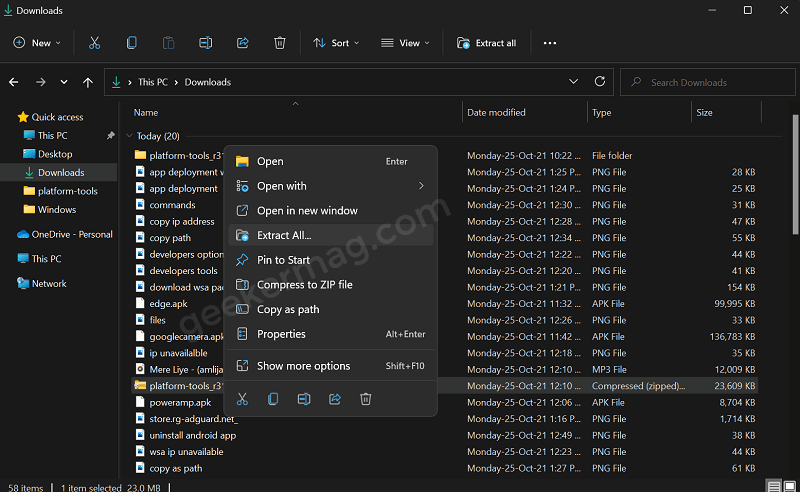
Download apk file for the Android app that you want to install on your Windows 11 PC using a trusted platform. We suggest apkmirror and apkpure.
For this tutorial, we will use this Poweramp Music Player app.
Next, run the Windows subsystem for the Android environment in Windows 11. For that, click on the search icon on the taskbar and type Windows Subsystem for Android.
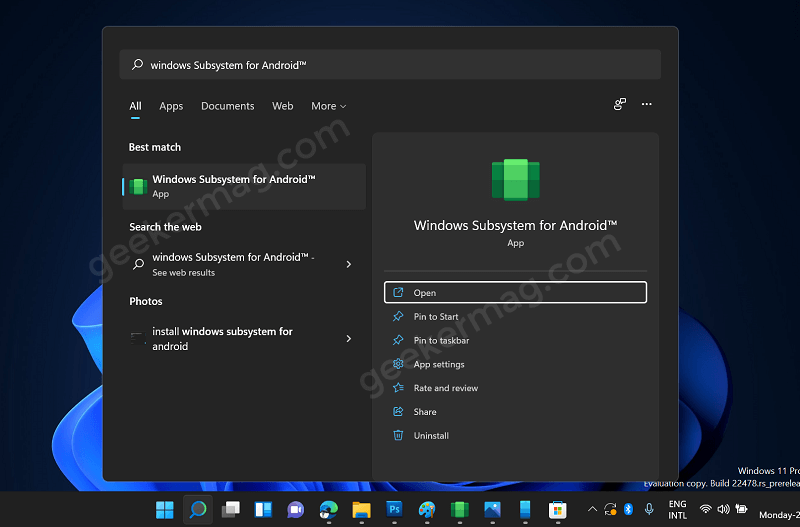
When it appears in search results, click to open it.
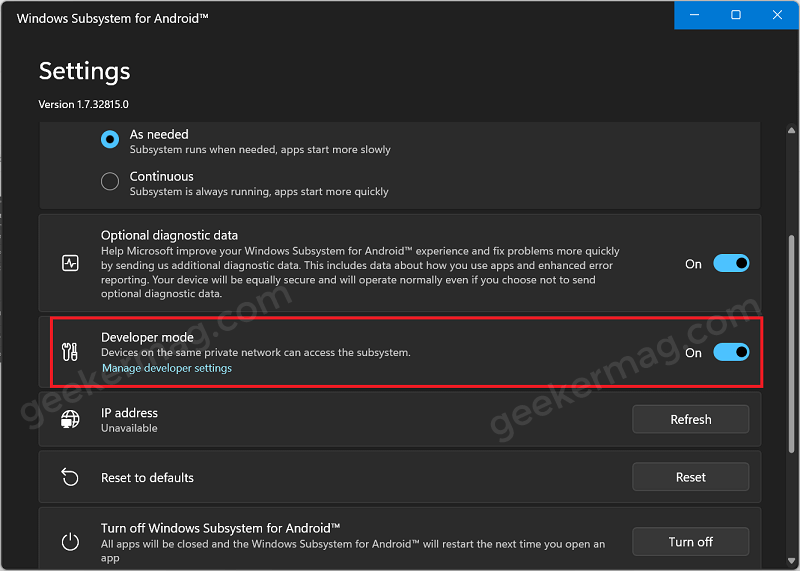
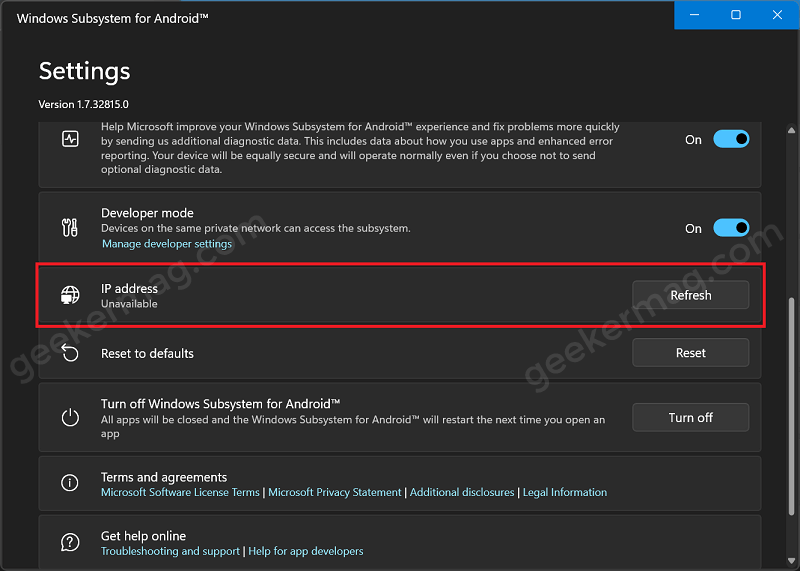
In the app, you need to move the slider for “Developers mode” to the ON position.
Next head over to the IP address section. Here you will find the IP address. If it’s unavailable, click on the Refresh button.
If it still falls to offer you an IP address, then click on Files options available at the top and this will launch Windows Subsystem for Android in another window.
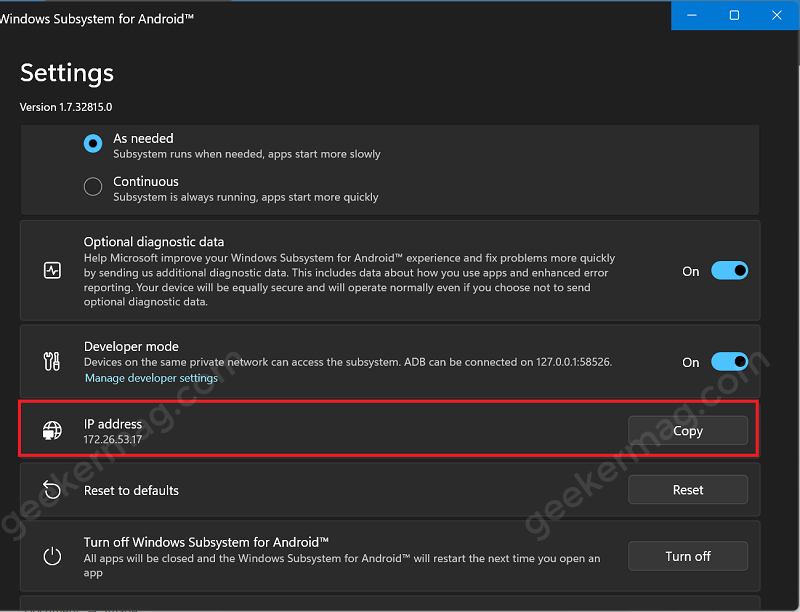
Once it’s opened, head over to the IP address section again and check this time you should see an IP address, click on the Copy button.
This step is very important if in a situation when an “IP address is unavailable in Windows Subsystem for Android.“
Now, you’re ready to connect it using ADB from the host Windows 11 Operating System. For that, use the IP address that you copied in the above step or use localhost (127.0.0.1) with port 58526, or use the IP address that you copied in the above steps.
Launch Elevated Command Prompt in Windows 11. For that, click on the Search icon and type CMD, when Command Prompt appears in search results, select Run as administrator.
Here, make use of the cd command to head over to the Android SDK Platform-tools folder. Suppose, you have extracted the tools in the Downloads folder, then you need to execute this command: C:\Users\username\Downloads\platform-tools_r31.0.3-windows\platform-tools
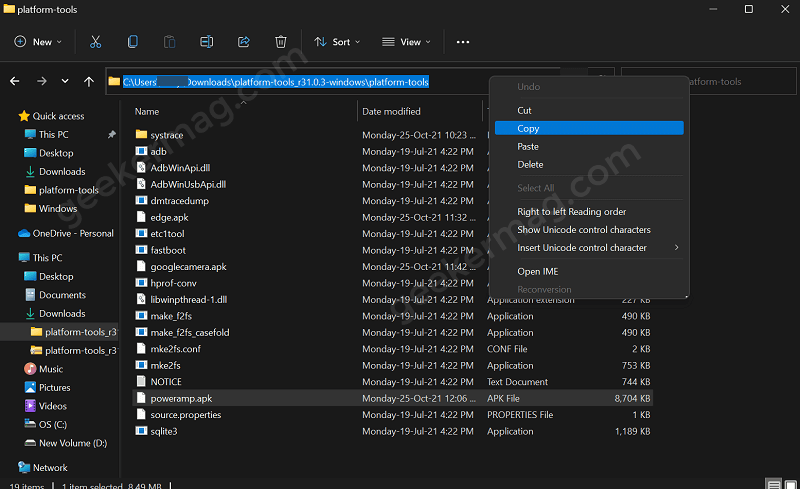
To easily copy the path, you need to head over to the tool folder and then click on the address bar in the file explorer. This will select the path and copy it from there.
After that, type adb connect ipaddress, the one you copied in the above step and hit enter.
To install the Android apk, you need to use ADB install appname.apk. For example; In this post, we will install the Poweramp android apk. So the command will be ADB install poweramp.apk

Note – Before executing the command, copy-paste the apk file to a platform-tools folder, else you will get the error ADB fails to start, there’s no such directory.
For your ease, I recommend you rename the file appname.apk format. It’s because whenever you download it from third-party stores the app name is very long.
If everything goes well, you will get the success message.
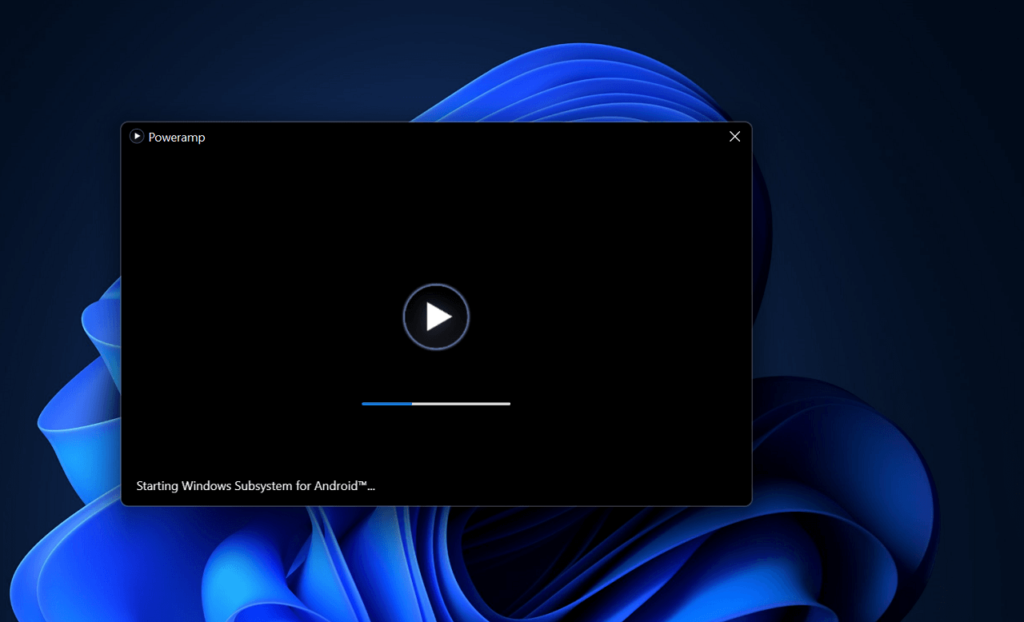
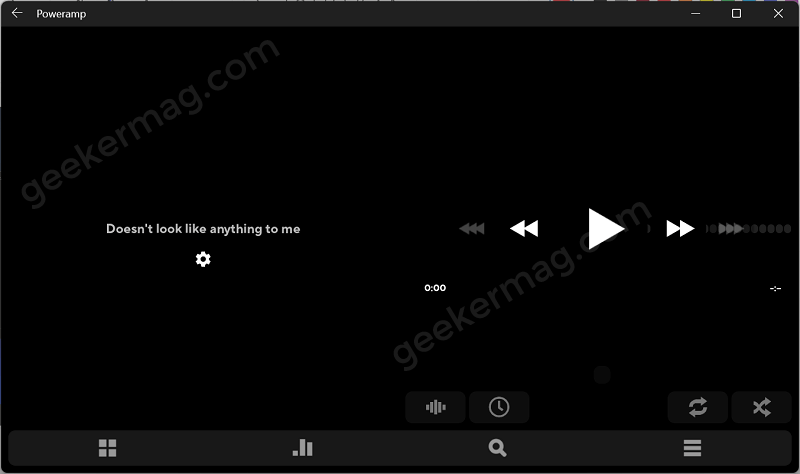
After that, the app will start appearing in the Windows 11 Start menu. When you open it this is how it will open:
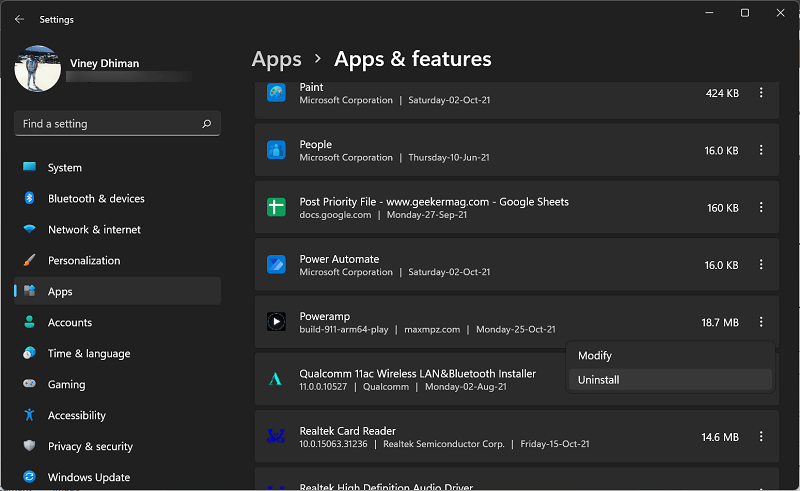
If you’re wondering how to uninstall the Android app from Windows 11, then the process is the same. Head over to Settings > Apps > Apps & features. Locate the app and then Uninstall.
The thing to keep in mind: Installing and running Android apps in Windows 11 is under development so don’t expect a high-quality experience at this time. Whenever we can more convenient option to install Windows 11, we will update this post.
Since installing Android apps in Windows 11 is limited to users who’ve enrolled in the beta channel. Although with the method discussed above, every user without country restrictions can install Android apps in windows 11.
What is your opinion about installing Android apps in Windows 11? Are you going to try this method? Does this method help you? Let us know in the comments.


