Windows 11 has certainly arrived with a big list of changes for all the end-users. For example, if we compare it with its predecessor Windows 10, Windows 11’s File Explorer boasts a noticeably simplified toolbar. So, we can say that the standard ribbon interface with “File,” “Edit,” and “View” options has become a thing of the past.
Due to this reason, it is possible that you may find it hard to manage a few of its settings, like the option to ‘Show Hidden Files’, for example.
Microsoft always keeps essential files secret on purpose to prevent any user-made mishaps. Besides this, there are other files that are intentionally been hidden by the user for a specific reason. Overall the files are hidden for the user’s safety.
How to Show Hidden Files, Folders & Drives on Windows 11
In case, you’ve recently installed Windows 11 and now you want to access some of the hidden files, folders, and even drivers, then fret not. In upcoming lines, you will learn all the possible ways on how to do that:
Using File Explorer
Launch File Explorer by clicking the icon for same on the Taskbar or you can use Windows + E key combo.
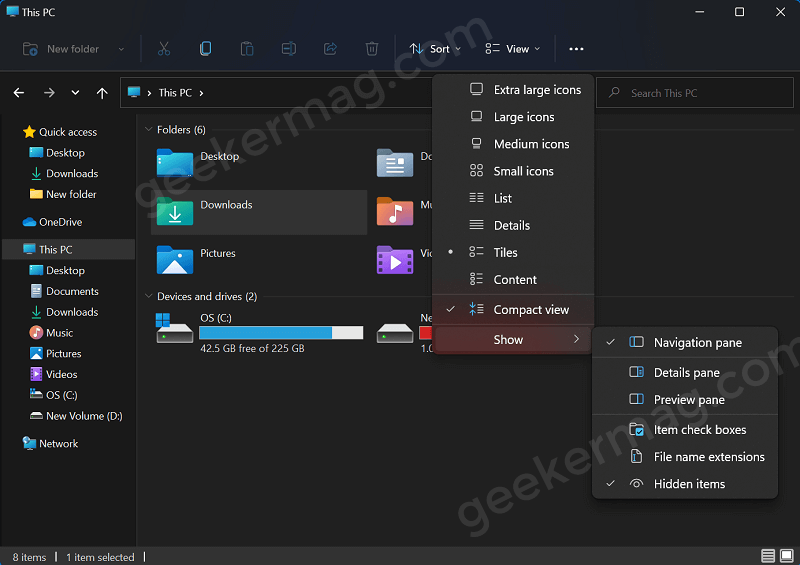
Click on the View button, and then select Show > Hidden items
Using File Explorer (Method Two)
In File Explorer, click the horizontal three-dot button and select Options from the menu.

You will now see the Folder Options window. Here, switch to the View tab.
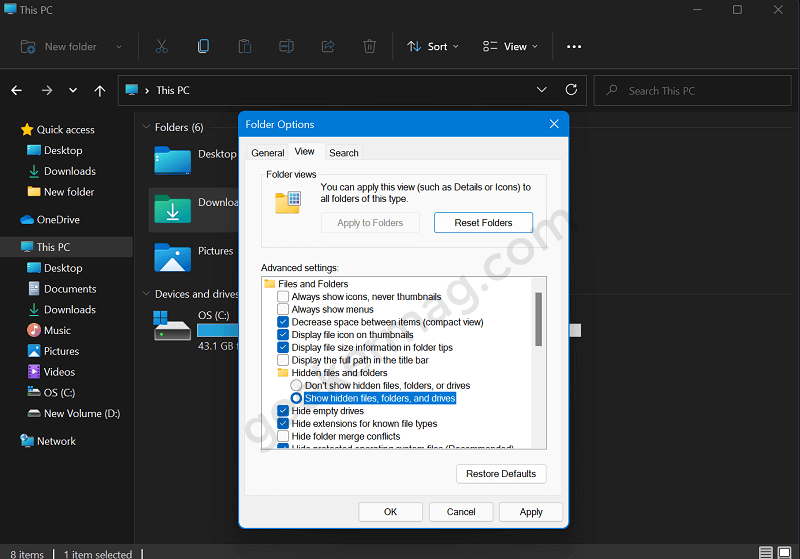
Here, head over to the Advanced settings option and check the option that reads “Show hidden files, folders, and drives“.
Now press the Apply button. After that, click OK.
Using Control Panel
Using Windows 11 Search, launch Control Panel and click on Appearance and Personalization.

Next, Show hidden files and folder options listed under File Explorer options.
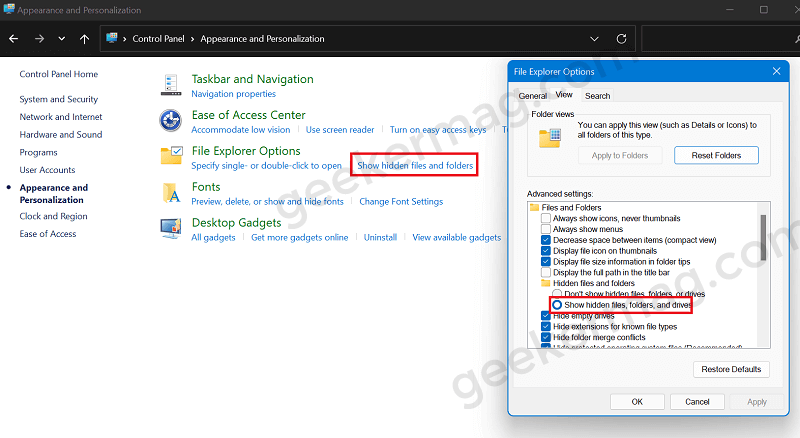
Doing this will launch the Folder Options window. You need to switch to View > Advanced settings and then select the option “Show hidden files, folders, and drives“.
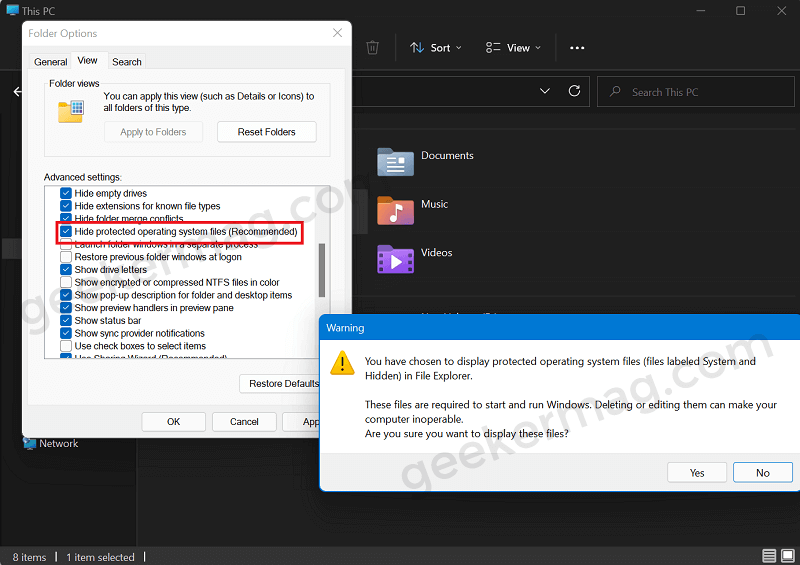
Note – In case, you want to show protected system files in Windows 11, then you need to uncheck the box for the “Hide Protected Operating System files (Recommended)” option (If dialog box with warning appear, clikc Yes to continue) and then click Apply/OK. Doing this only, if you’re aware of why and for what purpose you’re doing it.
Using Registry Editor
Click on the Search icon available on the Taskbar and then type regedit, when it appears in search results, click to open it.
When the UAC dialog box appears, click Yes to continue.
In Registry Editor address bar copy-paste this: HKEY_CURRENT_USER\Software\Microsoft\Windows\CurrentVersion\Explorer\Advanced and hit enter.
You will directly reach the Advanced key.

On the right side, look for Hidden DWORD (32-Bit) Value, double-click on it, and set its Value data to 1.
Click OK and close everything. After doing this you will be able to all hidden files, folders, and drives in File Explorer.
- Value data set to 1 show hidden files
- Value data set to 2 hide files again.
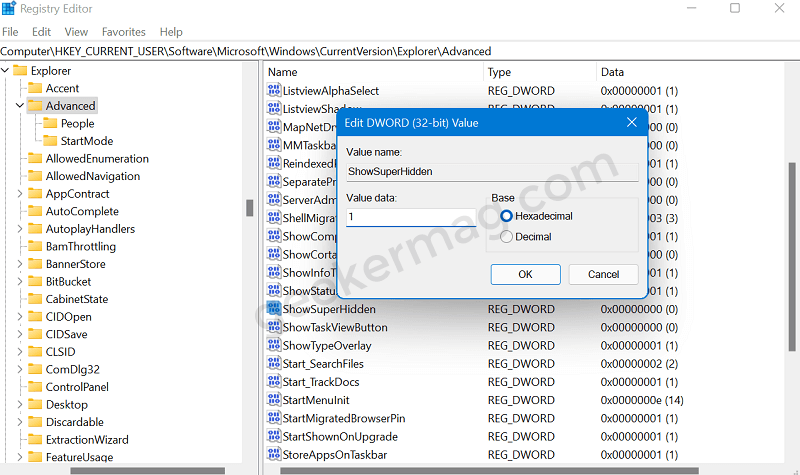
To show hidden protected system files in Windows 11, you need to set the value data of ShowSuperHidden to 1 and tap on OK.
There could be many reasons why Microsoft has hidden various files, folders, and drives in Windows 11 in the first place. Yet, you can easily locate all of those by following the steps and instructions mentioned above.
Do let us know about your queries and questions in the comments sections so as we can bring you more such posts in the future.


