Windows 11 Taskbar is one of the UI components in which Microsoft has done lots of improvements. If you have recently installed Windows 11, then you might have noticed that Taskbar items are centered align out of the box, but there’s an option to move Taskbar items to left.
Since Windows 11 Taskbar is easily customizable, you have full control over what items appear or hide on the Taskbar. In case, you don’t know how to do that, then this article will help you with that.
How to Show Or Hide items Appear on Windows 11 Taskbar
Launch Settings app in Windows 11 by pressing WIN + Key combinations.
Switch to the Personalization tab on the left and then on the right side, select Taskbar.
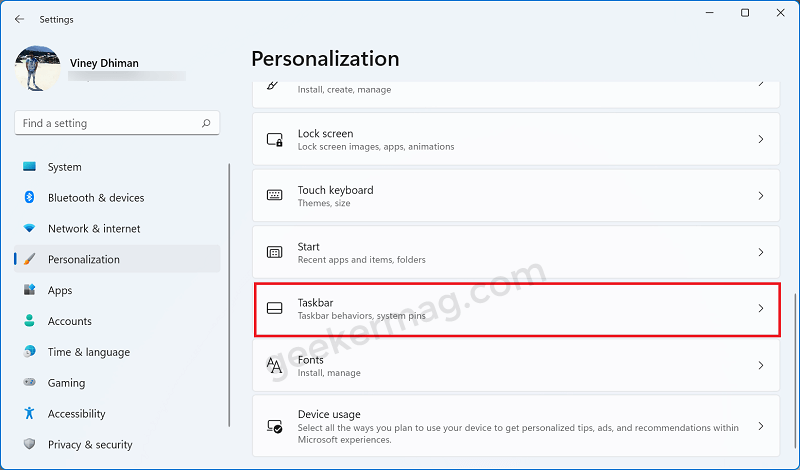
Alternatively, you can directly reach the Taskbar settings page too. For that, right-click on the Taskbar and select the Taskbar settings option.
The Taskbar settings page is divided into four sections: Taskbar items, Taskbar corner icons, Taskbar corner overflow, and Taskbar behavior.
Here, expand the Taskbar items section by click on it.

Next, you will see taskbar items that appear on the Taskbar out of the box. Taskbar items include Start button, Search, Task View, Widgets, and Chats.
You can show or hide a particular item using the button available next to each time. From this section, you can achieve the following this:
- Show or Hide Search from Windows 11 Taskbar
- Show or Hide Task View from Windows 11 Taskbar
- Show or Hide Widget from Windows 11 Taskbar
- Show or Hide Chats from Windows 11 Taskbar
Apart from that, you can even pin and unpin apps on the taskbar which you frequently use to access them easily. To pin the apps to the taskbar, follow the steps given below-
Open the Start menu and search for the app you want to pin.
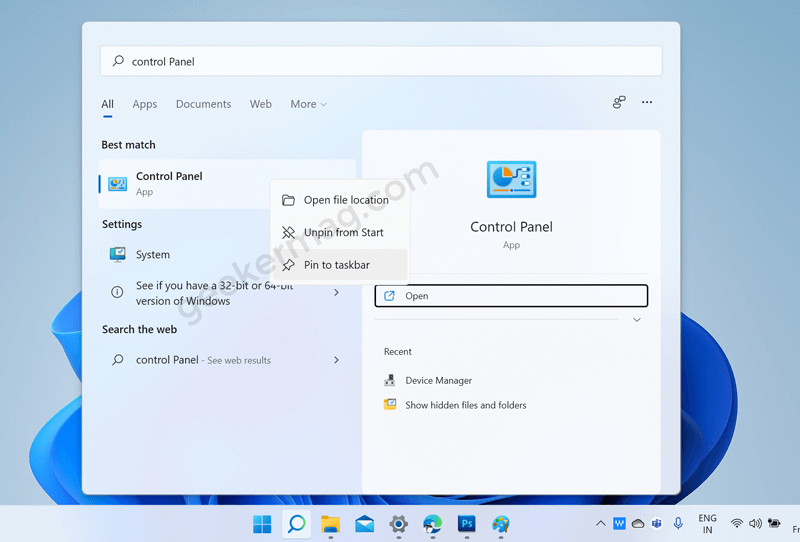
Now right-click on the app, and then click on the Pin to taskbar option. Doing this will instantly pin that app to the taskbar.
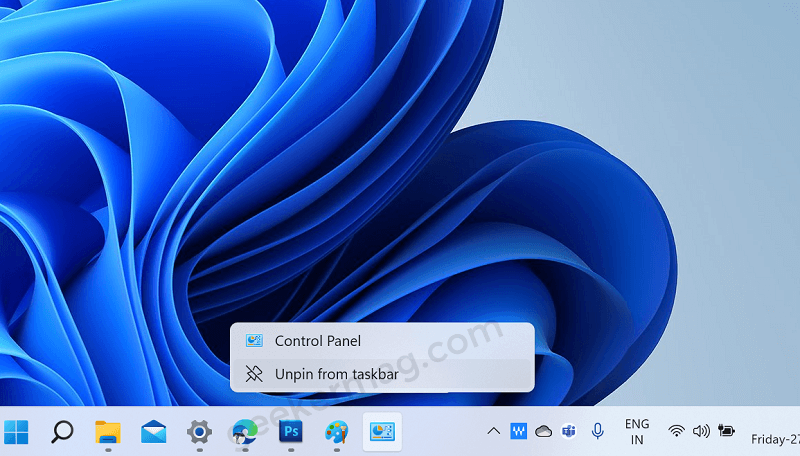
To unpin the same app, all you need to do is to right-click on the app available on the taskbar, select Unpin from taskbar option.
At this point, you have learned how to show or hide apps and items in the taskbar of Windows 11.
How to Show Or Hide items in Windows 11 Taskbar Corner Overflow
Windows 11 Taskbar also has a Taskbar Corner Overflow menu that opens up when you click on the ^ icon on the right side of the taskbar. In case, you want to show or hide items from the same menu, then here’s how you can do that:
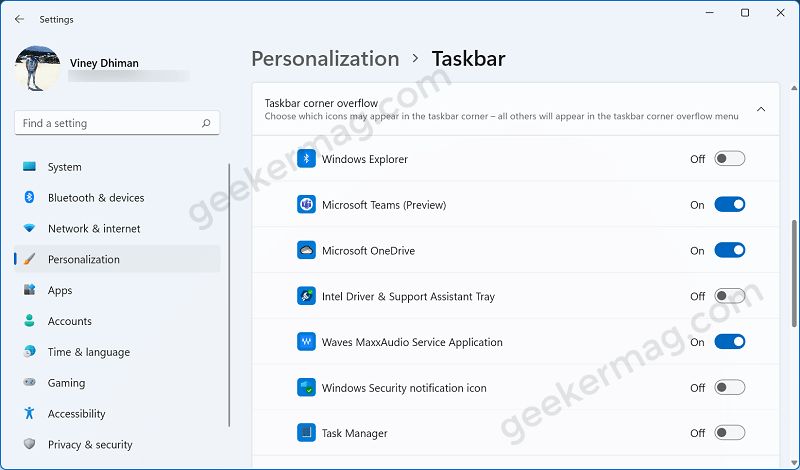
On the Taskbar Settings page, head over to Taskbar Corner Overflow section.
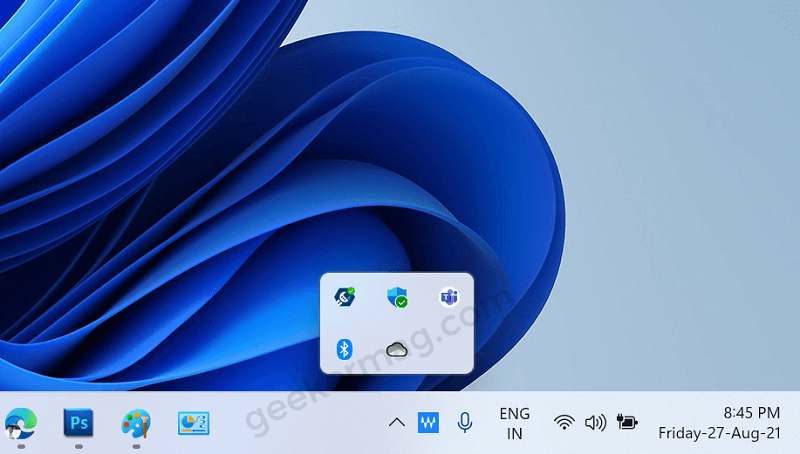
Depending on your requirement turn off/on the button next to each item available in this section.
How to Show Or Hide items in Windows 11 Taskbar Corner Icons
On the Taskbar Settings page, head over to the Taskbar corner icons section.
Here, you will find three items i.e. Pen menu, Touch keyboard, and Virtual Touchpad.
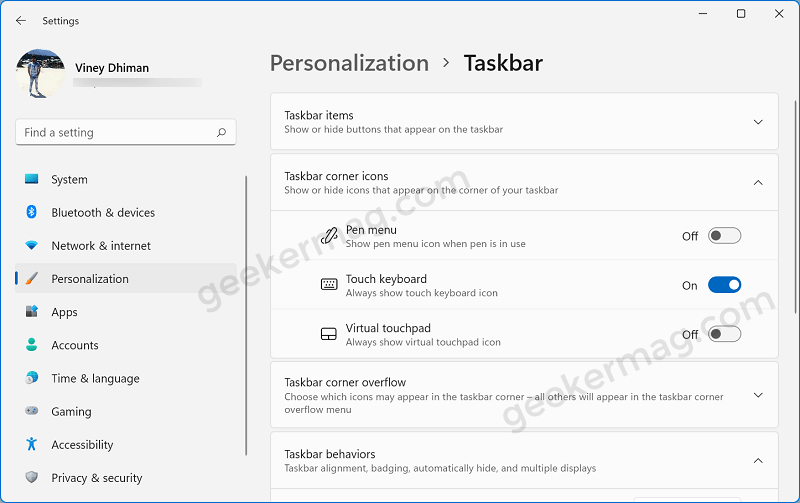
Depending on your requirement, you can turn on/off the button available next to each item.
Apart from that, you can head over to the Taskbar Behavior section to manage other settings that include:
- Automatically hide taskbar when not using
- Show badges to taskbar apps,
Show or Hide Items in Quick Settings Panel of Windows 11
There’s a Quick Settings Panel available on the right side of the Windows 11 Taskbar and out of the box, it shows Network, Volume, and Battery icon.
Fortunately, you can also show or hide items on the Quick Settings panel too. Here’s how you can do that:
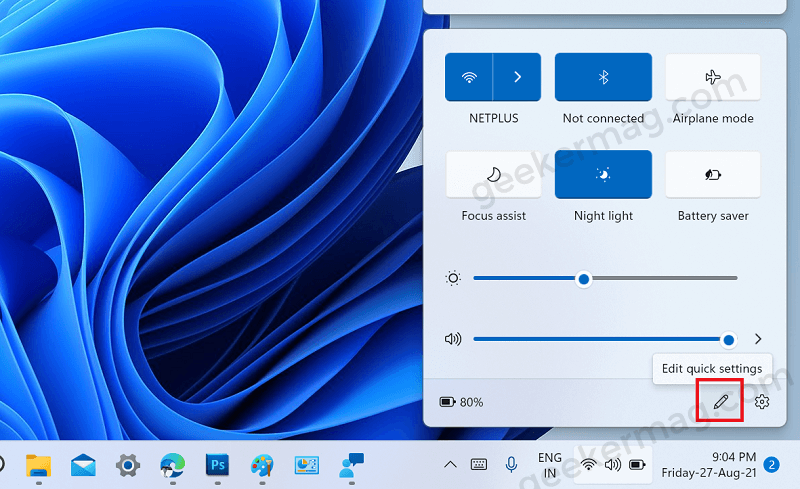
Click on the Quick Settings Panel section, click on the Pencil icon. Now this will open the Quick Settings panel in editing mode.
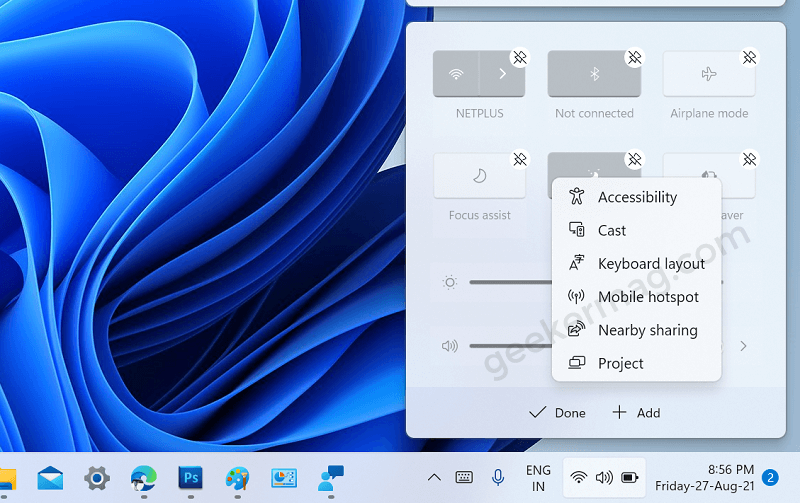
To Add items, click on the Add button and this will show you a list of items, select the one you want to add and then click Done.
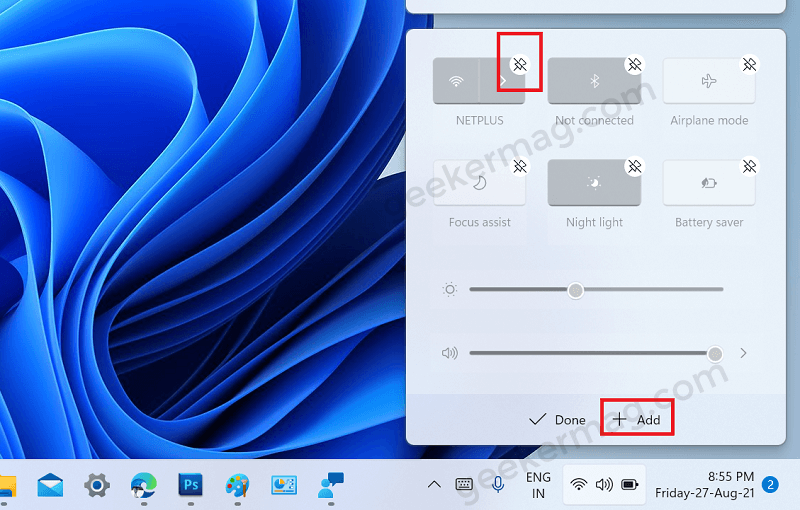
Apart from that, if you want to hide items from the Quick Settings panel, then in editing mode, click on each item that you want to hide and then click the Done button.
That’s how you can show or hide buttons that appear on the taskbar of Windows 11. If you have any query related to this tutorial, then feel free to ask us via comments.


