According to various reports from users, after upgrading to Windows 11 22H2 whenever they open Bluestack, especially Bluestack 5, it shows a dialog box with the error message “Incompatible Windows settings”.
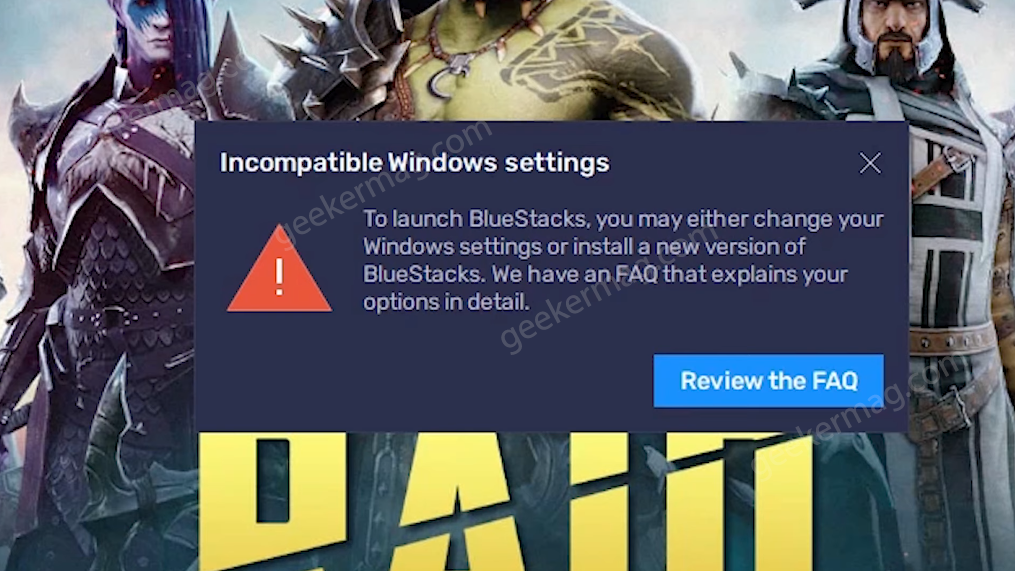
The message in the dialog box suggests users download the latest version of Bluestack 5 or modify windows settings on the PC accompanied by a “Review the FAQ” for more information. Clicking on it closes the app and redirects to the Support site.
Unfortunately, the majority of the affected users are already running the latest version of Bluestack 5, and they have no idea what “windows settings” refers to.
If you made up to this blog post, then it’s highly possible you’re one out of those affected users who’s unable to use Bluestack after upgrading to Windows 11 22H2, right? fret not!
Before you start reading the solution to fix this problem, it’s important to understand why the “Incompatible Windows settings” dialog appears in Windows 11. So below is the explanation:
Bluestack has a great history of compatibility issues with the Hyper-V feature of Windows, and if you have enabled Hyper-V on Windows 11 PC, then it’s highly possible that you will see Incompatible Windows settings dialog.
Fix – Bluestacks 5 “Incompatible Windows settings” in Windows 11 22H2
Developers working behind Bluestack 5 are already aware of the “Incompatible Windows settings” dialog box and suggest users run Bluestacks 5 version for Hyper V and Disable Hyper-V. So depending on your requirements, you can use one of the solutions:
Run Bluestacks 5 (P64) version for Hyper V
Uninstall the previous version of Bluestack 5 on your Windows 11 PC. For that, launch the Settings app by pressing WIN + I key combination.
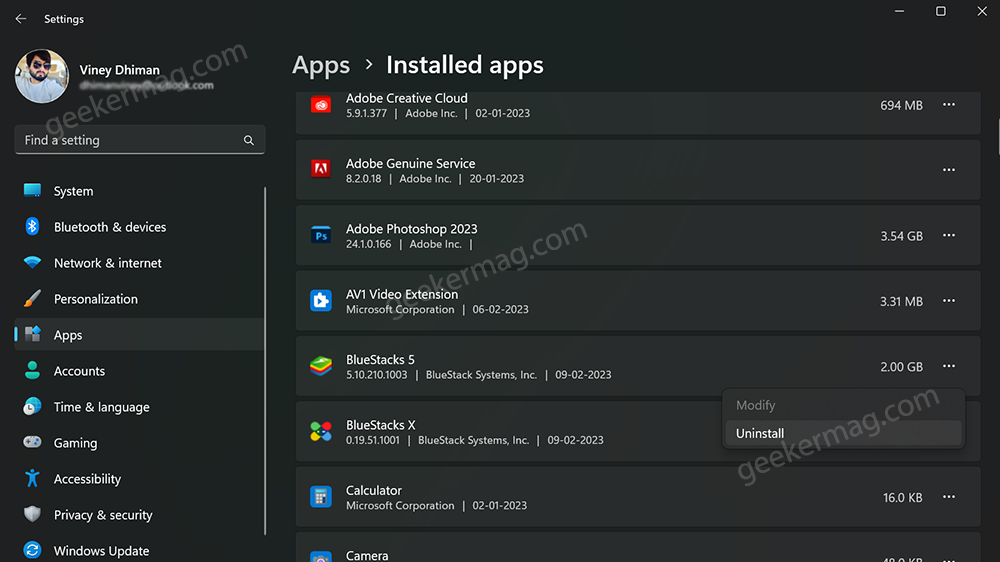
Select Apps > Installed Apps. On the right side, locate the Bluestack 5, and click Uninstall Twice.
After that, you need to head over to this page, and scroll down until you reach the section shown in the following screenshot:
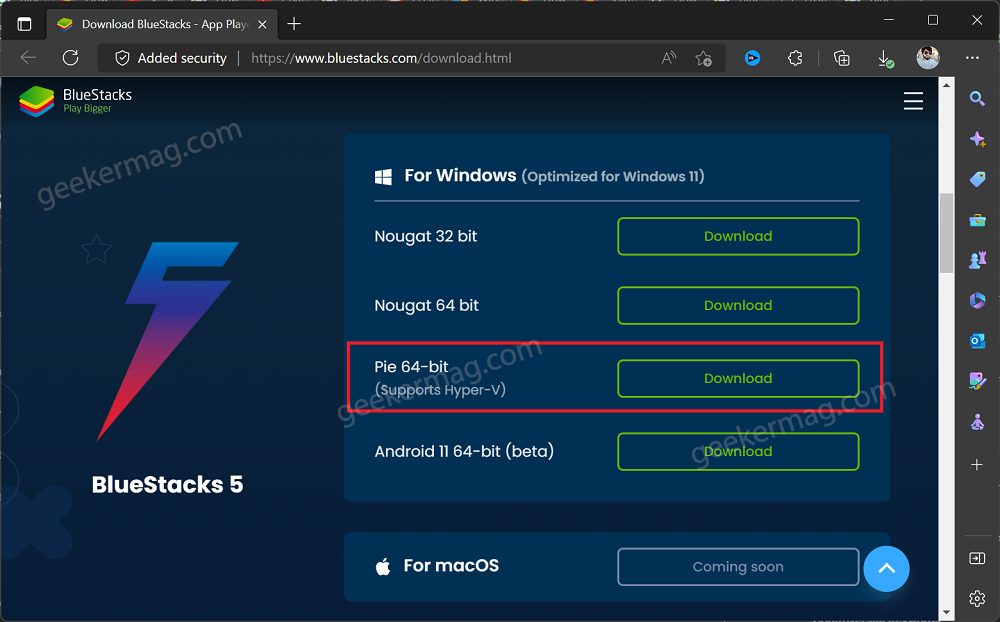
Here, click on the Download button next to the “Pie 64-bit(Supports Hyper-V)“. You will get the Bluestacks 5 setup file.
Run the setup file and complete the installation by following the on-screen instructions.
And you will be able to run Bluestack 5 Player app on your Windows 11 PC without an issue.
Run Bluestack 5 as Administrator
After installing the Bluestack 5 for Hyper-V if the error message still appears, then try to run Bluestack 5 app with administrator rights. Here’s how you can do that:
Click on the Search icon and type Bluestacks 5, and when the same app appears in the search results, click to open it.
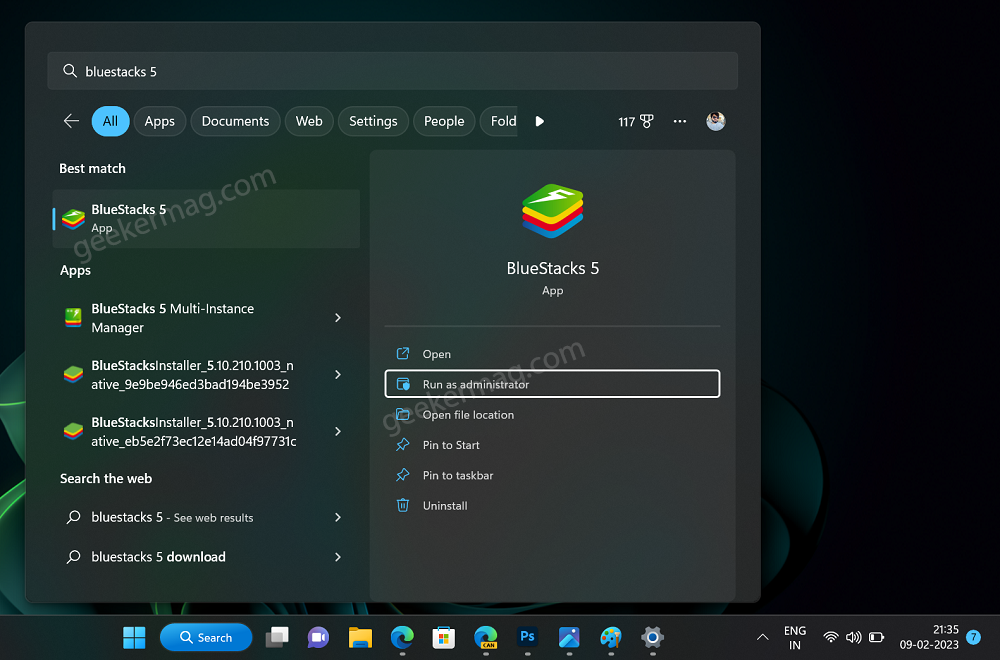
When the UAC dialog box appears, click Yes to continue.
This time you should be able to run Bluestack App Player without any error message.
Disable Hyper-V in Windows 11
In case, due to any reason Bluestacks 5 Hyper-V version fails to fix the issue, then the only solution is to disable Hyper-V in Windows 11.
You can check the instructions discussed here in the post or follow the instructions in the below added below:
Make sure to restart your computer to disable the Hyper-V feature in Windows 11.
In case, due to any reason above steps fails to disable the Hyper-V, then you can try Download and run this custom .exe file for disabling Hyper -V.
Follow the on-screen instructions suggested by the tool.
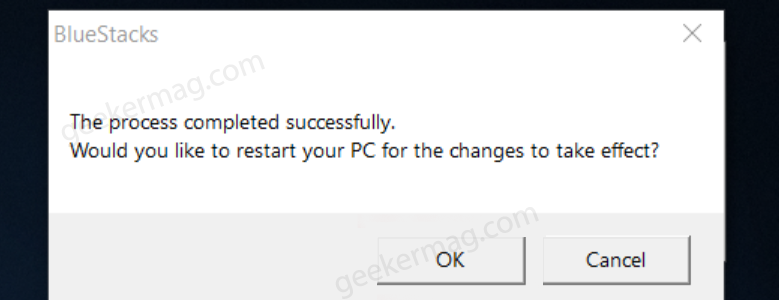
Wait for a few seconds, and once the process completes successfully, a dialog box with confirmation will appear.
Tip – If you disable Hyper-V on Windows 11 PC, then you can install Standard Bluestacks 5 app on Windows 11 as well.
So these are possible solutions that will surely help in fixing Fix – Bluestacks 5 “Incompatible Windows settings” in Windows 11 22H2. Let me know which solution helped you in fixing the issue.
Also, if you know any other solution that helped you feel free to share it in the comments.


