Windows 11 comes with certain security requirements like Secure boot that can lead to some complications. One of the common errors that people get when enabling Secure Boot in the Bios is the ‘Secure Boot can be Enabled when System in User Mode’ in UEFI mode.
What actually happens is, when affected users Enter BIOS on their PC, double-click on the Secure Boot option and click Enabled to Enable Secure Boot in UEFI mode. Instantly, a dialog box with an error message appears which reads:
Secure boot can be enabled when system in user mode repeat operation after enrolling platform key
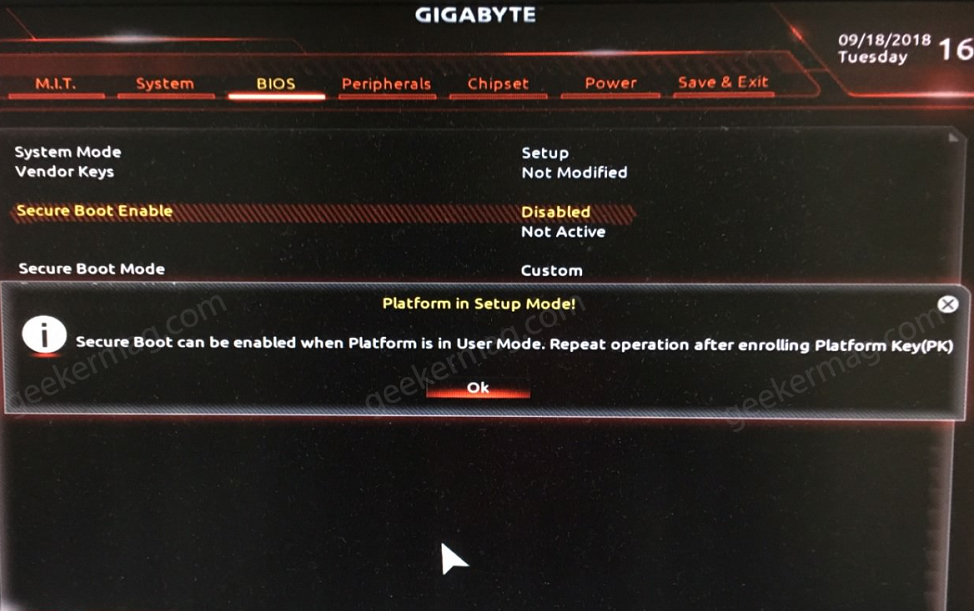
The above error message is actually stopping you from enabling Secure Boot in UEFI mode. As a result, you will not be able to install Windows 11 on their system or play games like Valorant and Fifa 2023.
Fix: Secure Boot Can Be Enabled When System in User Mode
Fortunately, there’s a quick workaround using which you can easily enable Secure Boot in UEFI mode without seeing this annoying error message. Here’s what you need to do:
If you made up this line, then I presume that you’re already in the BIOS. If not, check this post to learn How to Enter BIOS Windows 11/10.
The steps that we are going to show you work almost the same for both Gigabyte and MSI motherboards. However, if you’re facing this issue on any other motherboard, you can try the same steps or check the manufacturers’ support page for more information.
Once you are in the BIOS. Follow the instructions discussed below:
While trying to enable Secure Boot when you see the error message “Secure Boot Can Be Enabled When System in User Mode”, you need to go to the Secure Boot mode option, click on it, and from the menu that opens, change the setting from Standard to Custom.
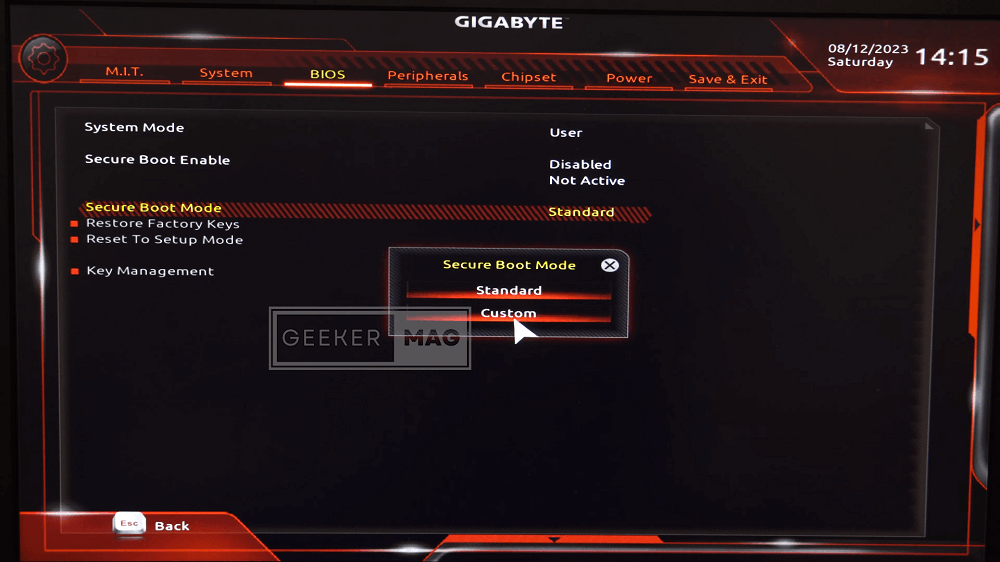
Once you set Secure Boot Mode to Custom, the options listed below which were grayed out will now be clickable.
Next, you need to navigate to the “Restore Factory Keys“, double-click on it and when the “Install factory defaults” dialog opens, select Yes. (Restore Factory Keys option will be available on Gigabyte boards)
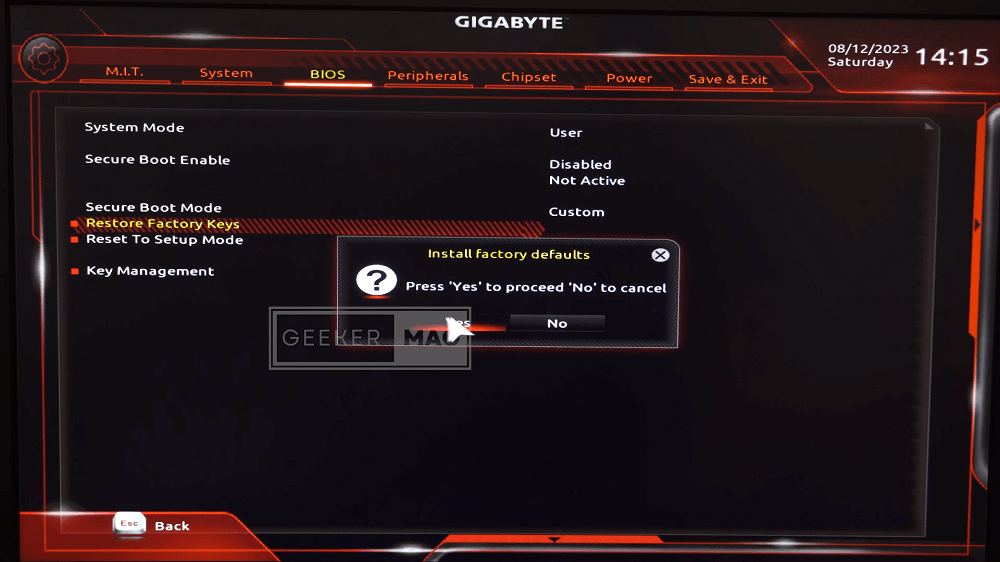
If your PC has an MSI motherboard, you will see an option “Enroll all factory default keys” instead of Restore Factory Keys.
Now, if you will be asked to reset your system, then select No.
After making the above changes, you will be able to Enable Secure Boot on your PC. For that, head over to the Secure Boot option, double-click on it, and change the Settings from Disabled to Enabled.
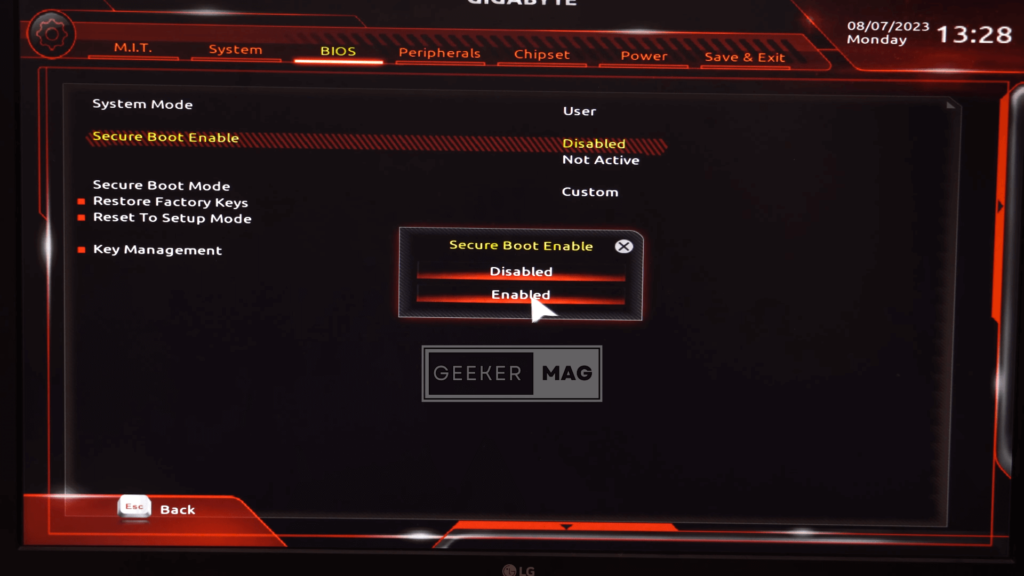
Again head back to the Secure Boot Mode option and change the settings from Custom to Standard.
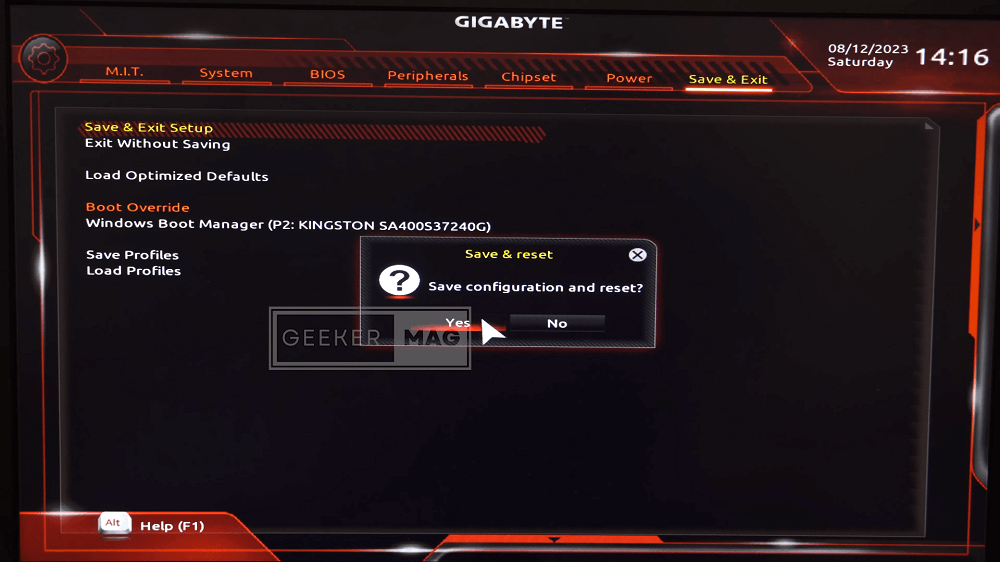
At last, go to the Save and Exit tab available on the top, then click on the Save and Exit button to apply the changes. Your PC should boot back into Windows and Secure Boot should now be turned on your system.
YouTube video: Fix: Secure Boot Can Be Enabled When System in User Mode
In case, you find the steps discussed above confusing, then check the YouTube video listed below:
Are you seeing “Secure Boot Can Be Enabled When System in User Mode” when trying to enable secure boot in UEFI mode? Does the solution covered in this post help in fixing the issue? Let me know in the comments.
Frequently Asked Questions (FAQs)
Why is Secure Boot not supported?
Some older hardware, operating systems, or custom setups might lack support for Secure Boot due to compatibility issues or outdated firmware. However, modern systems and software generally support it to enhance system security.
Should I enable Secure Boot?
Enabling Secure Boot is recommended for most users, as it enhances system security by preventing the execution of unauthorized code during the boot process. It safeguards against various types of malware and rootkits that can compromise the system.
How do I enable Secure Boot?
To enable Secure Boot, access your system’s BIOS or UEFI settings during startup (usually by pressing a specific key like F2 or Delete). Navigate to the Secure Boot settings and enable it. You might also need to configure trusted keys and certificates. Remember that enabling Secure Boot might require the use of digitally signed operating systems and drivers.


