Gamers know how NVIDIA GeForce graphic cards play an essential part in enhancing their gaming experience.
However, when some users try to install an NVIDIA graphics card, they see a dialog box with the error “NVIDIA Installer Cannot Continue,” with a different explanation (just to give users an idea of what causing the issue) and they don’t know how to resolve this error.

Fortunately! there’s a solution for this error.
The most common reason why this error occurs is because you’re running an outdated version of the NVIDIA graphics, and this error shows when you’re updating it.
So, if you come across this situation and are looking for a solution, then keep reading.
In today’s guide, we will explore four working methods that you can implement to resolve the error and install NVIDIA graphics in your Windows 11. Let’s dive in!
4 Ways to Fix “NVIDIA Installer Cannot Continue” Error in Windows 11
Here are four best working methods you can implement to fix the error:
1. Reinstall NVIDIA Graphics Driver Manually
If you’re facing this error even after making basic fixes like restarting your system, then you should reinstall the NVIDIA graphics driver manually in your system. This is the most preferred method and has a high chance of fixing the error. Here’s the step-by-step process to follow:
First, go to “This PC” and open Windows “C Drive”.

Now, click on the “View” option at the top bar and navigate to Show > Hidden files.
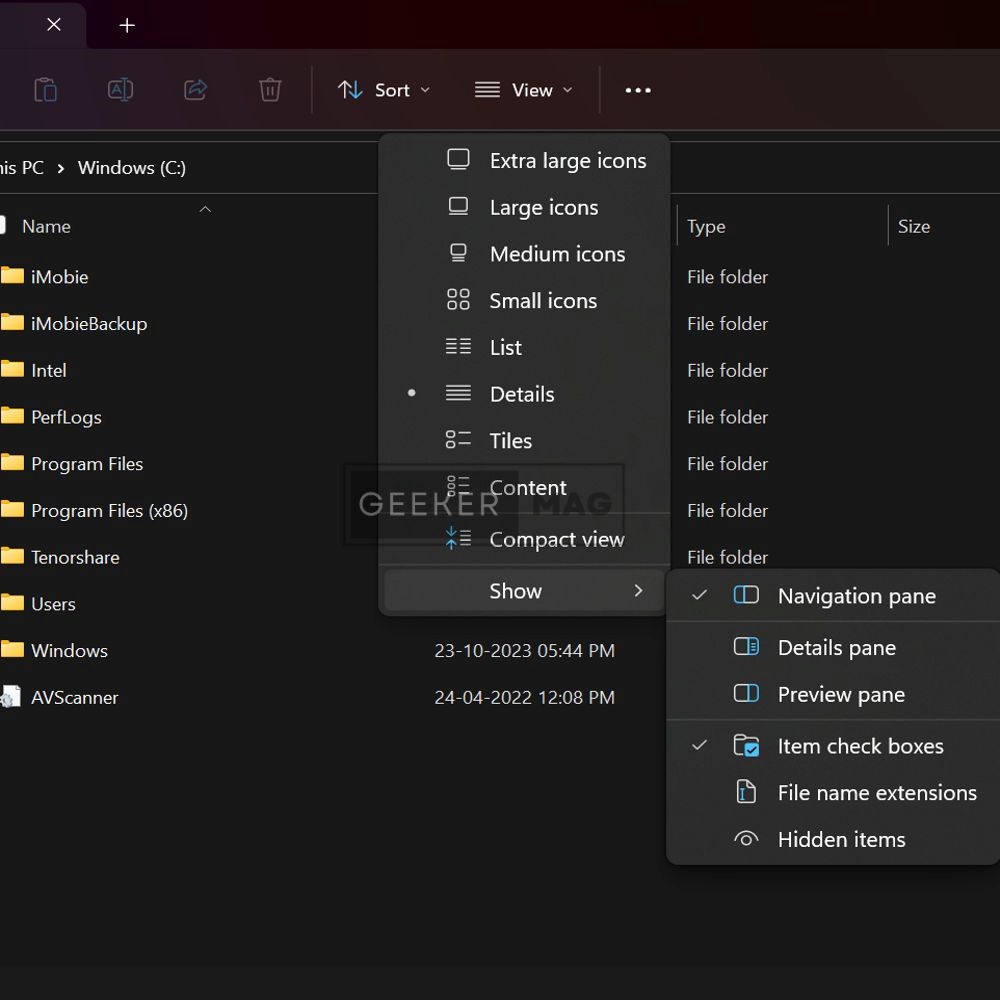
A folder named “ProgramData” will come up on the screen.

Open this folder and find the “NVIDIA Corporation” folder.

Navigate to the “Downloader” folder and open it.
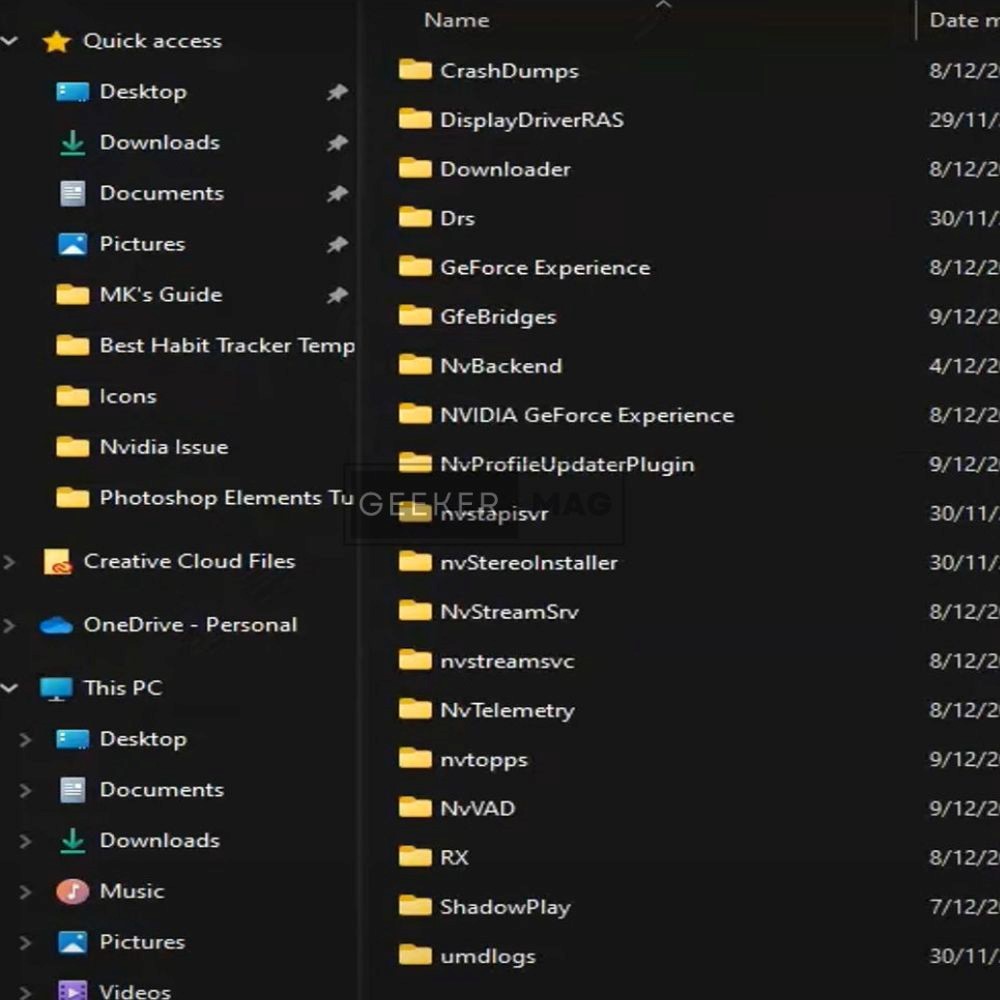
Here, you’ll find the unusual name folder. Open it to find the latest downloaded driver version of NVIDIA.
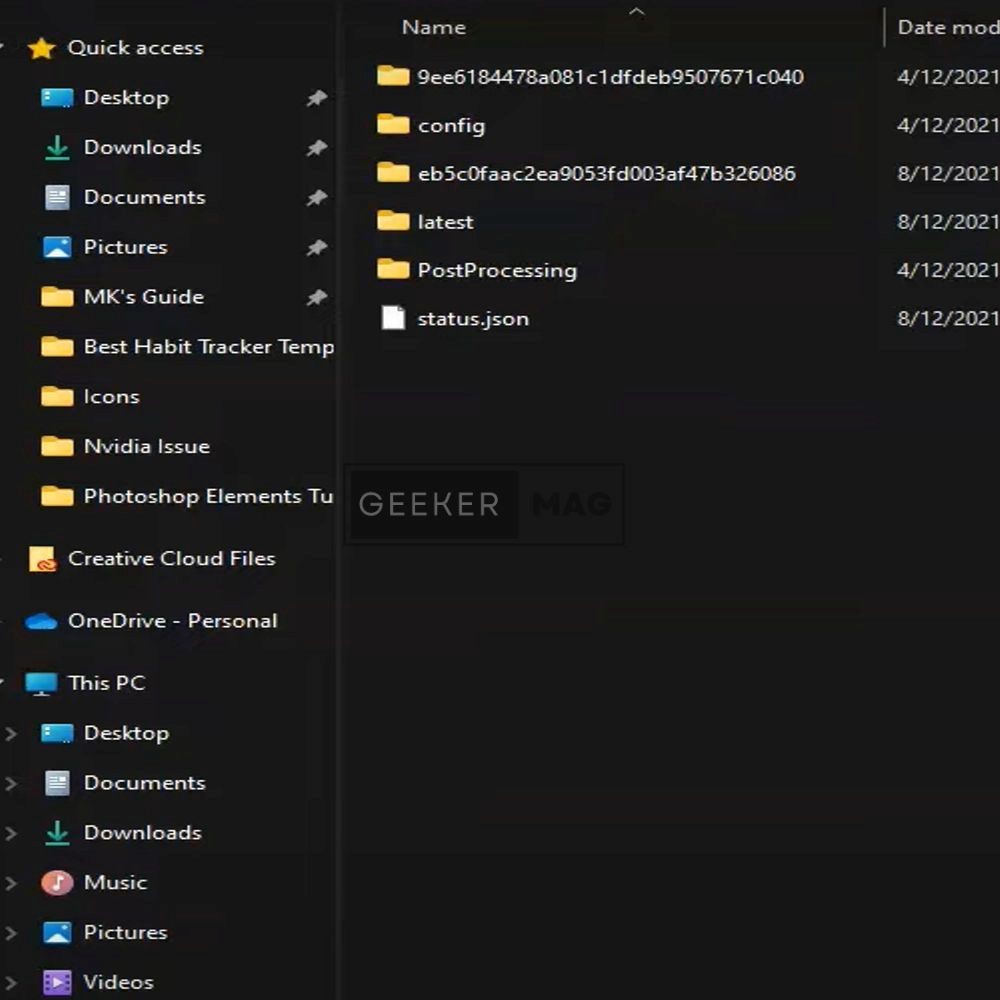
To ensure it’s the latest, press Win, type GeForce Experience, and check the driver version.
If your NVIDIA GeForce Experience driver version matches the file name, then you have found the right one, or you can go back and scroll below to check other folders to find that file.

Open that file and Install it.
Now, check if your issue is resolved and NVIDIA works.
2. Updating NVIDIA Graphics Driver
When you’re trying to update your old NVIDIA Graphics driver then it may cause this error. It’s one of the common reasons why outdated NVIDIA Graphics shows this error. Fortunately, there’s a manual way to update the NVIDIA Graphics driver and fix the error. Follow the steps below:
Press “Win + X” on your keyboard and navigate to “Device Manager”.

Scroll down below and find “Display Adapters” and double-click on it.
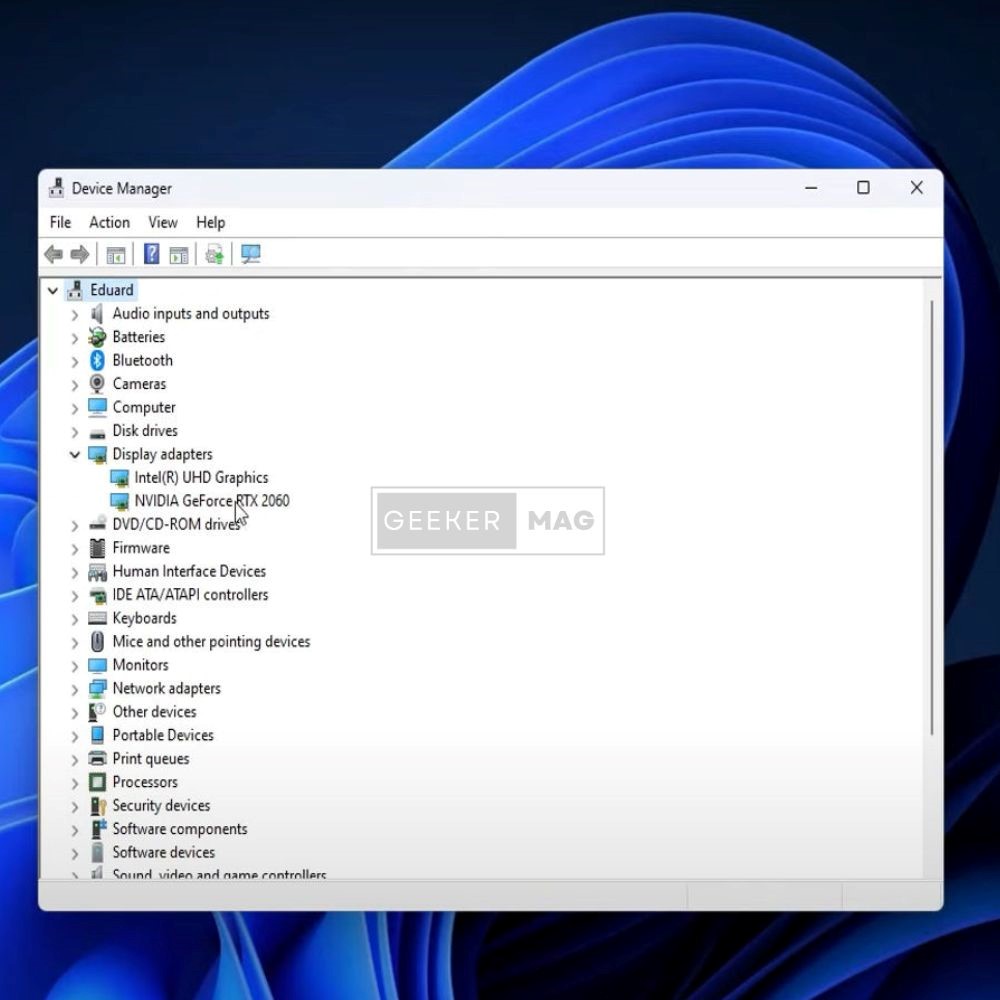
Here’s the “NVIDIA GeForce device” shown, just right-click on it and select “Update Driver.”
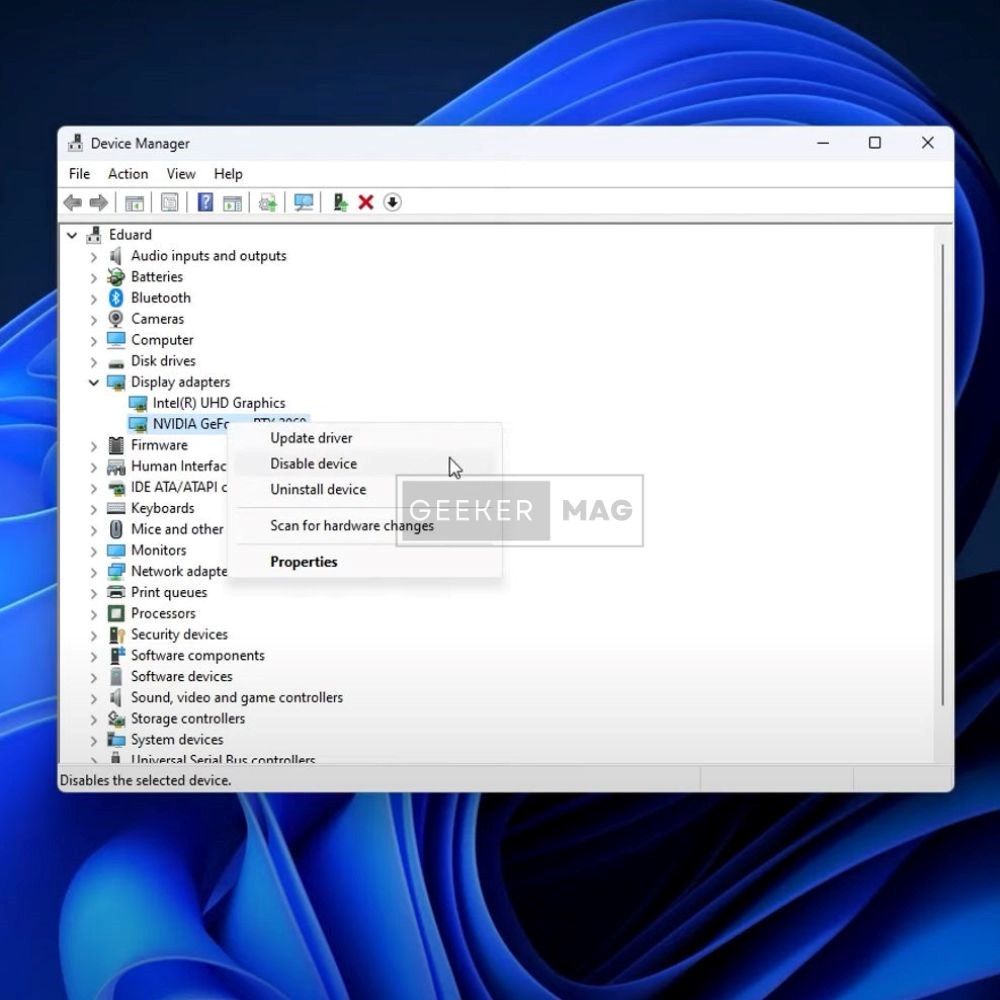
A new window appears, click on the “automatically search for drivers” option.

Once the loading is completed, the latest NVIDIA GeForce driver will automatically be installed in your Windows.
Note: If you’re getting a message “best drivers are already installed” then you can jump to the next method.
3. Install an Appropriate Version of the NVIDIA Driver
Sometimes, the reason behind this error appears when you’re installing the wrong NVIDIA GeForce Driver, which does not support your system. So, you need to install an appropriate version of the NVIDIA Driver to resolve this issue. Here’s how you can find the appropriate version:
Go to NVIDIA Driver Downloads and Enter the details that match your system.

Click on “Search” to find the appropriate NVIDIA Driver.
Once you find an Appropriate NVIDIA GeForce Driver version, then click on “Download.”
Now try to install and check if the error is resolved.
4. Stop All NVIDIA Running Processes and Files
This error may have occurred because old NVIDIA files are already running in your system and that’s why it’s stopping the installation of new NVIDIA updated files. Here’s the way to stop all previous NVIDIA running files and fix the issue:
Press Win + R on your keyboard to open the Run dialog box.
Type “services.msc” and hit Enter to open the services app.

Once a service tab opens, Find the NVIDIA-based files, right-click on them, and tap on Stop.

Repeat for each NVIDIA-based file and once all files are Stopped then Re-install the new NVIDIA Drivers and check if the error is fixed.
Wrapping Up!
These are the four working methods that you can implement to fix this “NVIDIA Installer Cannot Continue” Error in your Windows 11. We hope this guide helps you to resolve this error by trying any given method. Let me know in the comments – which method works for your system.


