External hard drives are invaluable for storing large amounts of data, but it can be frustrating when your computer fails to recognize them. Whether it’s due to a corrupted file system, driver issues, or hardware malfunctions, this issue can often be resolved without losing your precious data.
How to Recover Data from an External Hard Drive That Is Not Recognized
In this blog post, we’ll walk you through the steps to recover data from an external hard drive that is not recognized by your system.
Step 1: Check the Basics
Before diving into more technical solutions, ensure the following basic checks:
- Try a Different USB Port or Cable: Sometimes, the issue may lie with your USB port or cable. Try connecting your external hard drive to a different USB port or use another cable to see if it gets recognized.
- Test on Another Computer: Plug the hard drive into another computer. If recognized, the issue may be with the original computer’s USB ports or drivers.
- Listen for Unusual Noises: If your external hard drive makes strange clicking or beeping sounds, it could indicate a mechanical failure. In such cases, it’s best to consult a professional data recovery service.
Step 2: Check Disk Management
If your external hard drive is still not recognized, the next step is to check if it appears in Disk Management. This tool is available in Windows and allows you to see all the drives connected to your system.
Open Disk Management:
Right-click on the Start button and select Disk Management.
Look for Your External Hard Drive:
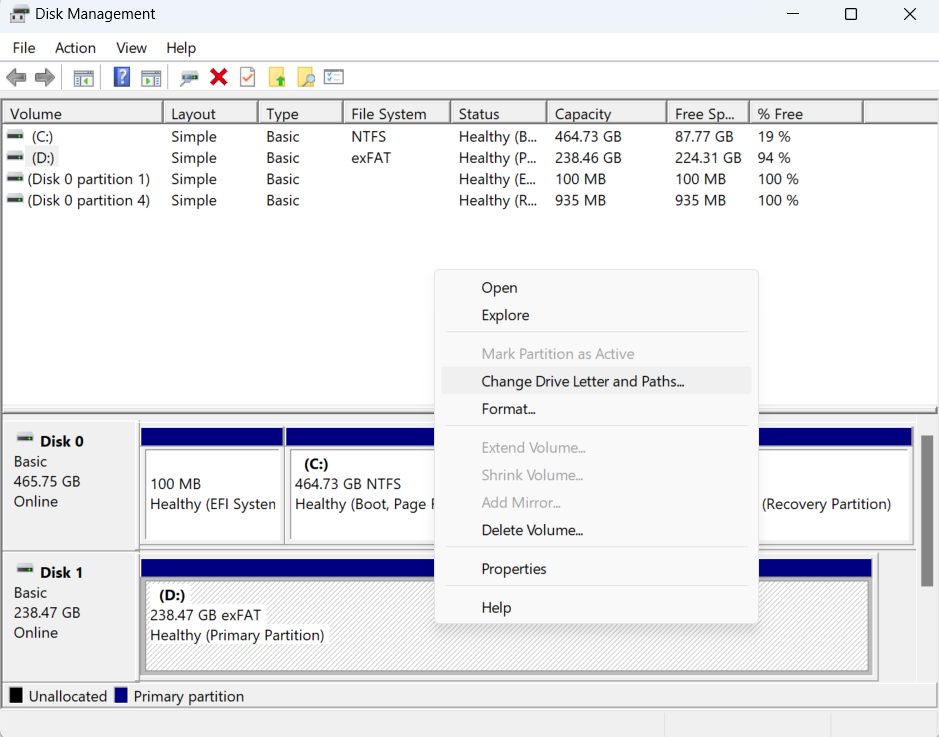
If you see your external drive listed but without a drive letter, right-click on it and select Change Drive Letter and Paths. Assign a new drive letter, and your hard drive should become accessible.
Initialize the Disk (If Applicable):
If the drive appears as Not Initialized, right-click on it and choose Initialize Disk. Follow the prompts to initialize the disk, which should make it recognizable by your system.
Step 3: Update or Reinstall Drivers
Outdated or corrupted drivers can prevent your external hard drive from being recognized. Here’s how to update or reinstall the necessary drivers:
Right-click on the Start button and select Device Manager.
Look under the Disk drives section. If you see your external hard drive with a yellow exclamation (In my case the hard drive is recognized, so it’s not showing a yellow mark) mark, right-click on it and select Update driver.
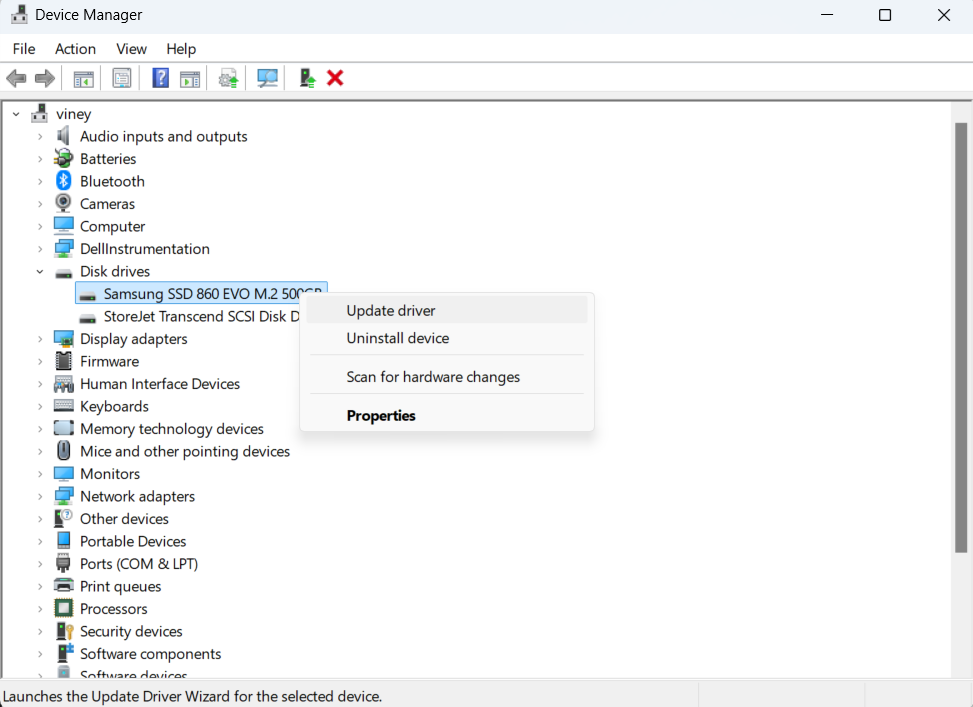
If updating the driver doesn’t work, try uninstalling it. Right-click on the external hard drive in Device Manager, select Uninstall device and then restart your computer. Windows will automatically reinstall the necessary driver.
Step 4: Use Stellar Data Recovery Software
If your external hard drive is still not recognized but appears in Disk Management, then use Windows Data Recovery Software from Stellar that can help you recover your data. Here’s a quick guide to using this tool:
Download and Install Stellar Data Recovery:
Visit the Stellar Data Recovery website and download the software. Follow the on-screen instructions to install it on your computer.
Launch the Software:
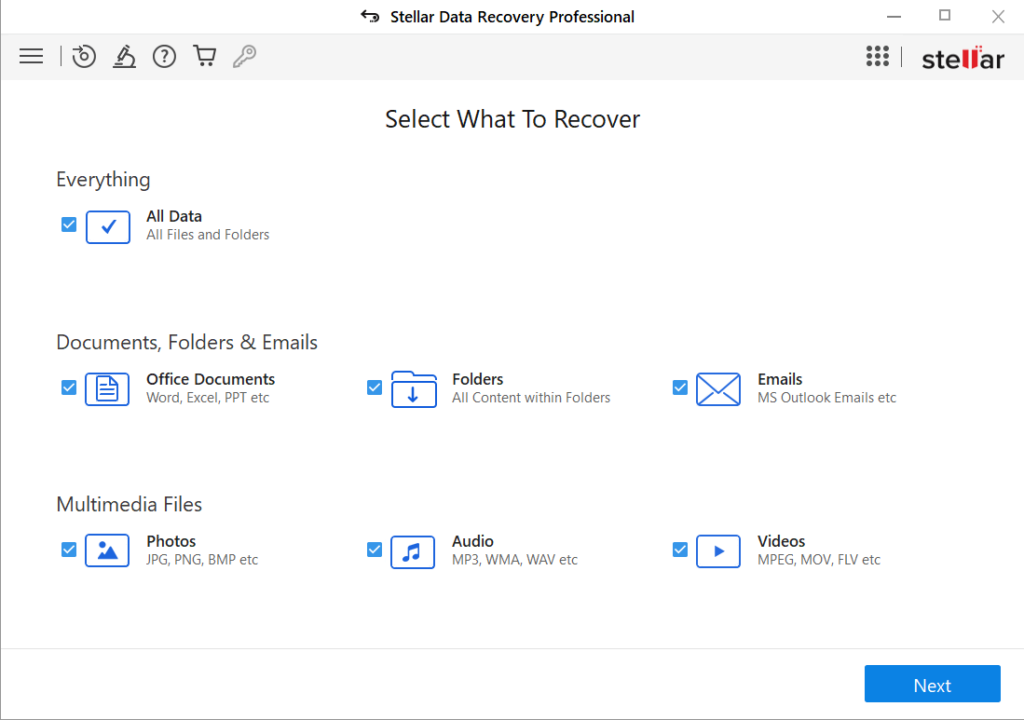
Open Stellar Data Recovery and select the type of data you want to recover (e.g., documents, photos, videos). If you want to recover everything, select All Data.
Select the External Hard Drive:
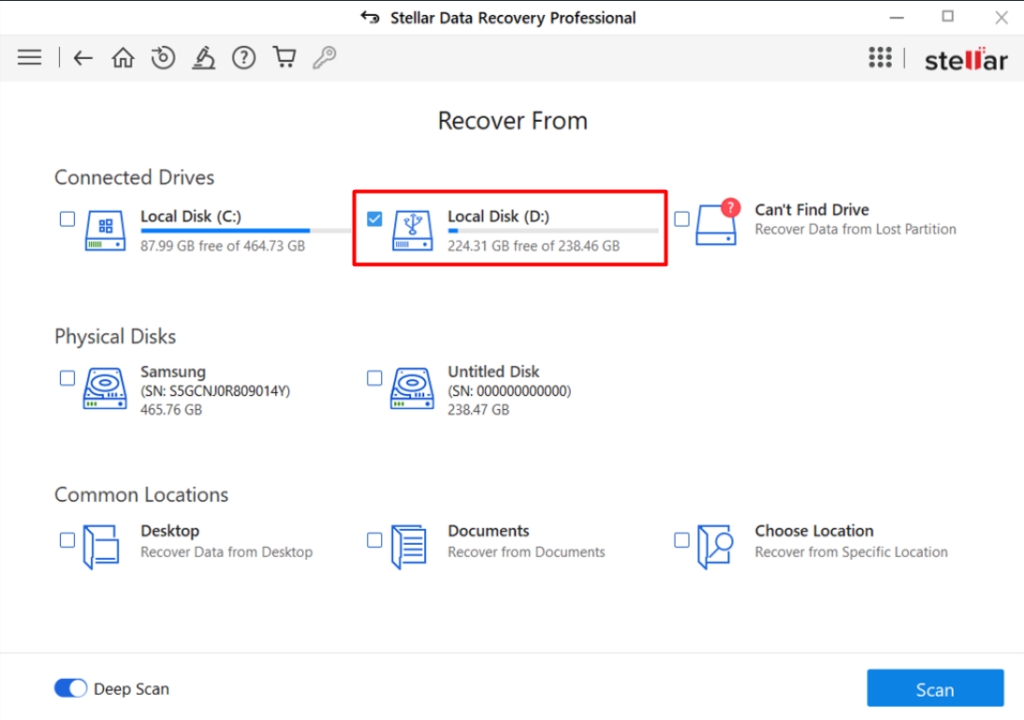
The software will display a list of drives connected to your system. Choose the unrecognized external hard drive from the list.
Scan the Drive:
Click on Scan to start the scanning process. It offers two modes; Normal Scan and Deep Scan.
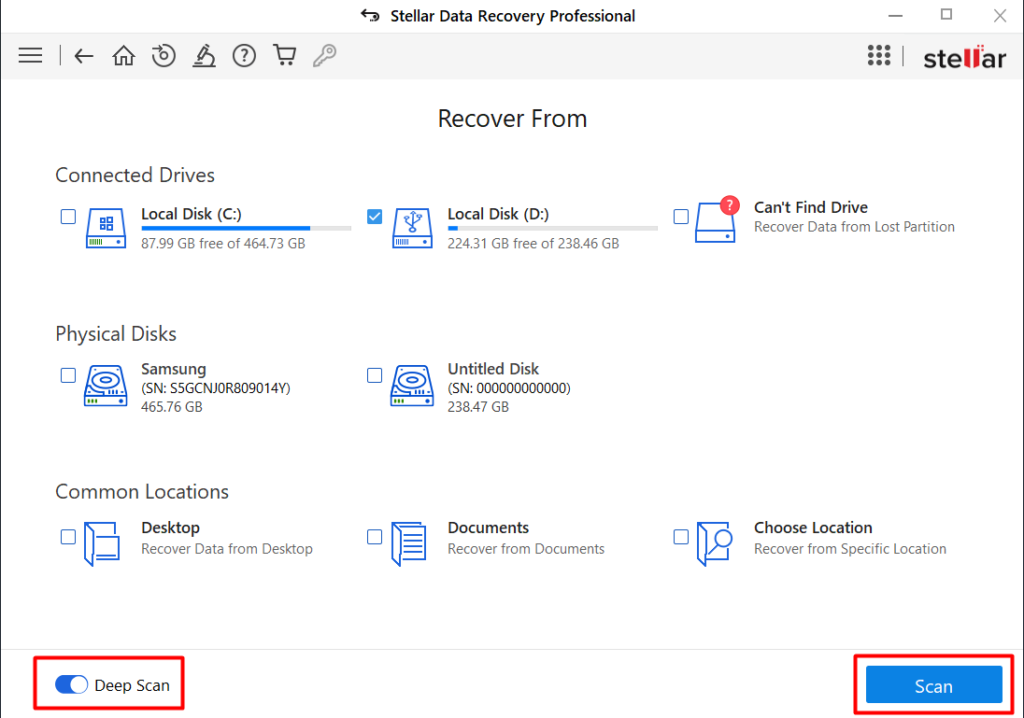
The normal scan will help in recovering the quick data and will take less time, while the Deep scan will perform an in-depth scan of the drive to recover possible data and, as a result, take a longer time.
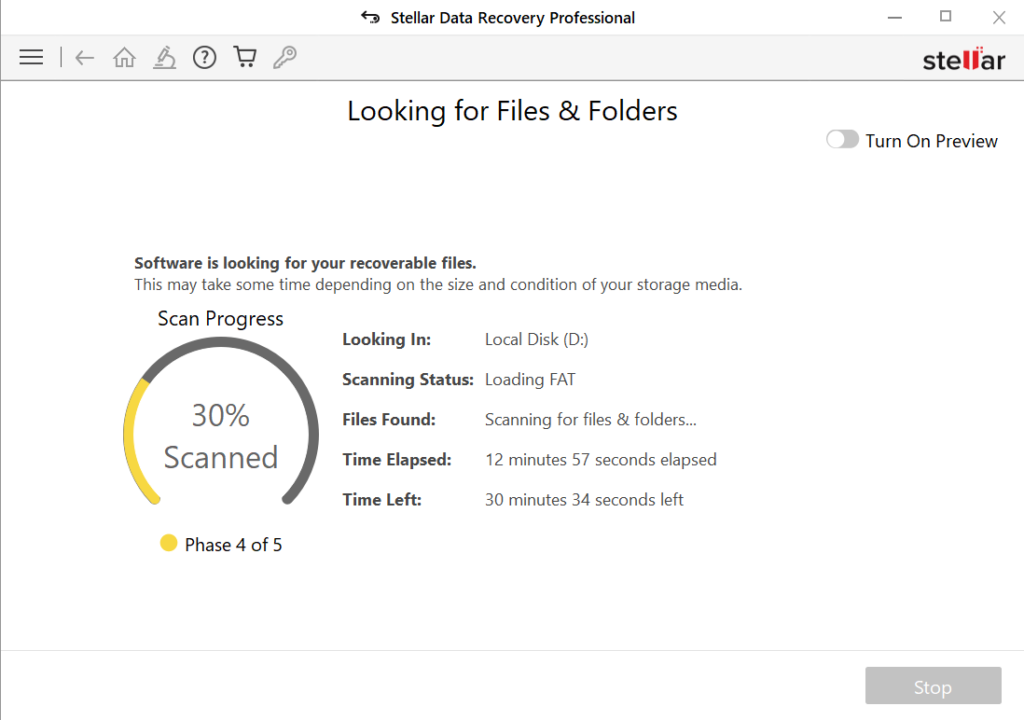
The software will search for lost or inaccessible data on the selected drive. Depending on the drive’s size, this may take some time.
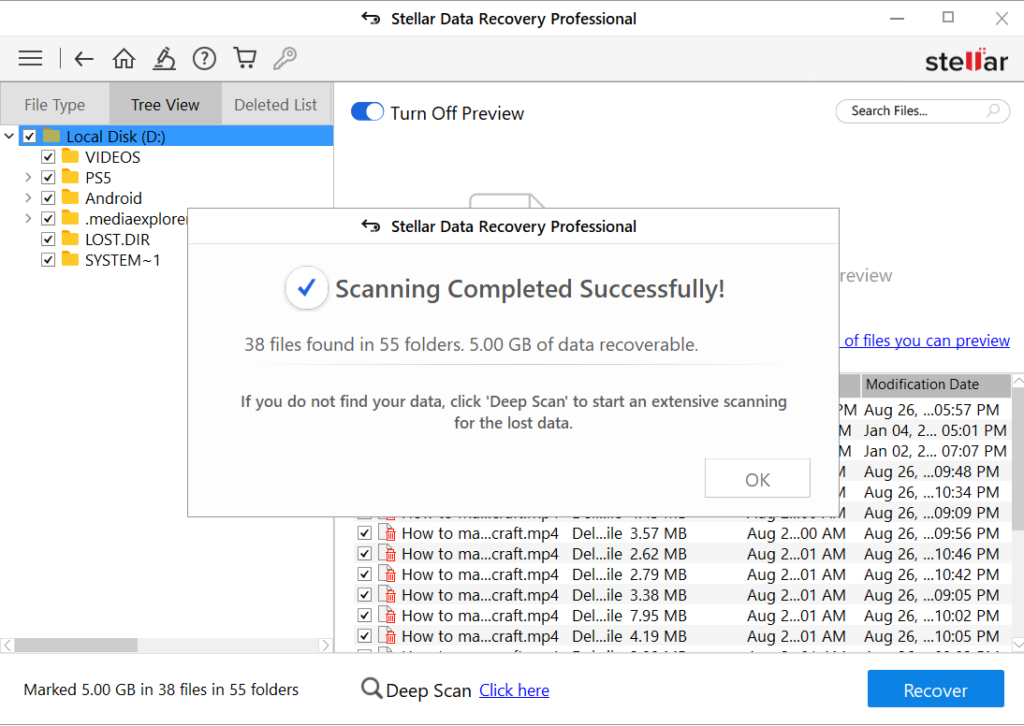
Preview and Recover Data:
Once the scan is complete, Stellar Data Recovery will show a list of recoverable files. You can preview these files before recovery. Select the files you wish to recover and click on Recover.
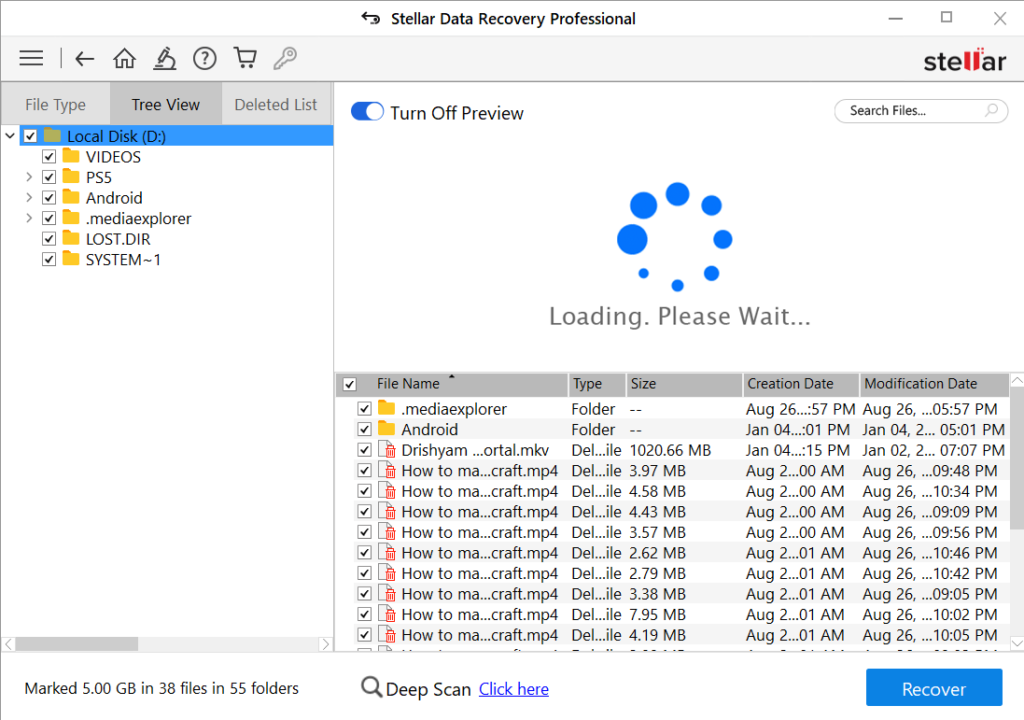
Save the Recovered Data:
Choose a safe location (preferably not on the same external hard drive) to save the recovered files. Click Start Saving to complete the process.
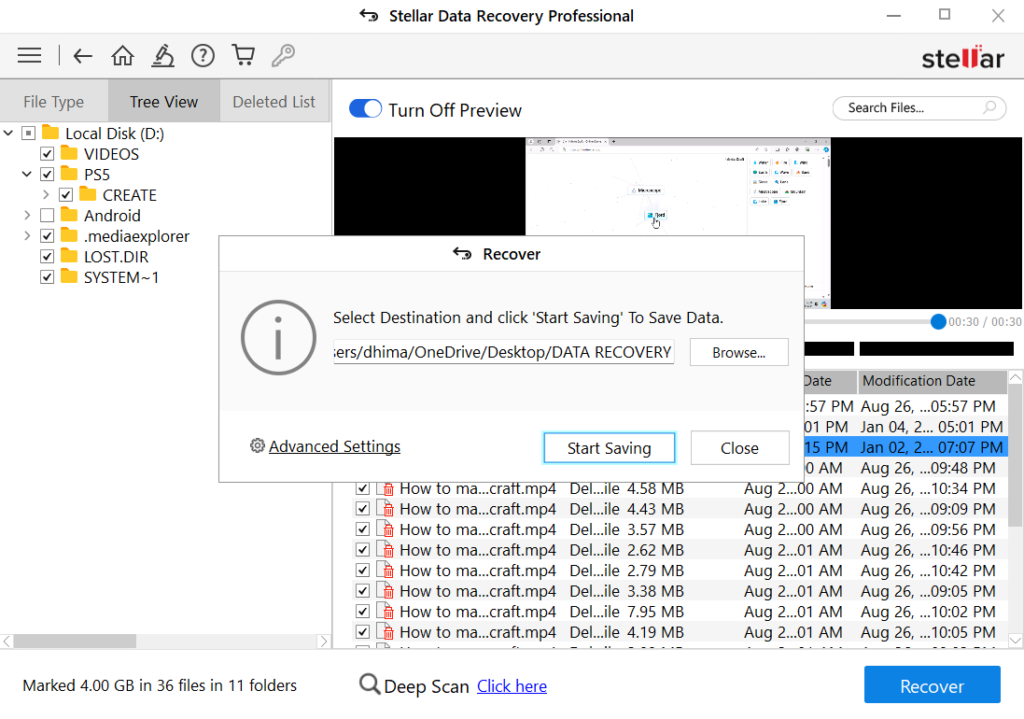
This will start saving the data to your output location, the process will take time depending on the data you want to recover.
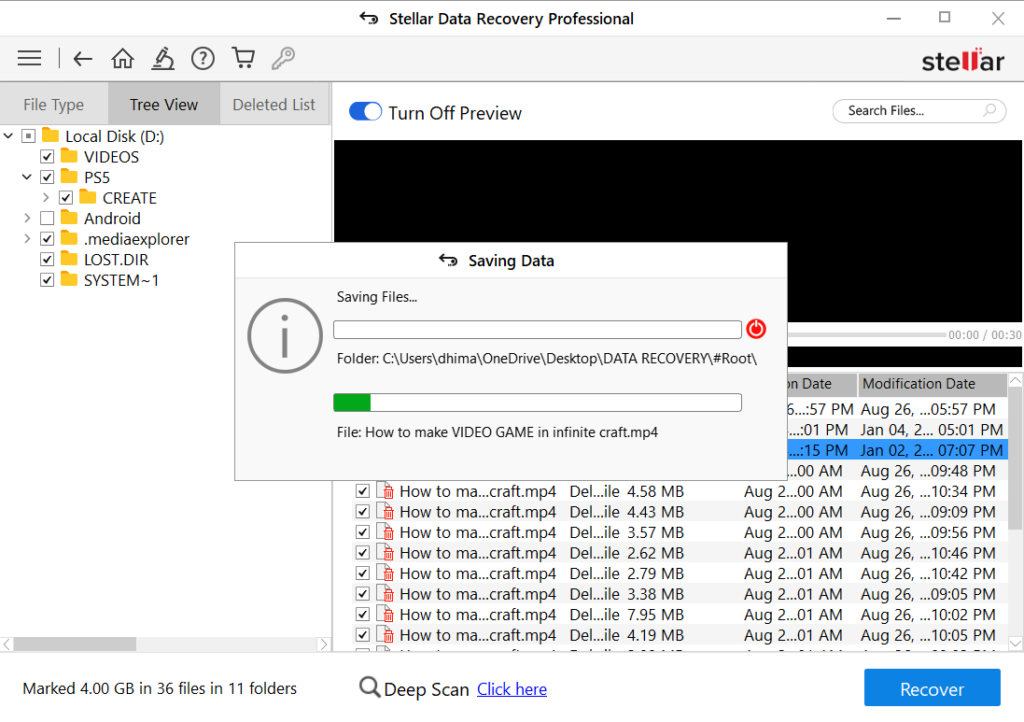
Using Stellar Data Recovery Software is a straightforward way to recover lost data from an external hard drive that isn’t recognized by your computer. With its powerful scanning and recovery capabilities, you can retrieve your important files with just a few clicks.
Recovering Data from an Unrecognized External Hard Drive on Your MacBook
First, make sure everything is plugged in correctly. Check the cable between your MacBook and the external hard drive. If that doesn’t work, try plugging it into a different USB port on your MacBook. You might also want to try a different cable in case the one you’re using is bad.
Next, take a close look at the hard drive. Check for any cracks, scratches, or other damage on the outside. Also, listen for any unusual noises like clicking or grinding. If you hear these sounds, it might mean there’s a problem with the hard drive itself.
Step One: Check Disk Utility
- Open Disk Utility: You can find it in your Applications folder.
- Look for the drive: If it’s listed, click on it and try to mount it.
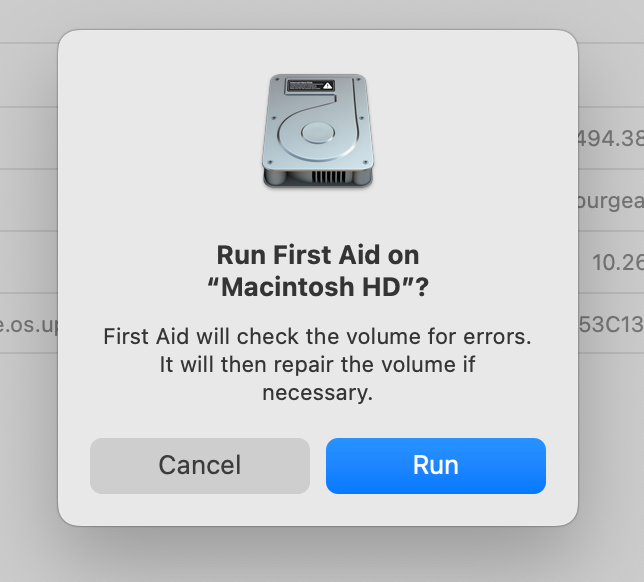
- Repair the disk: If it’s not mounted or shows errors, try running First Aid to repair the disk.
Step Two: Update macOS
Check for updates: Sometimes, software updates can resolve compatibility issues.
Test with another device: If possible, connect the drive to a different computer to see if it’s recognized. This can help isolate the issue.
Step Three: Use Data Recovery Software:
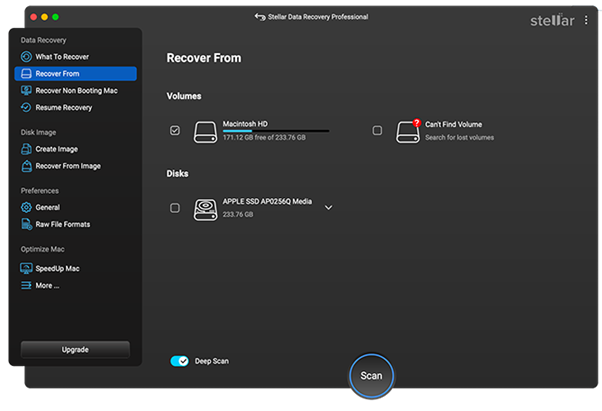
Professional tools: If the above steps don’t work, consider using Mac Data recovery software. In this software, you can check on “Can’t Find Volume” in the Recover from section
Important Note: If you’re dealing with sensitive data, consider consulting with a professional data recovery service. They have specialized tools and expertise to handle complex cases.
Step 5: Seek Professional Help
If all else fails and your data is critical, it’s time to consult a professional data recovery service. These experts have the tools and expertise to recover data from even the most damaged drives. While this option can be expensive, it’s often worth it for irreplaceable data.
Have you ever encountered an issue with your external hard drive? How did you resolve it? Share your experiences in the comments below!
Summary
While it’s frustrating when an external hard drive isn’t recognized, there are several steps you can take to recover your data. From checking basic connections and trying different ports to using Disk Utility or data recovery software, there are plenty of options to explore before calling in the professionals. Remember, staying calm and methodically working through each step can often get you back on track without too much hassle.

