Once you set up your OneDrive account, it will automatically sync your all data to cloud storage in the background. The syncing process uses much power and if you are running out of battery then it can kill your battery fast.
To deal with this situation, you can take help of power saving mode. The purpose of this feature is to save more power when you system is running out of juice. When this feature is ON, unimportant features are disabled automatically. As a result extend battery life.
Fortunately, OneDrive application also offer a similar option which when enabled make use of power saving mode to control Sync process.
Enable or Disable OneDrive File Sync in Battery Saver Mode in Windows 11
In upcoming lines, we will share with you instructions on how to enable or disable OneDrive Syncing in Power Saving Mode in Windows 11. So lets get started:
First of all, you need to locate OneDrive icon available on the left taskbar of the Taskbar.
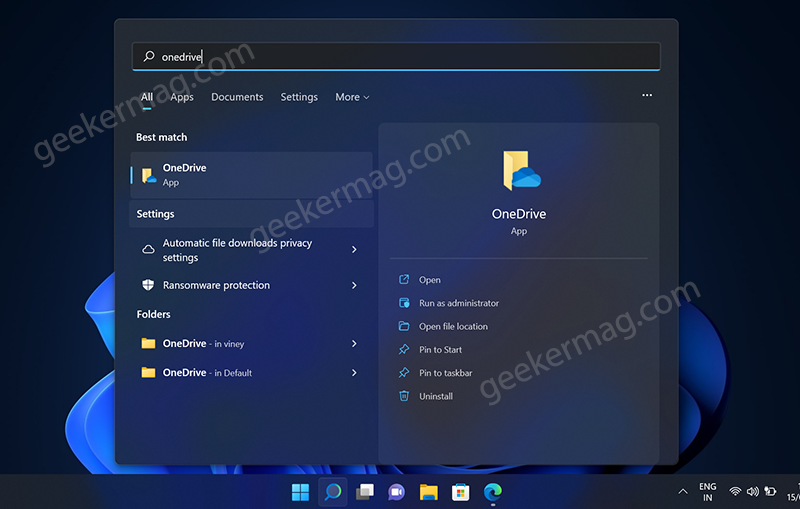
In case, OneDrive icon is missing on the Taskbar, then you need click on the Search icon available on the Taskbar and type OneDrive, when same app appear in search results, click to open it.
After doing this, OneDrive icon will start appearing on the Taskbar.
Now, click on the OneDrive app icon and then click on Help & support (Gear icon) from the menu that opens, click on Settings.
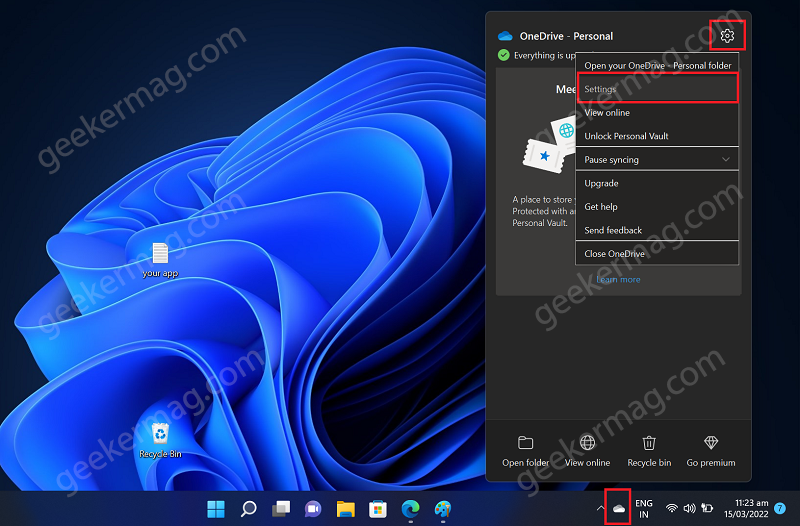
Microsoft OneDrive setting window will open. Here, switch to Settings tab on the top.
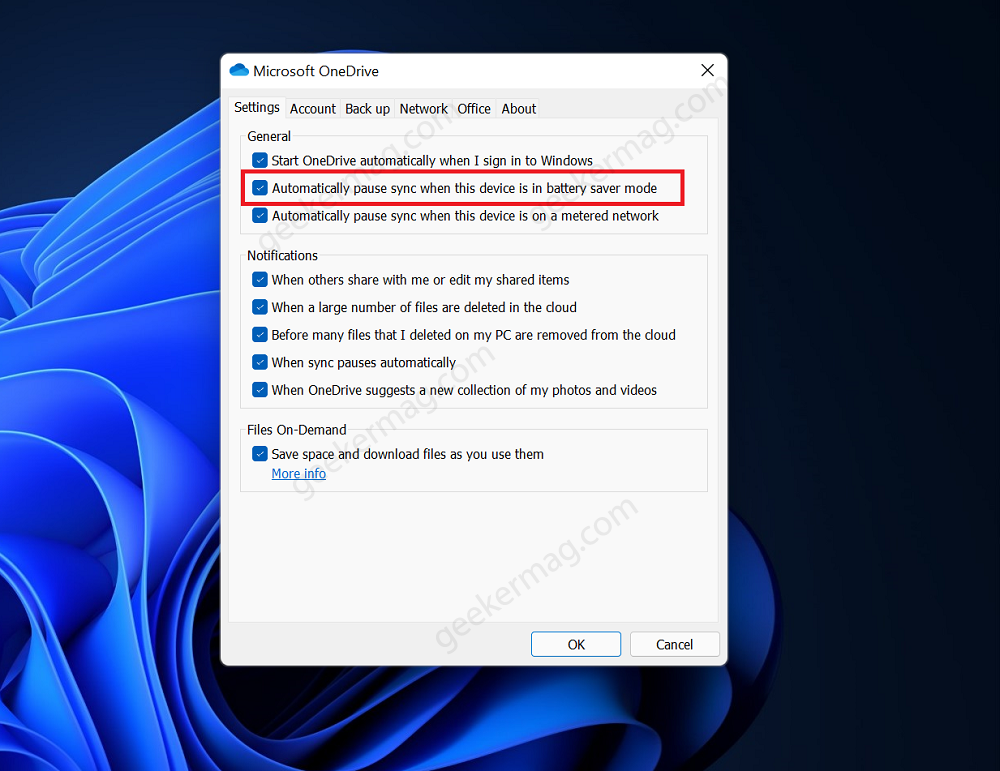
Under General section, Check the box for option that reads “Automatically pause sync when this device is in battery saver mode“
Make note off
- Checking the box will enable OneDrive Sync in Battery Saver Mode in Windows 11
- Unchecking the box disable Sync in Battery Saver Mode in Windows 11
So depending on your requirement, you can either turn on or turn off this option
At last, click OK to apply the changes and reboot your computer.
I hope you find this blog post useful.

