The “HYPERVISOR_ERROR” is a dreaded Blue Screen of Death (BSOD) error that is typically associated with Hypervisor, a crucial component responsible for managing virtual machines and ensuring their isolation from the host system. It can occur on both Windows 11 and Windows 10 operating systems.
When the hypervisor encounters a critical problem, it leads to an abrupt system crash and shows a Blue Screen of Death with HYPERVISOR_ERROR stop code. As a result, this error disrupts your work.

In this blog post, we will delve into the common causes behind the HYPERVISOR_ERROR and present effective solutions to resolve them. Whether you are a novice or an experienced user, follow these steps carefully to bring your Windows system back to a stable state.
What Causes a HYPERVISOR_ERROR BSOD:
- Incompatible or Outdated Drivers: One of the primary culprits behind the HYPERVISOR_ERROR is outdated or incompatible drivers, especially those related to virtualization technologies like Intel VT-x or AMD-V. Conflicting drivers can lead to critical errors in the hypervisor, causing the BSOD.
- Virtualization Settings: Incorrectly configured virtualization settings in the system BIOS or UEFI can trigger the HYPERVISOR_ERROR. This includes enabling virtualization features without proper hardware support or improper configurations.
- Software Conflicts: Certain third-party applications, especially those that utilize virtualization technology themselves, can conflict with the system’s hypervisor and cause errors.
- System File Corruption: Corrupted system files can impact the functioning of the hypervisor, leading to the HYPERVISOR_ERROR.
- Hardware Issues: In some cases, hardware problems like faulty RAM or a failing CPU can manifest as a HYPERVISOR_ERROR.
Now that we understand the potential causes, let’s move on to the solutions.
Fix the HYPERVISOR_ERROR Blue Screen on Windows 11 and 10
If you landed on this blog post, then it’s highly possible that you’re seeing HYPERVISOR_ERROR BSOD. Don’t worry, as most of the time, this BSOD Error can be fixed by applying quick and easy solutions. Let’s start with the first solution in our blog post:
Confirm if Hyper-V Is Enabled or Not
There’s a huge possibility of HYPERVISOR_ERROR BSOD Error if the Hyper V feature is disabled or not configured properly. Ensure that it’s enabled. Check this blog post to learn How to Enable Hyper-V in Windows 11.
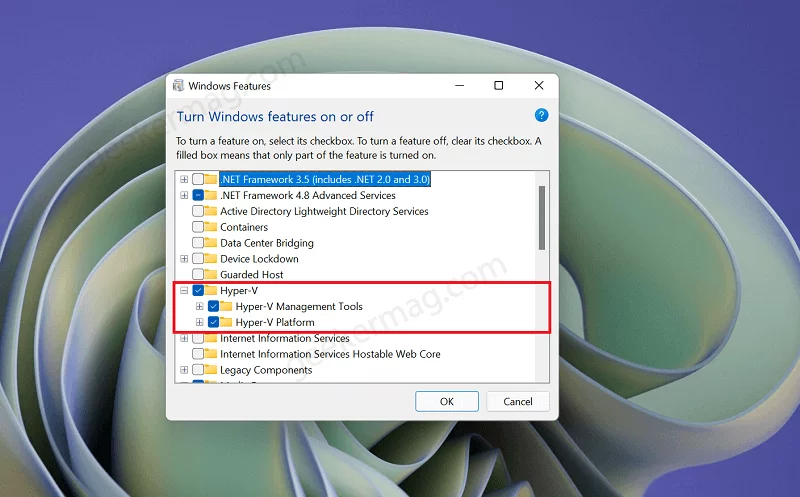
In case it’s already enabled, then disable it first, and enable it again. You will find all the instructions in the reference link.
If this fails to fix the issue, then try the next method.
Update, Uninstall, and Reinstall Virtualization-Related Drivers
If you’re PC running an outdated virtualization driver, then there’s the possibility of Hypervisor BSOD. Here’s how you can update the drivers.
In the Device Manager, you need to look for the “System Devices” section and expand it.
Locate virtualization-related drivers (e.g., Intel VT-x or AMD-V) and right-click to select “Update driver.“
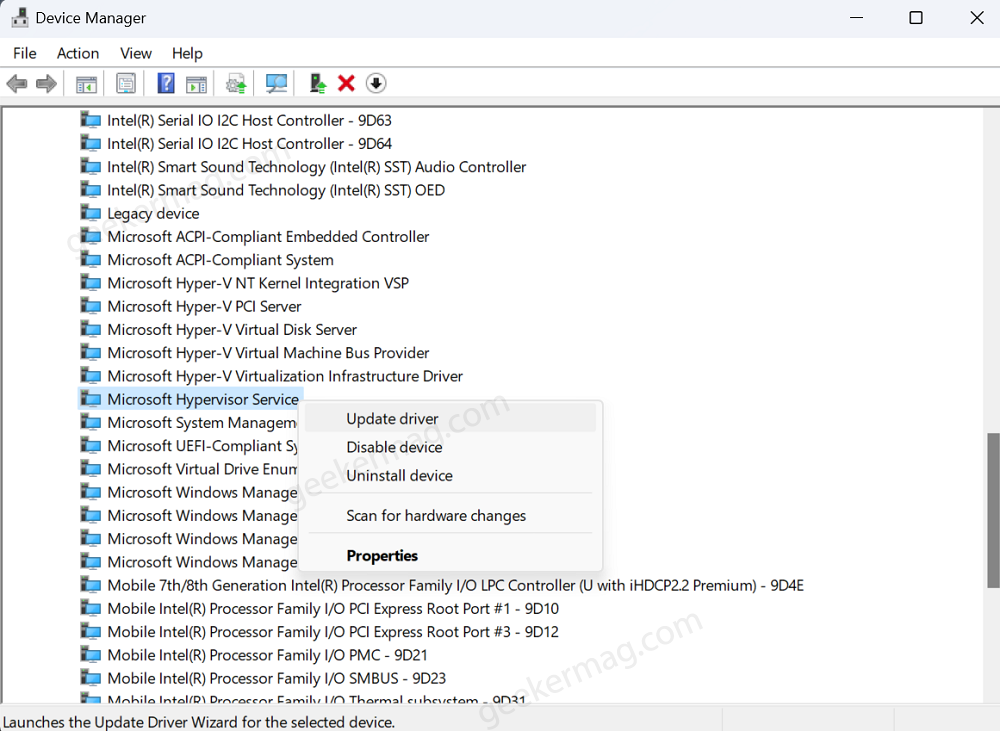
Choose “Search automatically for updated driver software” and follow the on-screen instructions.
In case it says your PC running up-to-date drivers, then delete a particular driver and reinstall it. You can check our previous blog post on How to Update Virtualization Drivers for Windows 11.
Alternatively, you can head over to the manufacturer’s website and download the latest Virtualization driver for your Windows PC or use OutByte Driver Updater.
Check Virtualization Settings is Enabled
We have already covered step-by-step instructions on how to check if Virtualization is enabled on your PC (With or without entering BIOS.)

If you’re sure that the Virtualization feature is enabled on your PC and still you’re facing the issue, then head over to the next step.
Uninstall Problematic Applications
Sometimes if you’re using another application that makes use of Virtualization technology like Bluestack Player, VirtualBox, VMWare and others can trigger Hypervisor Error BSOD due to incompatibility.
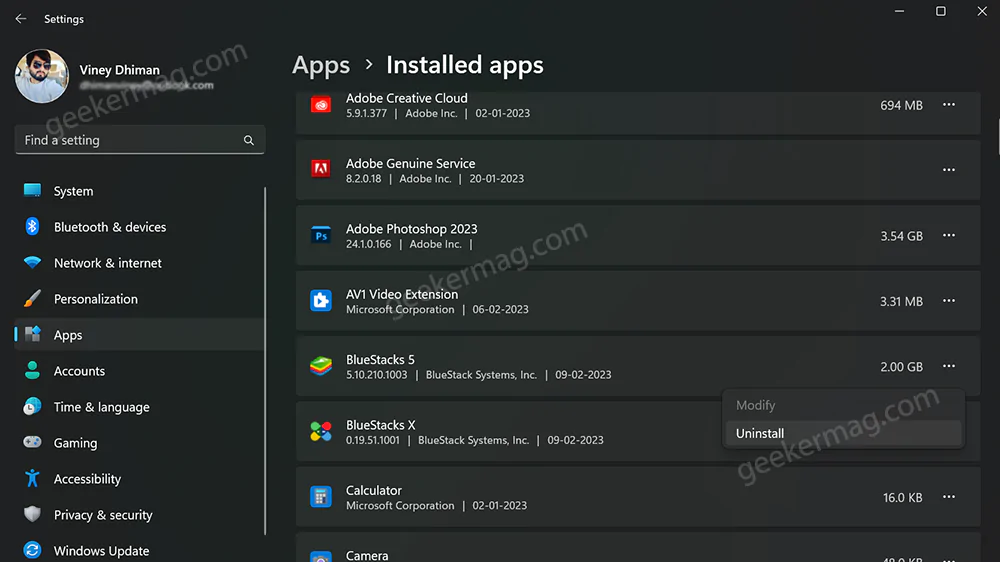
In case you’re running a similar Virtualization program, then try to temporarily uninstall the apps from the PC and check if this fixes the issue.
For that, go to Settings > Apps > Installed apps. Here, locate the app and click Uninstall Twice.
If it does, then head over to either Microsoft support or that particular product forum (Google search for finding the forum) and check reports about similar issues.
If you’re not running any virtualization program, then try the next solution in the list.
Perform SFC and DISM Scan to Repair System Files
System File Checker (SFC) and Deployment Image Servicing and Management (DISM) are default command line tools that help in repairing corrupt system files and Windows OS Images.
You can follow the instructions Run SFC on Windows PC and Run DISM on Windows PC and check if this fixes the issue or not.
Run Windows Memory Diagnostics Test
The HYPERVISOR_ERROR error can also be caused by a problem with your computer’s memory. Here’s how to run Windows Memory Diagnostics:
Click Open the Start menu and type Windows Memory Diagnostics (MdSched.exe), when the same app appears in search results, click to open it.
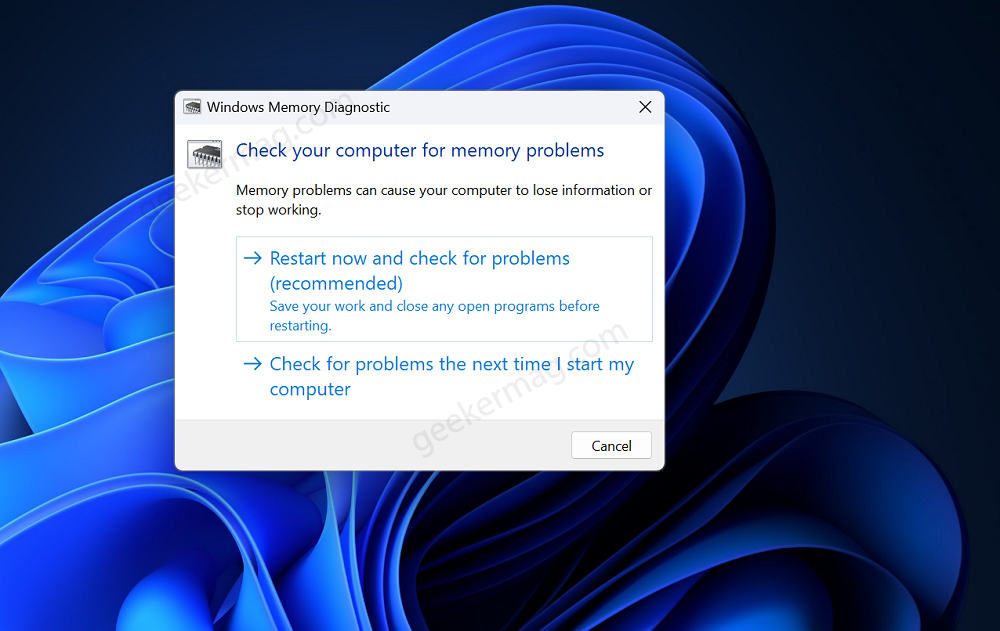
In the Windows Memory Diagnostics dialog, choose the option to “Restart now and check for problems.” Your computer will restart, and the memory test will begin. Make sure to save your open files and documents before doing that.
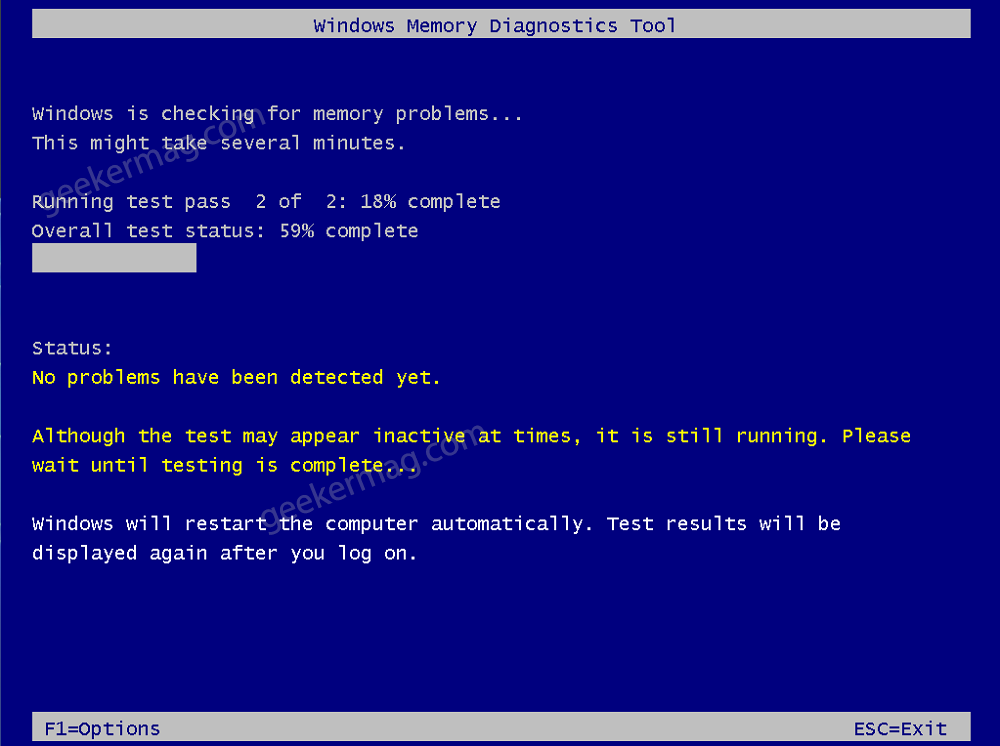
During the memory test, the Windows Memory Diagnostics tool will check for memory problems. This process might take some time, depending on the size of your RAM.
After the memory test is complete, your computer will automatically restart again.
If any memory problems are found, you may need to replace the faulty RAM module(s) to resolve the issue.
If no memory problems are found, likely, the HYPERVISOR_ERROR is not related to the RAM, and you can proceed with other troubleshooting methods.
Restart Hyper-V Service
Restarting the Hyper-V services can help resolve issues related to the hypervisor that might be causing the HYPERVISOR_ERROR Blue Screen on your PC, here’s how you can do that:
Click on the Search icon and type Services, when the same app appears in the search results, click to open it.
In the “Services” window, scroll down to find the “Hyper-V Virtual Machine Management” service.
Right-click on the same service and select the Restart option from the menu.
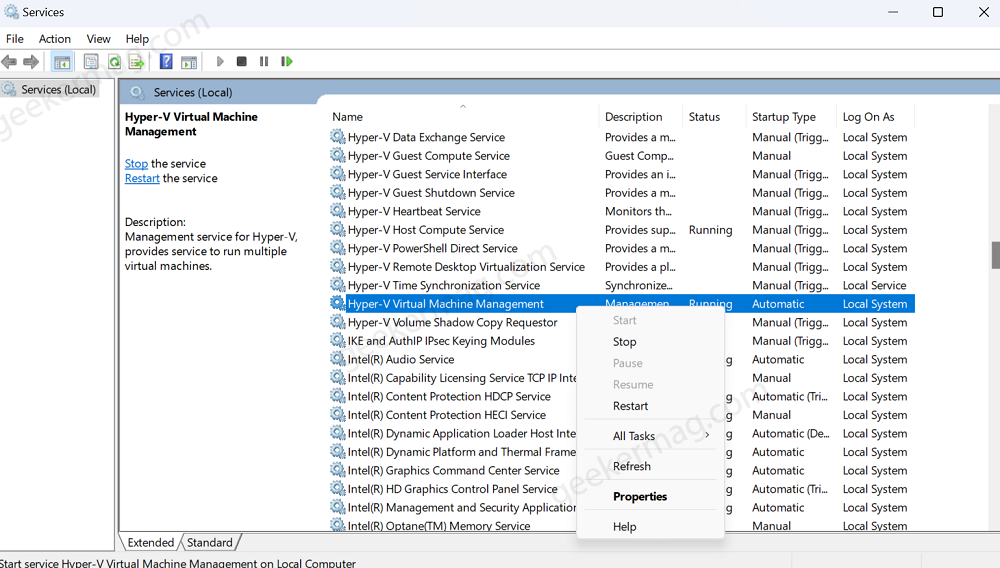
Wait for the service to stop and then start again.
Similarly, locate and restart the “Hyper-V Host Compute Service” and “Hyper-V Host Service” if available.
After restarting the necessary services, close the “Services” window.
Restart your computer to apply the changes.
By following the solutions outlined in this blog post, you can troubleshoot and fix the Hypervisor_Error BSOD on your Windows PC. In case you’re aware of any other working solution, feel free to share it in the comments.


