In today’s digital age, the ability to perform a reverse image search has become an invaluable tool, especially on smartphones. Whether you’re trying to identify a particular object, find the source of an image, or verify the authenticity of a photo, Google’s reverse image search can be a game-changer.
Perform Google Reverse Image Search on iPhone
Performing Google reverse image search on Android devices is easy as compared to iOS or iPhones. Below in this post, In this guide, we’ll walk you through the steps to conduct a Google reverse image search on your iPhone.
In Chrome Browser
If you have Chrome set as your default browser, the process is straightforward:
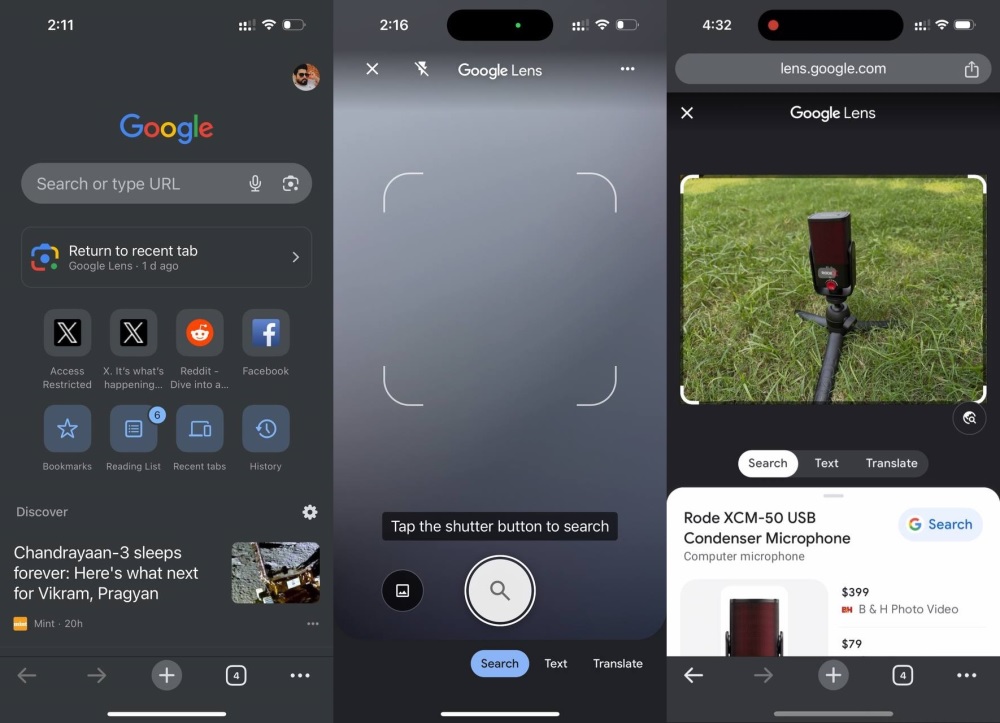
Launch Chrome browser and visit google.com. In the search box, tap the lens icon.

Here, tap on the Shutter button to search for a picture or tap the Gallery icon to select a picture from the gallery for which you want to perform a reverse image search.
Google’s image search powered by Google Lens will promptly detect and display similar results.
Use Google Search App
For users who prefer Safari or Edge as their browsers, if you visit Google Search and tap on the lens icon, it will ask you to download the Google Search app as you can’t perform reverse image search within the browser. So here’s what you need to do:
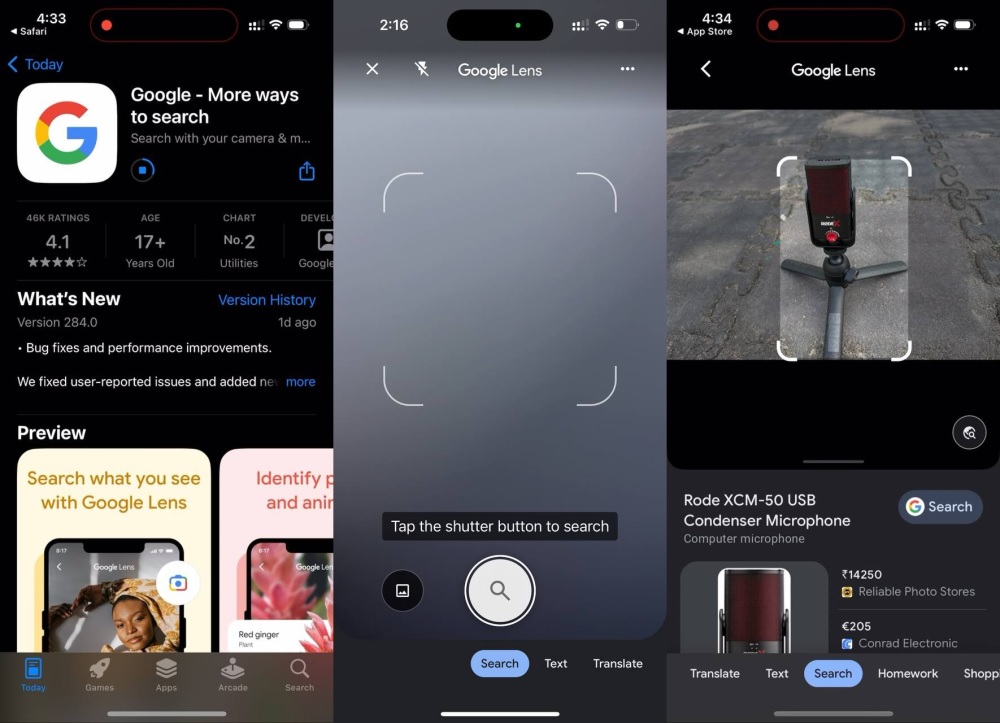
Download Google Search app from the App Store.
Open the application and tap on the lens icon within the app interface and tap on it to initiate the reverse image search process.

Similar to the previous method, you can either use the camera or choose an image from your photo library.
Google’s image search powered by Google Lens will swiftly identify and present similar results.
As simple as that!
So these are two ways using which you can perform Google’s reverse image search on your iPhone. So, next time you come across an image you want to know more about, don’t hesitate to perform a reverse image search.


![[Solved] Apple Watch Pausing Workout Automatically? 4 Fixes (2026) [Solved] Apple Watch Pausing Workout Automatically? 4 Fixes (2026)](https://geekermag.com/wp-content/uploads/2026/01/apple-watch-workout-pause-after-11-seconds--450x253.jpg)

