If you love customizing desktop backgrounds, then the possibility of adding stickers on the desktop background will be a great addition to Windows 11, isn’t it? It will be a great way to express yourself with stickers.
Keeping this thing in mind, Microsoft has added a new customization tool named “Sticker Editor” that allows users to place or add stickers on the desktop wallpaper or background.
These stickers will appear over the desktop background and be applied across all wallpapers. In simple words, if you change the desktop background, then you can keep the sticker on it as well.
How to Enable Desktop Stickers in Windows 11
Sticker Editor feature is partially working for users running Windows 11 build 25162 in the dev channel. In case, you’re an insider and can’t wait to use the Sticker Editor feature, then there’s a registry hack using which you can enable sticker editor in Windows 11. Here’s how to do that:
Click on the Search icon and type regedit, when the Registry editor appears in search results, click to open it.
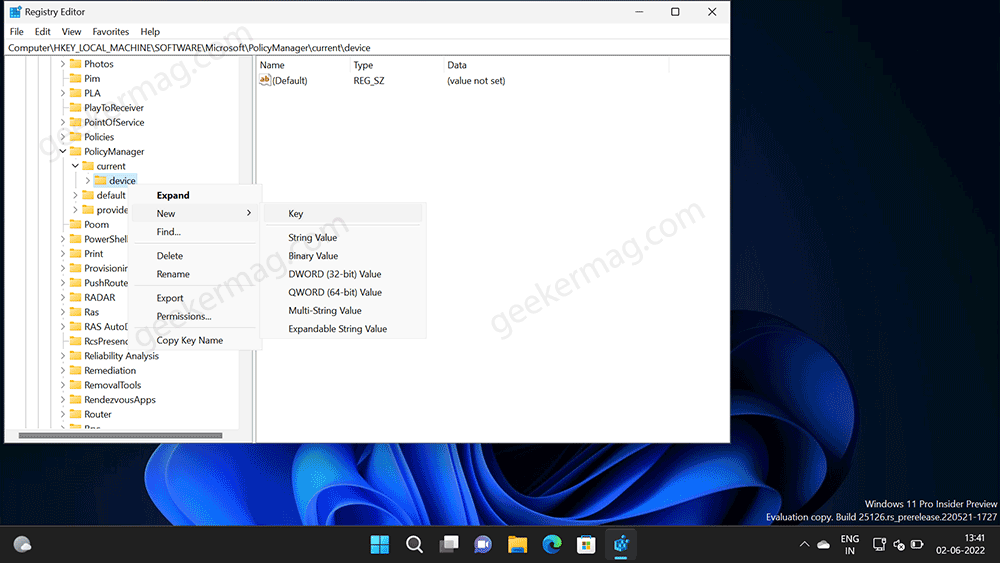
In Registry editor navigate to: HKEY_LOCAL_MACHINE\SOFTWARE\Microsoft\PolicyManager\current\device.
Right-click on the Device key and select New > key and name it Stickers.
Right-click on the Stickers and then select New > DWORD (32-bit) Value and name it EnableStickers.
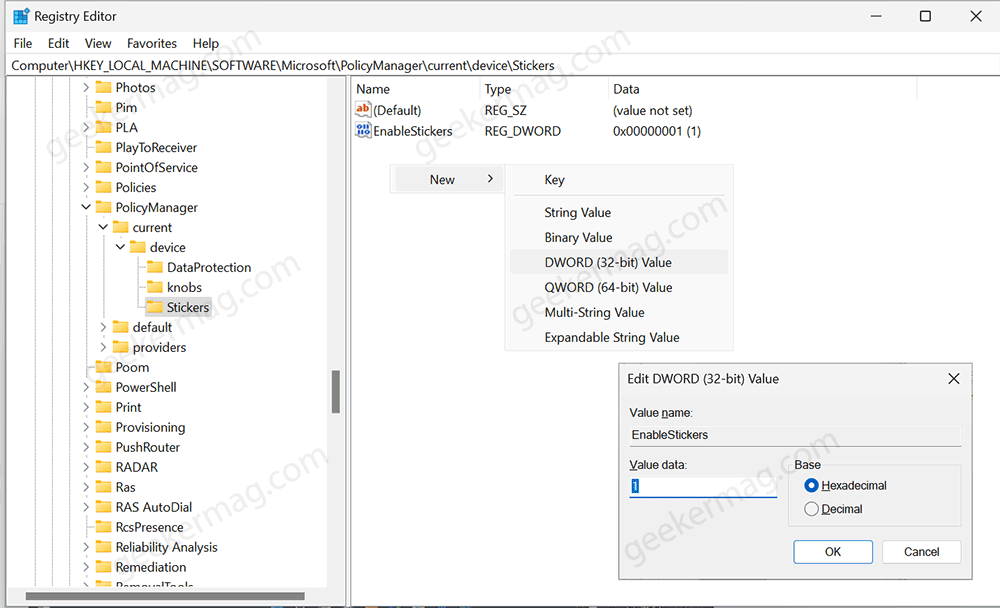
Double-click on the EnableStickers DWORD Value and set it Value data to 1.
After that, close the Registry editor, Reboot your computer, and Restart file explorer.
Use Sticker Editor to Add Stickers to Desktop Background in Windows 11
Now that you have force enable Desktop stickers in Windows 11, follow the instructions below to add stickers to the desktop background.
Launch Settings app by pressing WIN + I key combination.
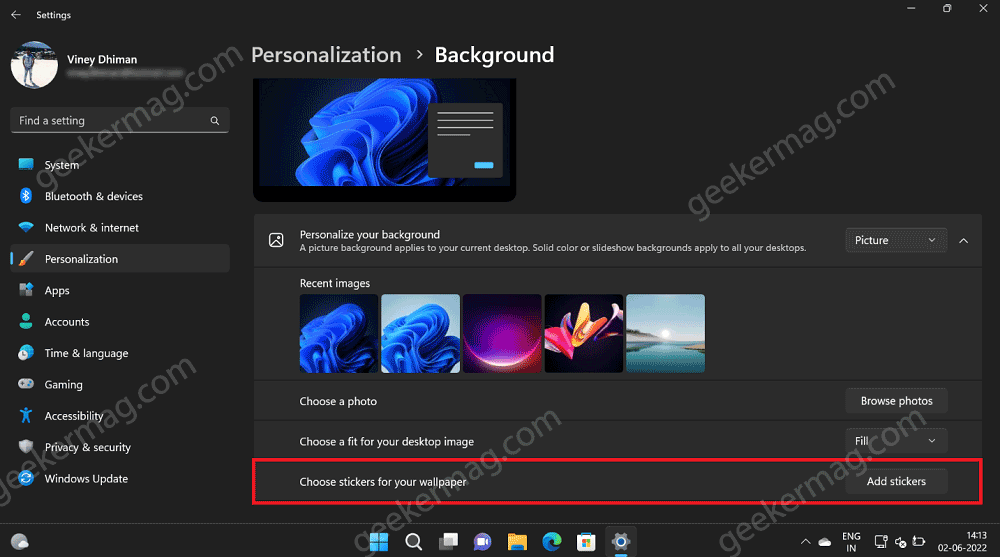
Select Personalization > Background.
On the right side, you will find the new option “Choose stickers for your background“, click on Add sticker button.
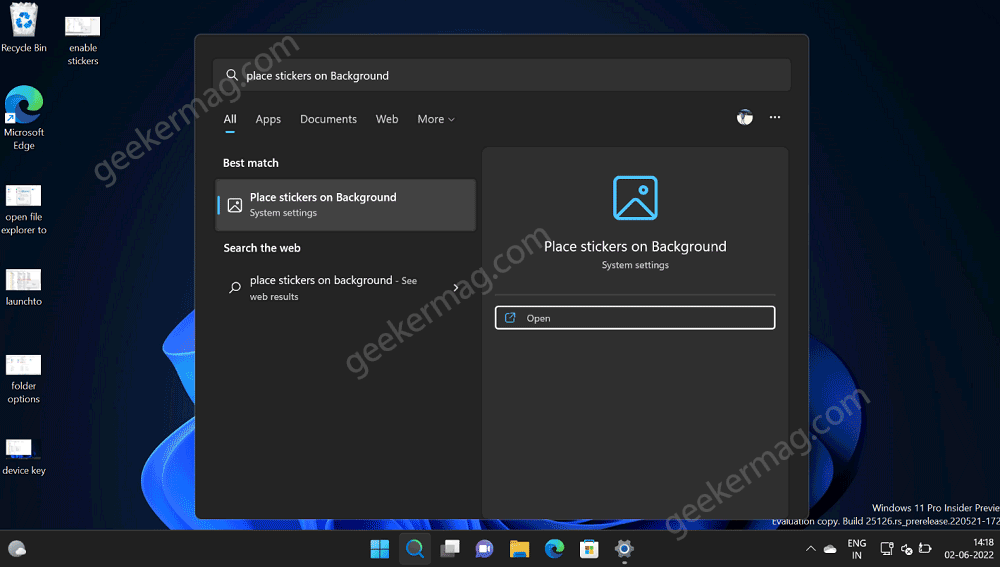
Alternatively, click on the Search icon and then type “Place sticker on background” and when the same setting appears in search results, click to open it.
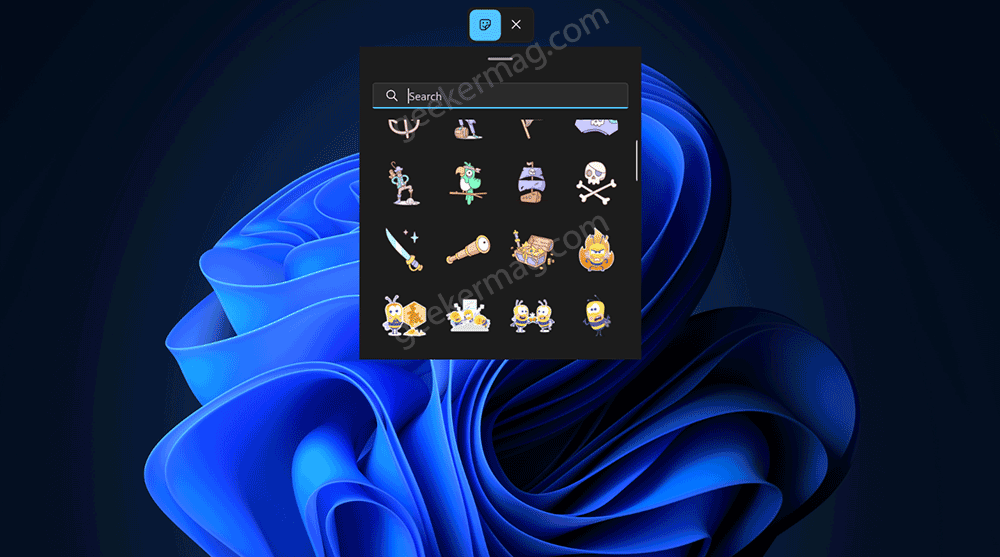
Instantly, Sticker editor tool will appear on the desktop featuring various stickers. Select a sticker of your choice.
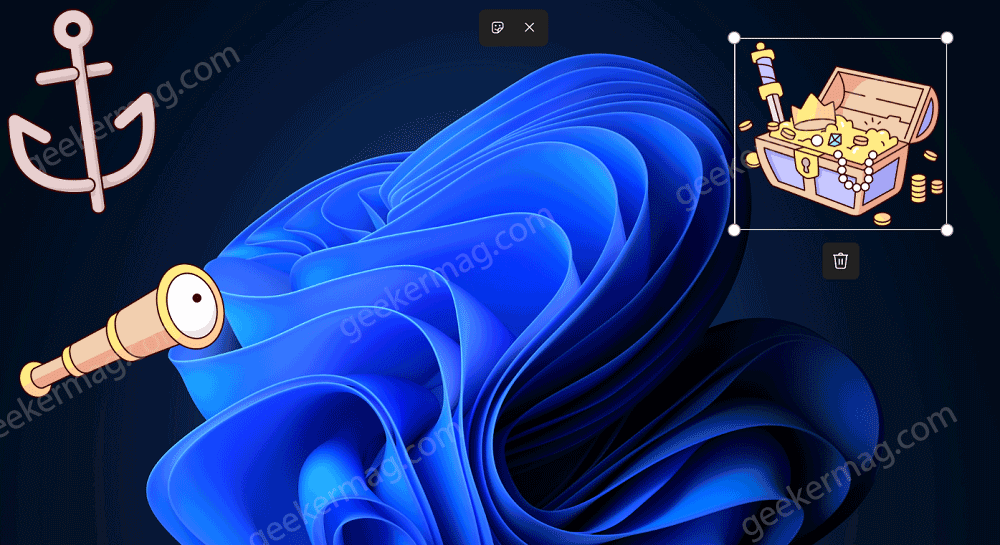
After that, you can resize sticker depending on requirement. Once done, make a click on the desktop and the sticker will be applied.
To quickly add or edit stickers, you can right-click on the desktop and select Add or edit sticker option from the menu.
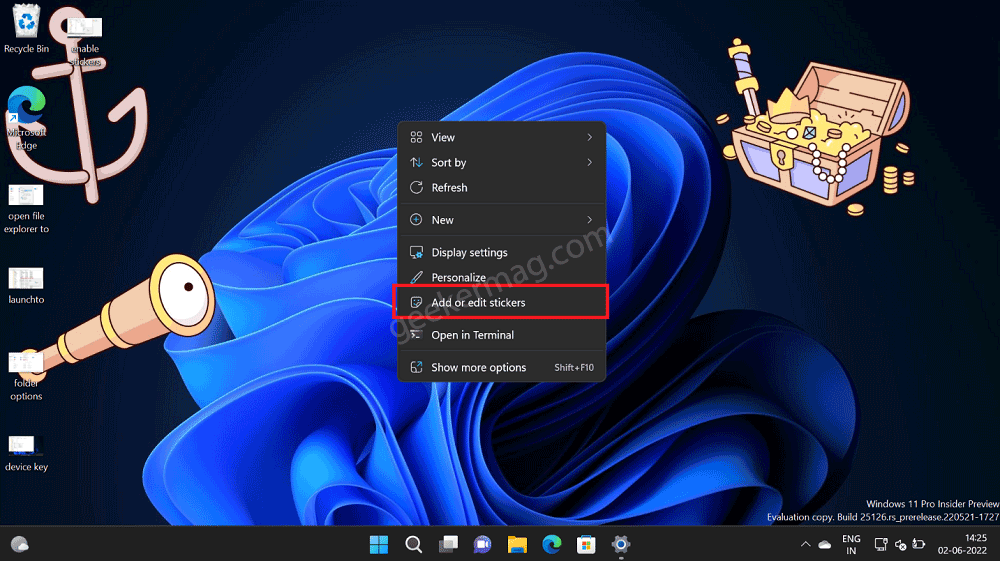
Now, this will activate the Desktop stickers editor, depending on your requirement you can either add a new sticker or resize the previous one or click on the delete option to delete it from the desktop.
As discussed above, the sticker will appear on the top of the desktop background which means even if you change the wallpaper, the sticker will still be there.
As of now, the Sticker tool feature is under development and there’s no information on when the Sticker tool will be available for all insiders. When we get more information about it, we will definitely update it in the post.
In the meantime, let us know what is your opinion Sticker tool added by Microsoft in Windows 11?


