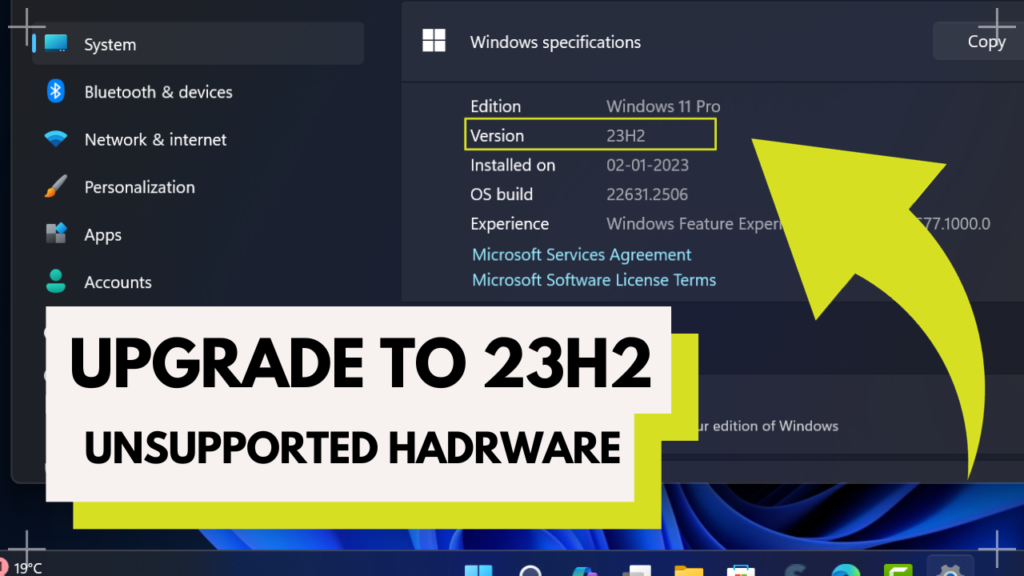
Microsoft has recently rolled out Windows 11 KB5027397 Cumulative update or you can say Windows 11 23H2 Update to all users with lots of new features.
Those users who own Windows 11 23H2 supported devices can head over to the Windows Update settings page and download and install it.
On the other hand, if users with unsupported devices try to check for updates, then Windows 11 KB5027397 won’t appear.
Also, if you try to update to Windows 11 23H2 on Unsupported devices, then it shows the message “This PC doesn’t currently meet Windows 11 system requirements“, which is normal.
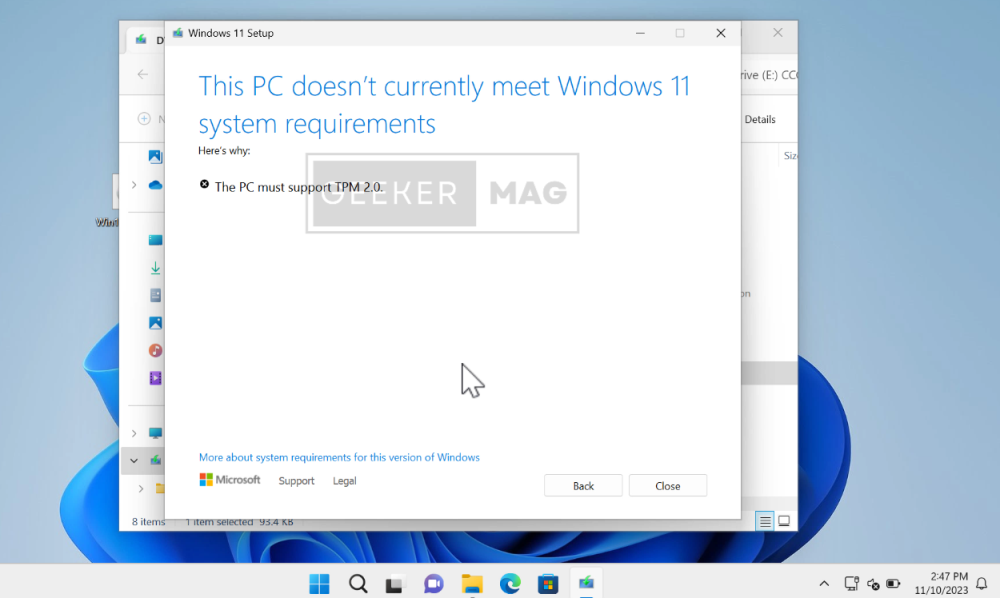
If you landed on this video, then you definitely want to update to Windows 11 23H2 on a PC with unsupported hardware, but unable to do that, as it won’t appear in Windows Update or seeing the message discussed recently.
Check this blog post, if you want to upgrade to Windows 11 23H2 from Windows 10 22H2
How to Upgrade to Windows 11 23H2 from 22H2 Unsupported Hardware
Below in this blog post, I will show you a quick hack using which you can easily upgrade your PC with unsupported hardware from Windows 11 22H2 to 23H2 using an ISO image that is downloaded from the Microsoft website.
So without further delay, let’s learn how to do that:
If you made upto this line, then I presume that you have already downloaded Windows 11 23H2 ISO image. If don’t, then follow the link to download it.
Double-click on the Windows 11 23H2 iso image to mount it. This will create another drive in File Explorer.
Next, open that drive and copy all the Windows OS files inside it.
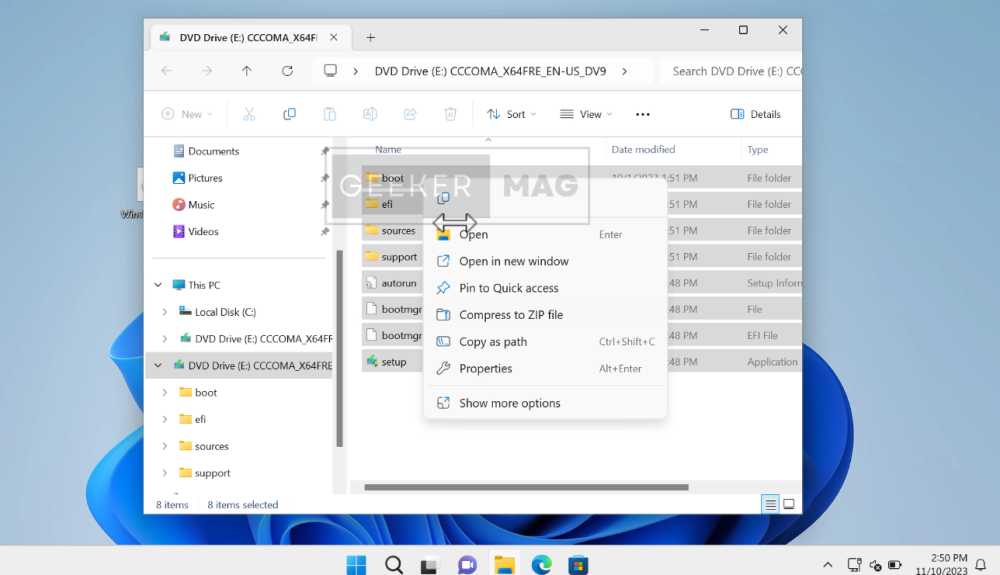
After that, head over to Windows Installation Drive which is C Drive usually, and open it.
Here, you need to create a new folder with the name win11 or windows11 or something similar depending on your preference. I suggest you make it short.
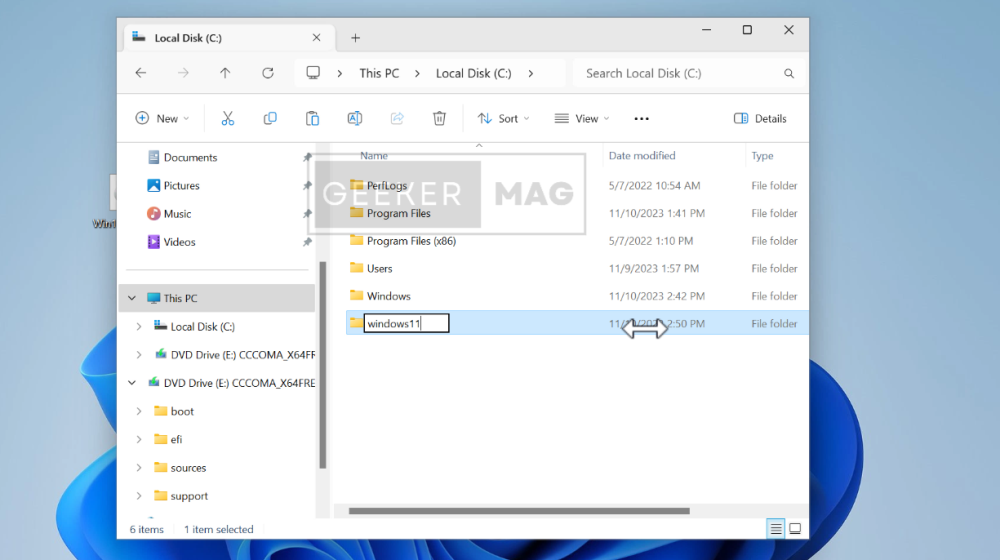
Open the folder that, you have created and paste all the Windows OS files that you copied in the earlier step.
Once all the files are copied into the folder, you need to open a command prompt with admin rights.
In the Command prompt window, you need to type this command: cd \ and hit enter.
Next, you need to type: cd windows11\sources and hit enter.
In the Above command, you need to replace windows11 with the name of the folder you have created.
Next, you need to type: setupprep.exe /product server and hit enter.
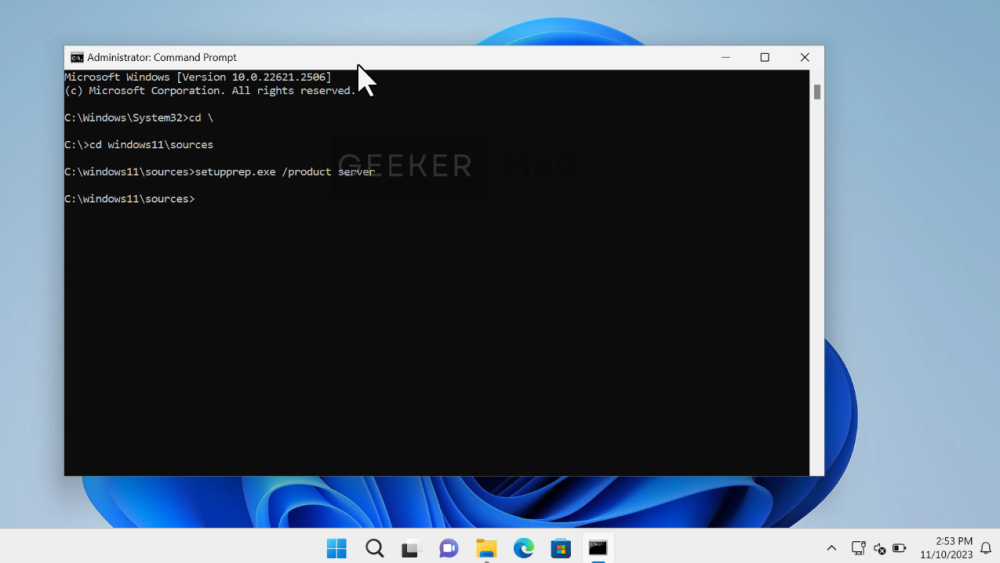
Wait for a few seconds and this will run the setup automatically and you will see this dialog box. It will show you that this will Install Windows Server, don’t worry ignore it.
The setup will automatically install the edition that is running already on the PC. For example, if your PC running Windows 11 Pro 22H2, then it will automatically upgrade to Windows 11 Pro 23H2, and the same for other editions.
Now, click on the link that reads “Change how setup downloads updates” and select the “Not Right Now” option. Selecting this will make the upgrade process shorter. After that, click on the Next button.
In the next screen, you will notice that the setup will bypass the PC minimum requirements screen and prepare the PC for upgrade.
After that, follow onscreen instructions and complete the upgrade process.
How to Upgrade to Windows 11 23H2 from 22H2 in Unsupported Hardware – YouTube video
This will start the installation and upgrade process to Windows 11 23H2. The process will take 30-40 minutes or maybe less or more depending on your system requirements.
This is how you can upgrade from Windows 11 22H2 to 23H3 on a PC with unsupported hardware. Why don’t you try this method? And if you have any queries, feel free to ask in the comments.


