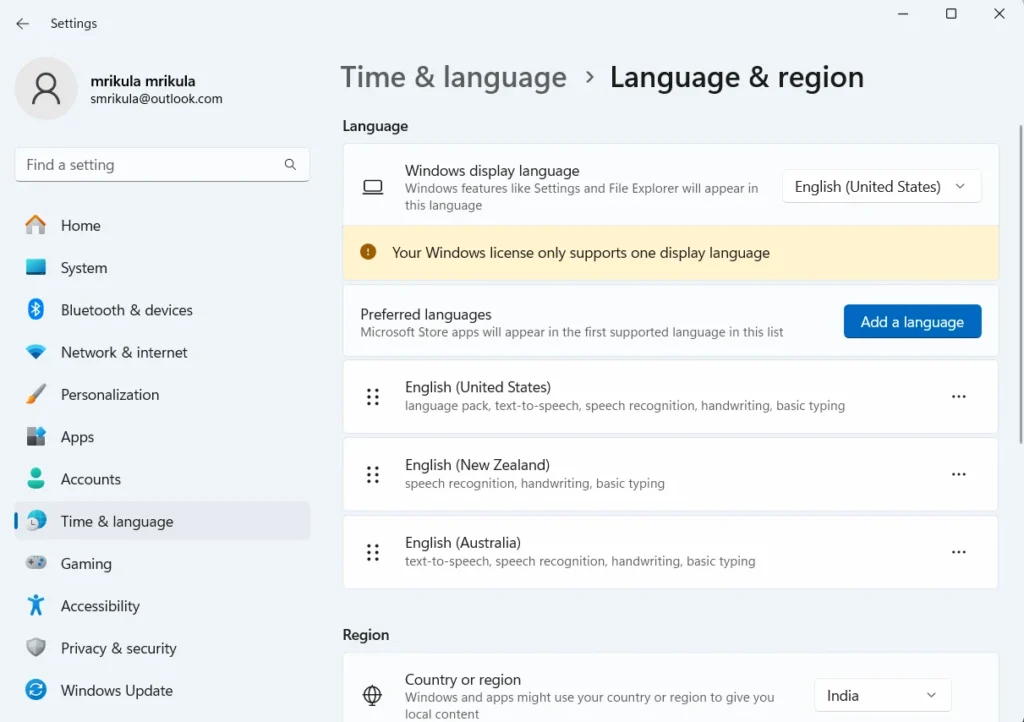
Sometimes when you trying to switch to Windows display language, it shows a message that say, “Your Windows License Only Supports One Display Language.”
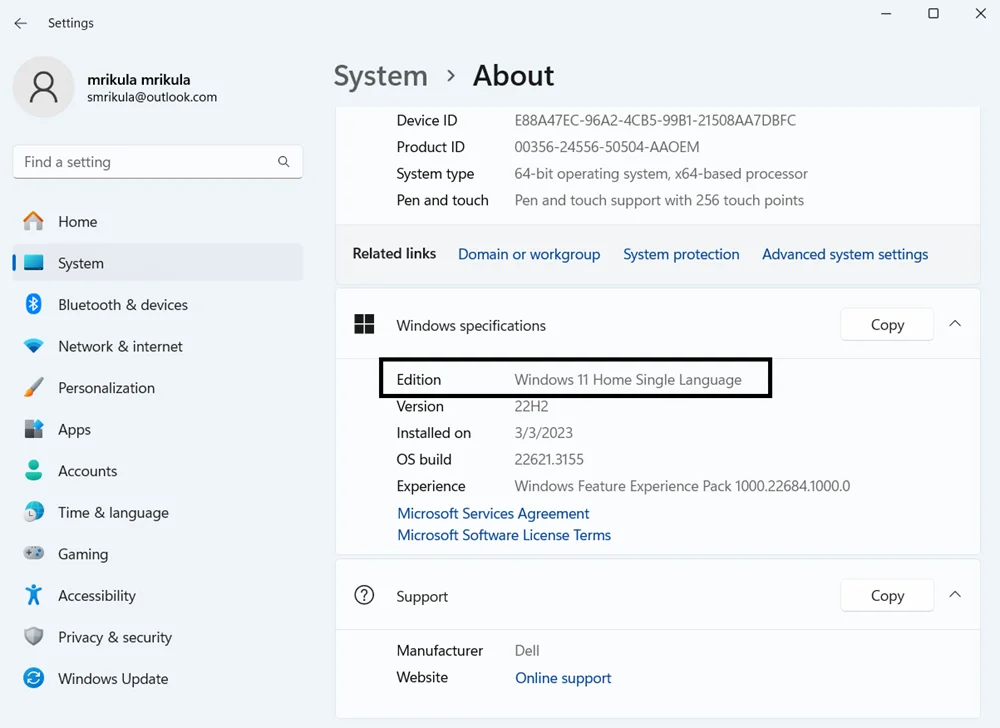
If you are getting an error message that says “Your Windows License Only Supports One Display Language” when you try to switch the display language on Windows. This indicates that your copy of Windows you’re running on your PC offers “single language license”.
The downside of this license is that it only allows you to use one language for your display or changing display language isn’t allowed with this license.
You can confirm this by going to Settings > System > Windows Specification > Edition. If its “Windows 11 Home Single Language“, then you’re using single language license.
If you want to switch the display language, then you have two options; Purchase the Windows 11 Home to Pro upgrade licence from Microsoft and perform clean installation of Windows 11 and during installation select preferred display language.
Fortunately, there’s a quick workaround using which you can change Windows display language without opting for two methods discussed above. So, without further delay, lets learn the trick:
Bypass “Windows License Only Supports One Display Language” Error
Right-click on the Start button and select Settings from the menu that opens.
In the Settings app, you switch to Time and language, and then click on the “Language and Region.”
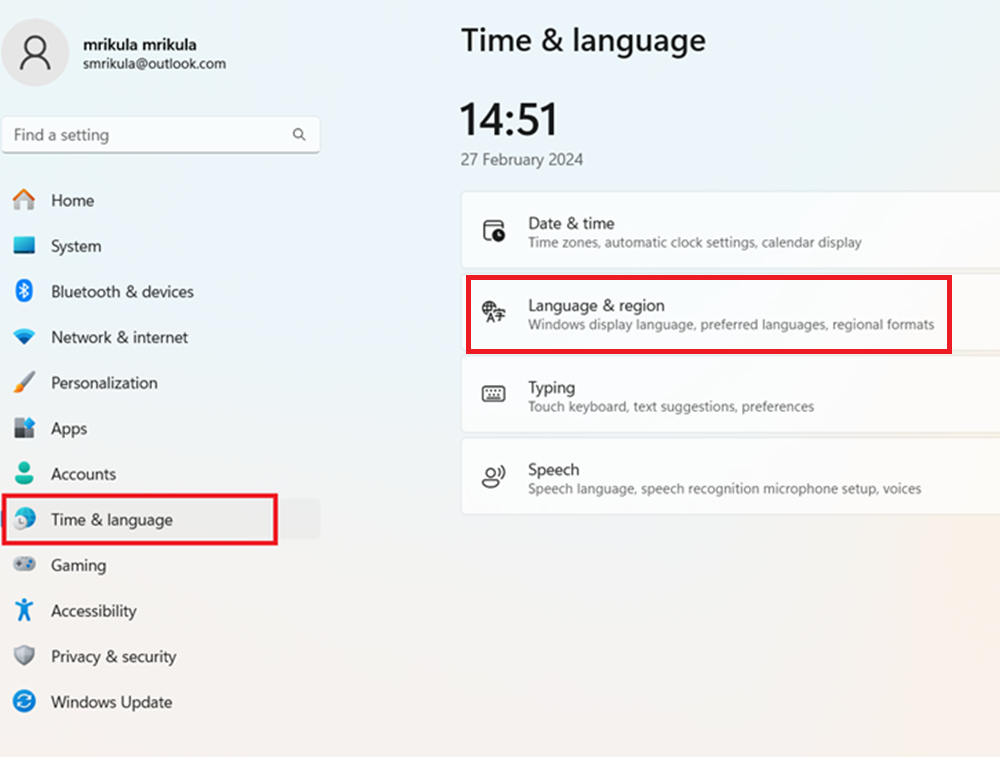
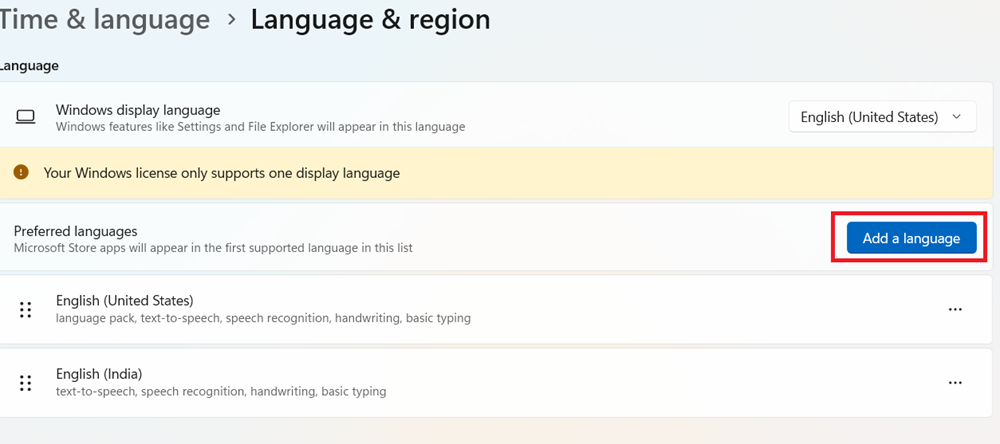
Under Language section, click on the “Add a language” button available next to “Preferred language.
From the Install language feature dialog, select your preferred language from the list, and click on the “Next.”

On the next screen, check the boxes for all optional language features, and click on “Install” to now wait till Windows installs the preferred language.
After that restart your computer to apply the changes.
Steps to Switch to preferred Language Via Registry Editor
After installing the preferred language pack, you need to make use of Registry editor to switch to the preferred display language.
Before that, you need to find the Language ID for Windows Display Language. For that, click on this link to visit the Microsoft Website. Press Ctrl + f simultaneously to open search box. Now type name of your desired language.
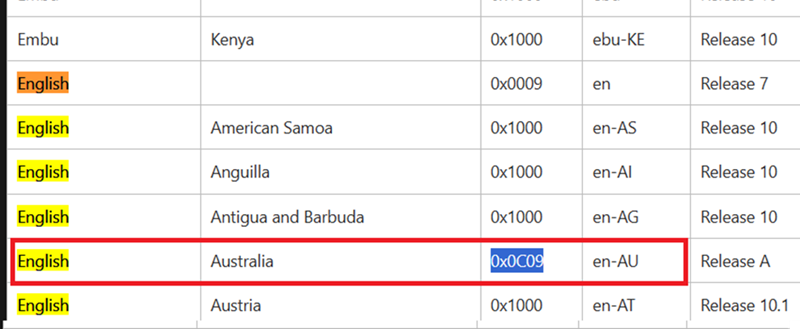
This will highlight the searched query. Simply, copy the last four digits of the Language ID.
Open Registry Editor on your PC. For that, click on the search icon and type Registry Editor, and when it appears in search results, click to open it.
When prompted, click on “Yes” in the UAC window.
In the Registry editor, you need to navigate to HKEY_LOCAL_MACHINE > SYSTEM > CurrentControlSet > Control > NIs > Language
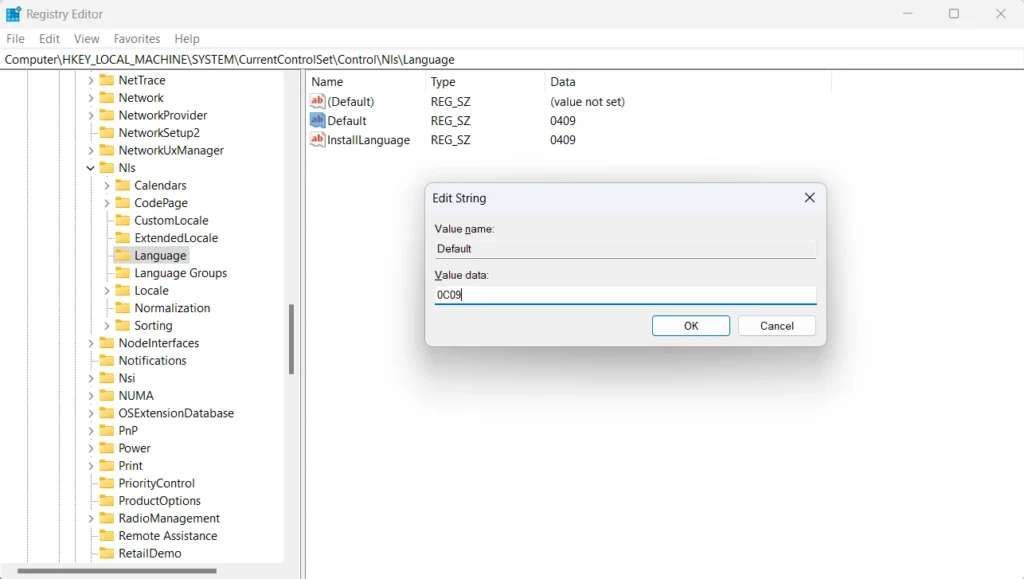
On the right side, double-click on the “Default” string, you will see a “Value Data” field on screen. Paste the last four digits of the Language ID you copied from Microsoft website. Click on “OK.” And close the Registry Editor. Restart your PC.
This process allows the user to change their preferred display language. In case you want to switch back to earlier language or another language, simply find the preferred language ID as discussed earlier steps and modify the values in Registry editor.
In case you encounter any sort of difficulty while applying this workaround or have specific query, feel free to ask via comments. We will love to answer your query.


