Windows 11 offer users a nifty feature Windows Subsystem for Linux (WSL) that allows users to run a Linux file system accompanied by Linux based GUI apps and command line tools within Windows. WLS is useful handy for developers who need both platforms.

In case, you’ve install Windows Subsystem for Linux on your Windows 11 PC and now want to remove it, then you can’t just uninstall it just like you uninstall other apps installed on your device.
It is possible that Windows Subsystem for Linux (WSL) is not working properly on Windows 11 or you want to reset WSL or there might be other reasons for doing this.
The process is complicated and to achieve this you have to follow different steps like removing the Linux distros, additional components, and then disable the platform to uninstall WSL on Windows 11.
How to Uninstall Windows Subsystem for Linux (WSL) on Windows 11
In this blog post, we’re going to share step by step instructions on how to uninstall Windows Subsystem for Linux on Windows 11. Let’s start with first step:
Step 1: Uninstall Linux distros
Open Windows 11 settings with Window + I and then go to Apps.
Click on Apps & features on the right sidebar.
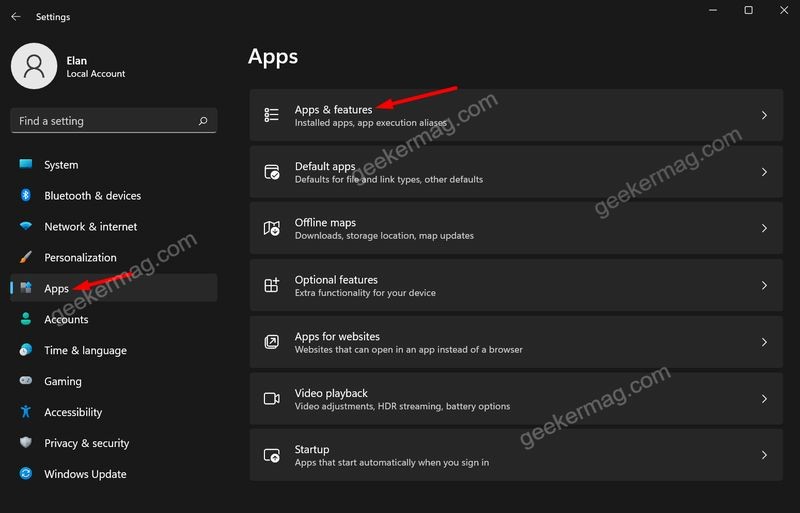
From the list of apps, you need to head over to Linux Distro, For example Ubuntu and other
Click on the three dot icon and choose Uninstall to remove Ubuntu distro. You can follow the same steps to remove other installed distros.

Step 2: Remove Linux Subsystem
Now you have to uninstall Windows subsystem apps. To do this, follow these steps:
Open Settings and then go Apps.
Click on Apps & features.

In the app list option, search for “linux”.
Click on the three dot icon and then click on Uninstall to remove Windows subsystem for linux update and WSLg Preview.
Step 3: Disable WSL
The last step is to disable Windows Subsystem for Linux feature on Windows 11.
Open Windows 11 settings and then go to Apps.
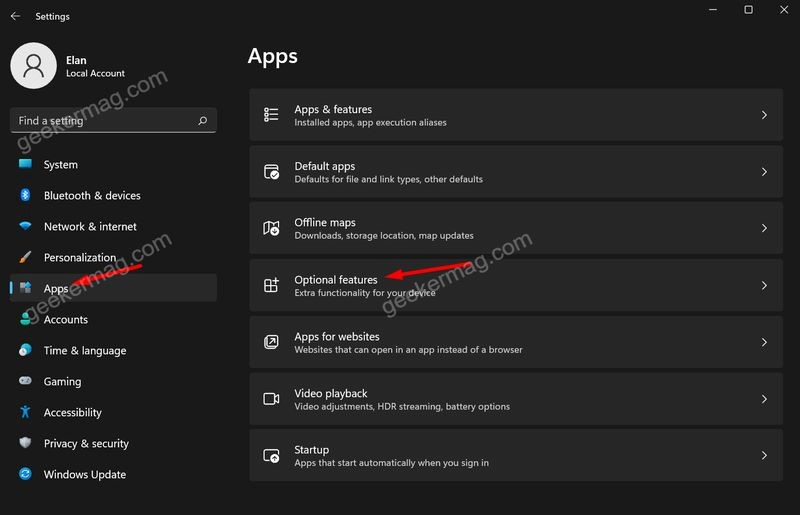
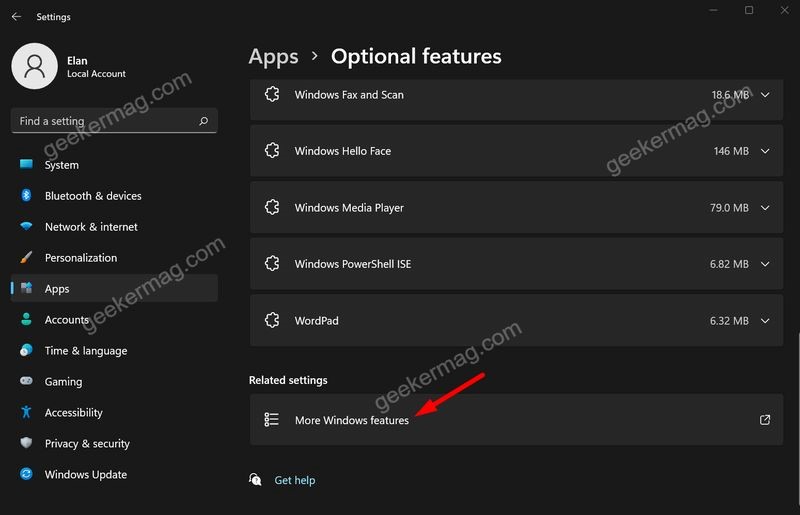
On the right side, scroll down and select Optional features.
In the Optional features, scroll down and find more Windows features. This will open Windows features.
Here you have to uncheck the option for Windows Subsystem for Linux. Wait for few seconds.
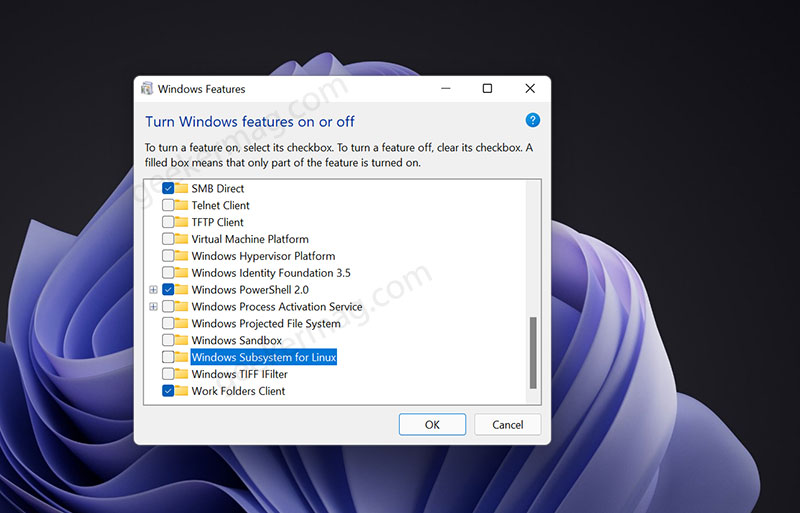
Once done, click on OK to save settings and restart your computer.
If you made up to this blog post, then it confirms that you have successfully removed Windows Subsystem for Linux from your Windows 11 PC.
Don’t worry, you can reinstall Windows Subsystem for Linux in Windows 11.


