Clippy, the beloved digital assistant from Microsoft Office, which was discontinued by the company a long time ago is making an unofficial comeback on Windows 11 as well as on Windows 10 with an exciting twist. Thanks to the efforts of FireCube Studios.
The developer has created its own version of Clippy that utilizes the OpenAI ChatGPT language model version 3.5. However, in order to make the app fully functional, users are required to purchase an OpenAI API key to connect it with ChatGPT.
It’s worth noting that the developer mentions the development of another version that is currently in progress, which won’t require an OpenAI API key.
Once you install and connect Clippy to ChatGPT, you can ask a wide range of questions using natural language, and the AI assistant will provide responses similar to asking a question on Bing Chat or Google Bard. You can inquire about various topics or seek guidance on performing tasks in Windows 11 & Windows 10.
The AI assistant will provide step-by-step instructions. It works similarly to Windows Copilot assistance for Windows 11. However, it’s important to note that this version of Clippy does not have the capability to execute commands or modify system settings on your behalf.
How to Get or Install Clippy with ChatGPT on Windows 11/10
In this tutorial, we will guide you through the simple steps to get Clippy AI up and running on your Windows 11 PC. Don’t worry, even if you’re not a tech-savvy user, we’ve got you covered!
Step 1: Obtaining an OpenAI API Key for Clippy
To begin, you’ll need an API key from OpenAI to enable the smart replies feature of Clippy AI. Follow these steps:
Visit the OpenAI website and sign into your account. If you don’t have an account, you can create one for free.
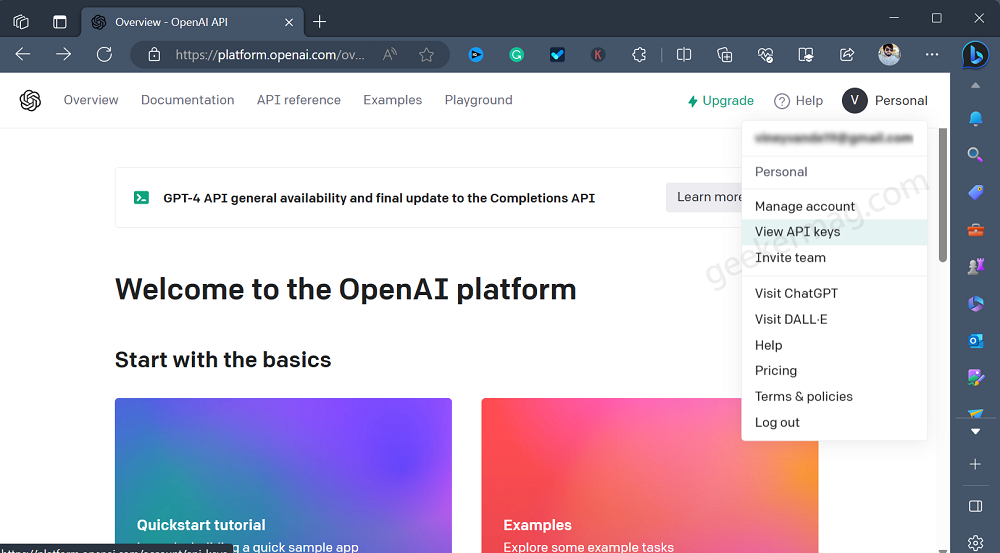
Once logged in, click on your Profile in the top-right corner and select “View API keys.”

Click the “Create new secret key” button, and give your secret key a name, then click Create Secret key to generate a new API key.

Copy the API key and keep it safe. We recommend pasting it into a Notepad file for future reference.
Step 2: Download and Install Clippy from Microsoft Store
Now that you have your API key ready, let’s proceed with installing Clippy:
Open the Microsoft Store on your Windows 11 PC.
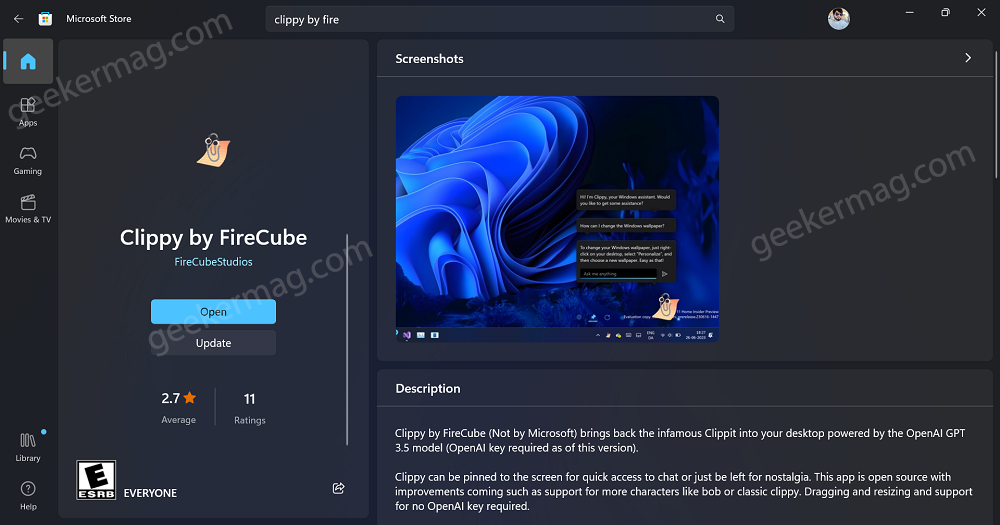
Search for “Clippy by FireCube” (Free) and click on the app to access its store page. Use the direct link to download the app.
Click the “Install” button to begin the installation process.
Step 3: Configure or Connect Clippy with ChatGPT
With Clippy installed, it’s time to configure it with your API key:
Launch the Clippy app on your Windows 11 PC. You’ll see Clippy appear in the bottom-right corner of your screen.

Open the System Tray (located on the right side of the taskbar) and click on Clippy’s icon. The app settings page will open.
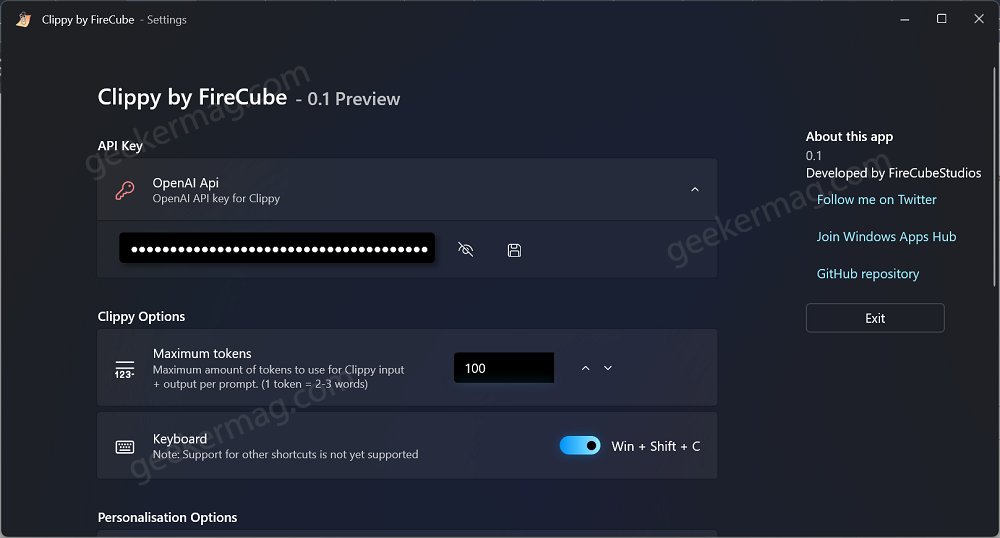
Paste the API key you obtained earlier in the “OpenAI API” section.
Click the “Save” button to store the API key.
Close the settings window, and you’re ready to start using Clippy AI!
Step 4: How to Use Clippy AI on Windows 11 and Windows 10
Now that Clippy AI is configured, let’s see how you can chat with it and get answers to your questions:
Click on the Clippy icon in the bottom-right corner of the screen to activate the chat interface.
A text box will appear where you can enter your questions or queries. Please type your question and press Enter to submit it.
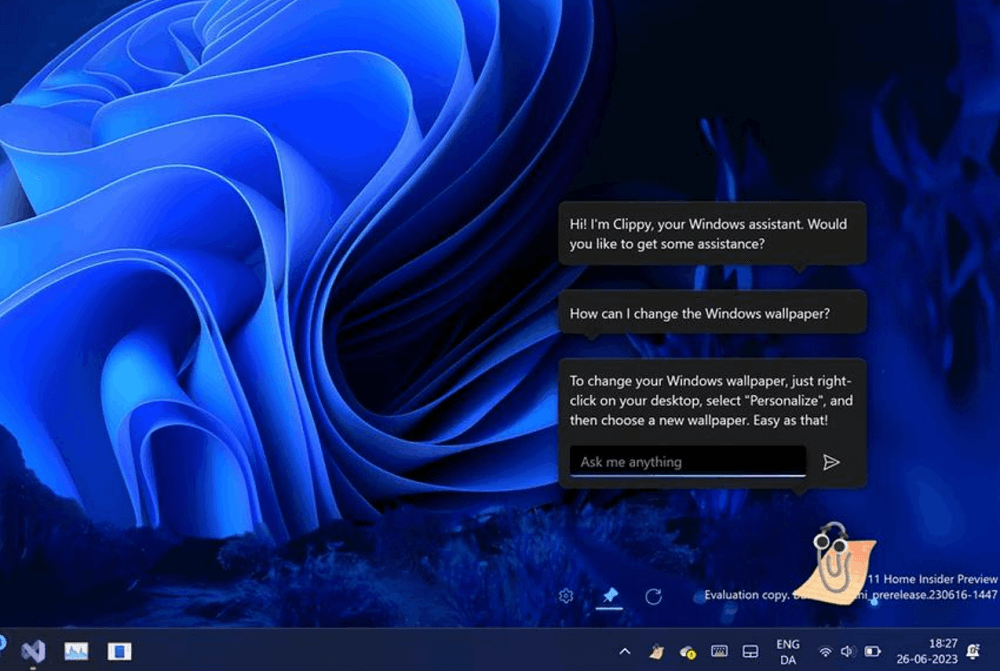
Clippy AI will process your question using the powerful ChatGPT model and provide you with a helpful response.
If you encounter any errors, you can click the “Reload” button to refresh the app.
Step 5: Clippy Quick Activation Shortcut
For your convenience, you can use a quick shortcut to activate Clippy AI:
Press “Windows + Shift + C” on your keyboard, and Clippy will instantly appear, ready to assist you.
Enjoy your interactions with Clippy AI, and let the helpful assistant enhance your Windows 11 experience!


