The gaming industry is consistently evolving with high-level graphics and is now providing a much more realistic experience to game lovers.
So, it’s essential for gamers as well to stay up-to-date with their graphics for smooth gaming performance and compatibility.
If you’re a gamer who is using the NVIDIA Control Panel, then it’s time to update your NVIDIA settings for a high-level gaming experience.
Today, we will break down some of the best NVIDIA control panel settings that you must try to maximize your visual graphics and better gaming performance in your system. Let’s explore!
Best NVIDIA Control Panel Settings for High-Level Gaming Performance (2023)
Here’s the list of some of the best NVIDIA control panel settings you should set in your system to get the best gaming experience:
1. 3D Settings
The very first thing you need to change in order to enhance your gaming experience is to change the image settings. Here’s how you can change it:
Right-click on the desktop and select “NVIDIA Control Panel“.
Once it opens, navigate to ‘Adjust image settings with preview‘ under the ‘Manage 3D Settings’ at the left-sidebar.
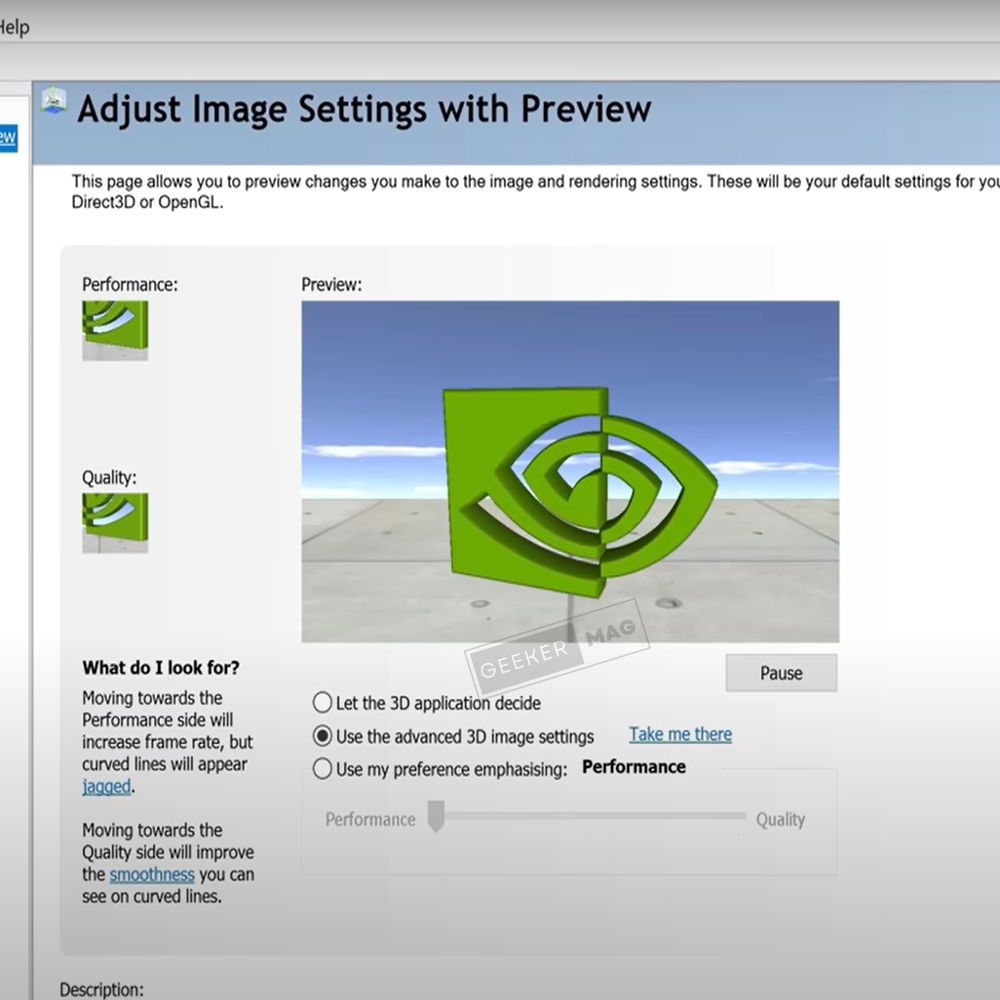
Now, choose the middle option, ‘Use the advanced 3D Image Settings,’ and click on Apply to save the changes.
This setting helps you enhance your visual gaming experience.
2. Image Sharpening
With this setting, you can enhance your game visibility and make it look sharper and clearer. It gives the feeling of a YouTuber playing at top resolution. Follow the step-by-step process to make changes in the setting:
Open ‘NVIDIA Control Panel’ and go to ‘Manage 3D Settings‘.
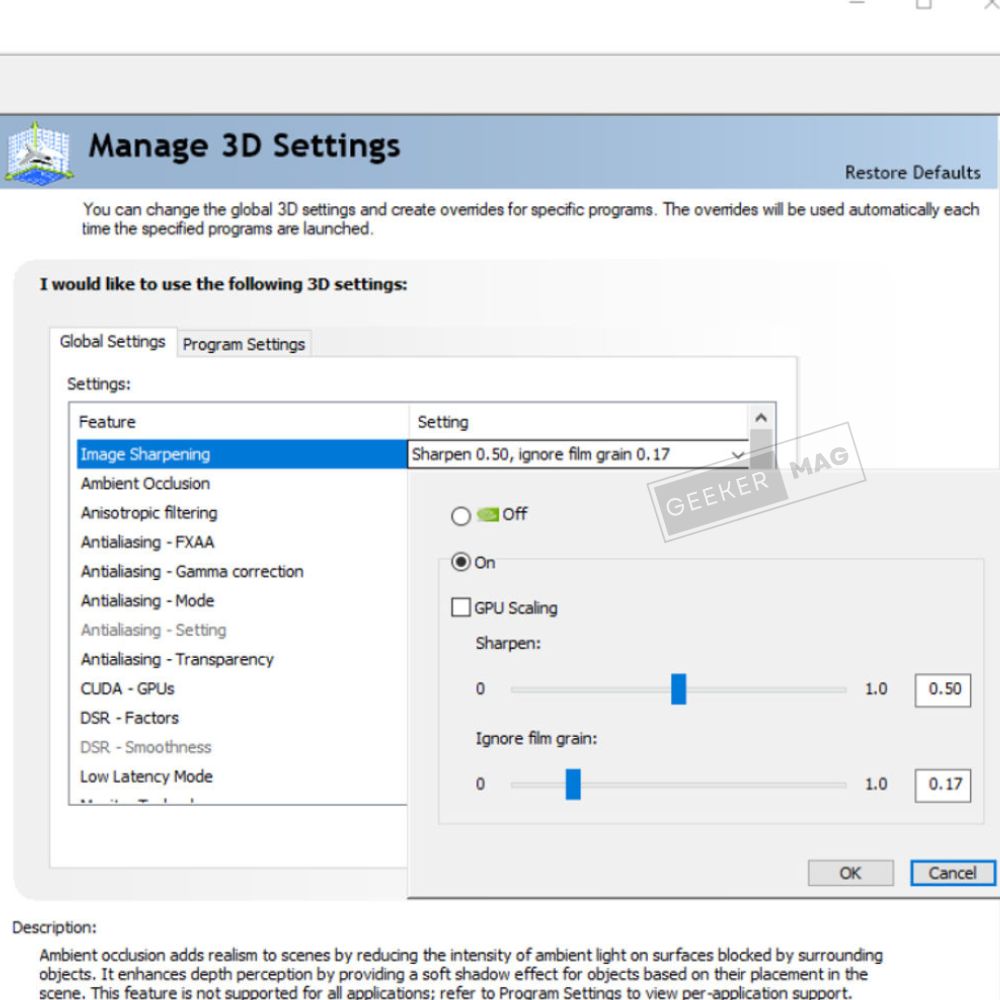
Click on ‘Image Sharpening‘ right-side and turn it on.
Set the ‘Sharpen’ to 0.50 and the ‘Film grain’ to 0.17.
Now, click OK to make the changes.
3. Background Application Max Frame Rate
You can set the maximum frame rate that the game will run in the background when the Alt-tab is out. It helps you quickly switch to another tab if required, and it will limit the frame rate. Here’s the way to enable or disable it:
Open the NVIDIA Control Panel and navigate to ‘Manage 3D Settings‘.
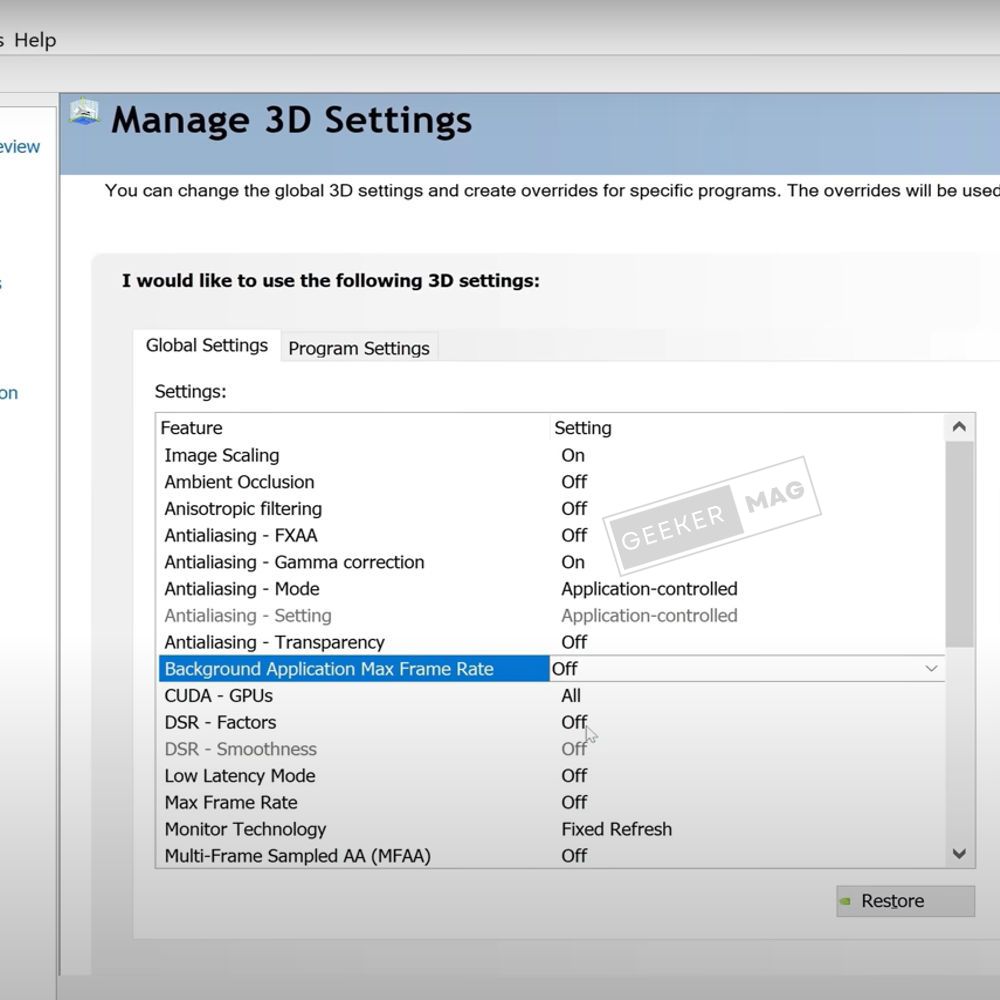
Navigate to ‘Background Application Max Frame Rate‘ and turn it on to 30 FPS.
Click OK to apply the changes.
4. Dynamic Super Resolution (DSR)
DSR helps to improve the game resolution and enhance the visual quality by rendering images. So, you can run high-resolution games on a low-resolution display by enabling DSR. Here’s how you can do it:
Go to NVIDIA Control Panel > Manage 3D Settings.
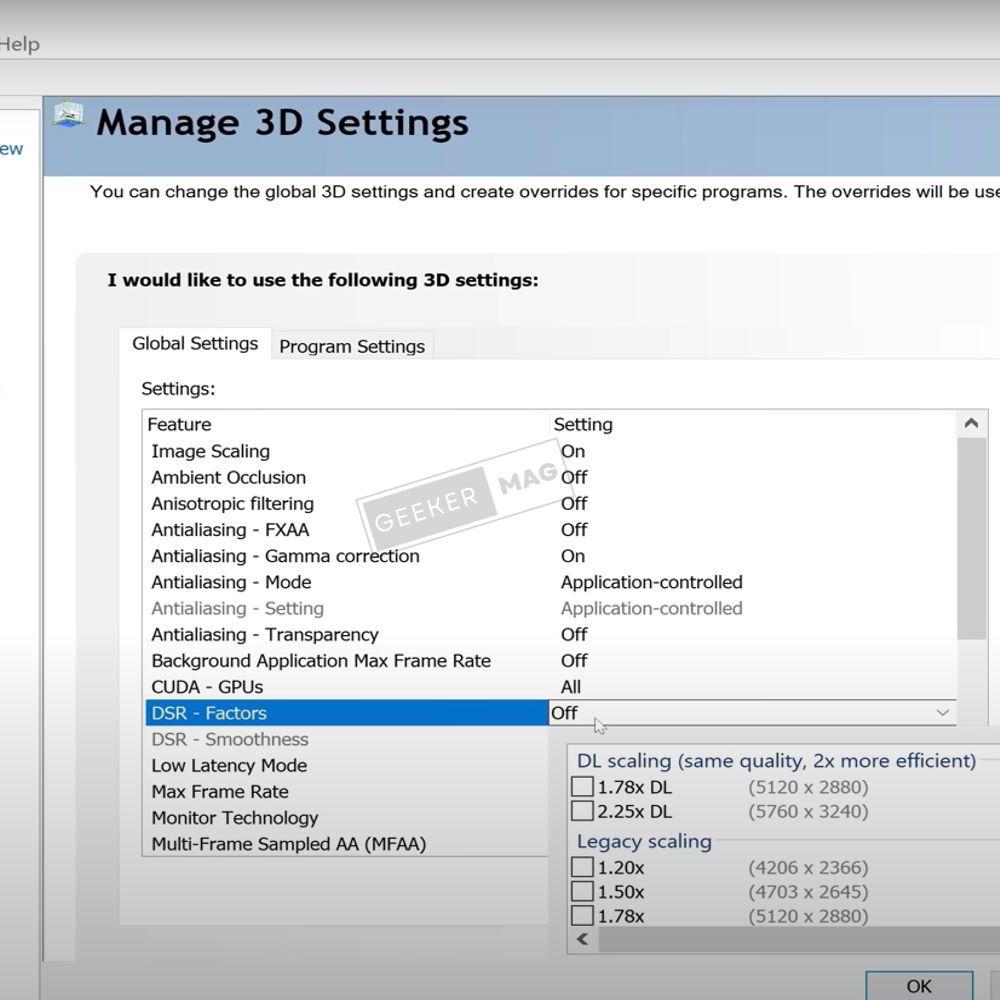
Navigate to ‘DSR – Factors‘ to select all resolutions and ‘DSR – Smoothness‘ to 33%.
Click on Apply to make the changes.
5. Ambient Occlusion
Ambient Occlusion can enhance your game’s graphics and add more realistic shadows to your game. Follow the given steps to enable this setting:
Navigate to Manage 3D Settings in the NVIDIA Control Panel.

Scroll down to ‘Ambient Occlusion‘ and turn it On/Off based on the game.
Then, click on Apply to save the settings.
Note: Keep it turned off for newer games, but you can try for old games.
6. Max Frame Rate
Different games run on different FPS, and you can use it to limit or maximize the Max Frame Rate. However, you should turn off this setting because most of the games have built-in max frame rates. Here’s how:
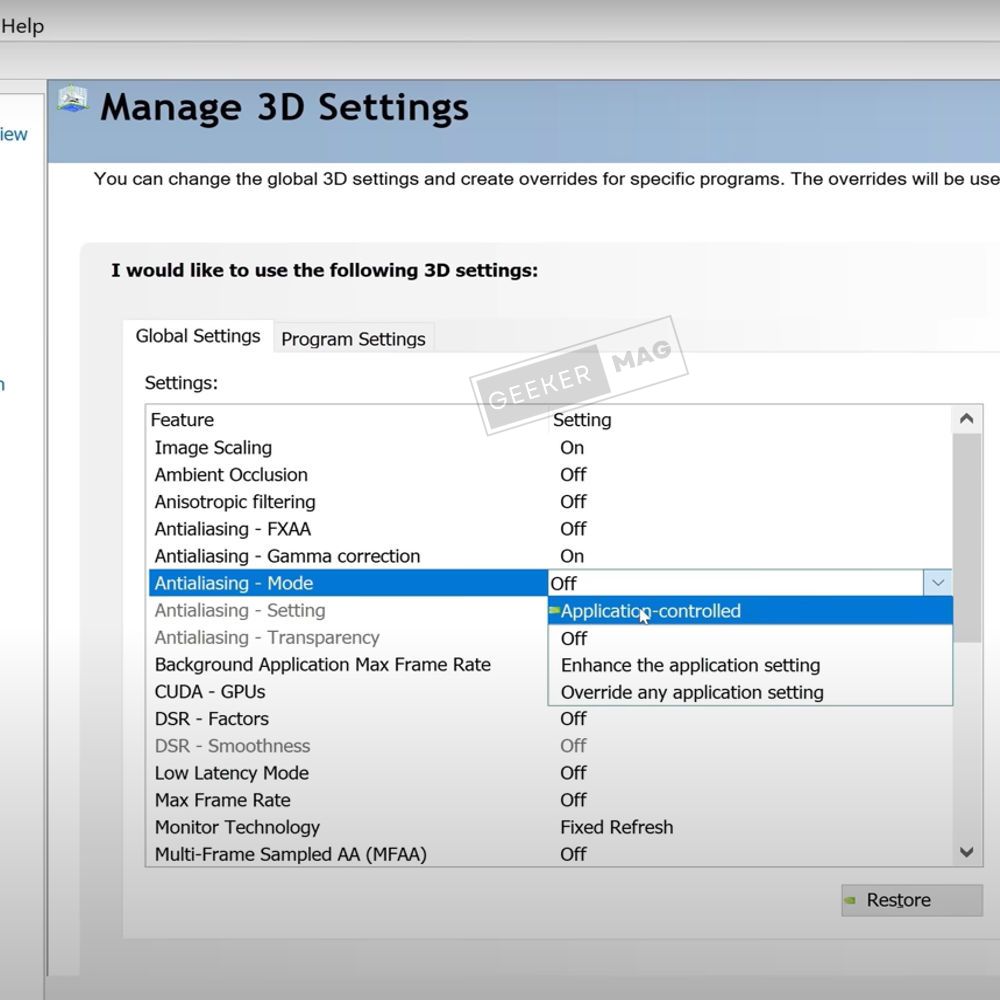
Open NVIDIA Control Panel > Manage 3D Settings.
Scroll down to ‘Max Frame Rate‘ and turn it On.
Apply the changes in the NVIDIA Control Panel Settings.
7. Power Management
Power Management Mode settings can improve your gaming performance. Here’s the way to enable it:
Open NVIDIA Control Panel > Manage 3D Settings.
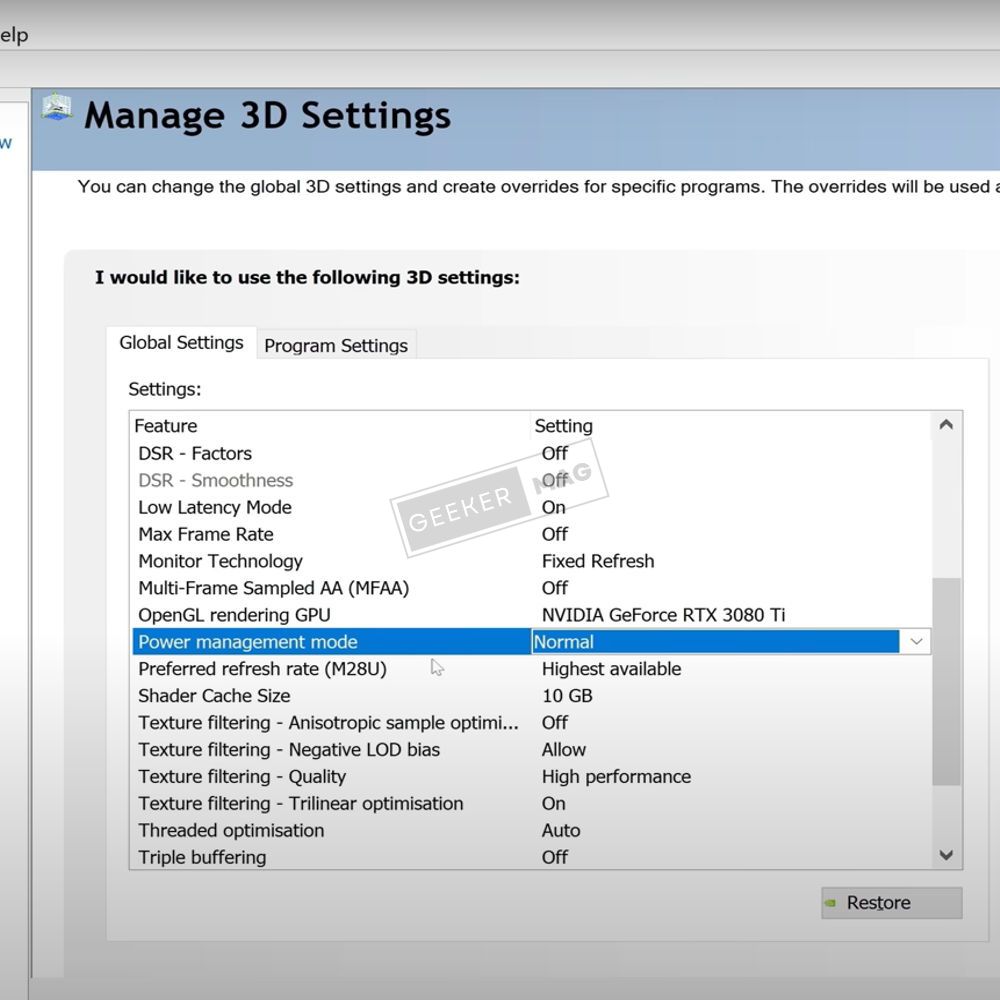
Scroll down to ‘Power Management‘ and set it as ‘Prefer Maximum Performance.’
Then Click on Apply.
8. Disk Space
Usually, the Disk Space set for gaming is defaulted on the C drive, and that causes it to be out of space sometimes. So, if you’re a regular gamer, then you may need to increase the disk size. Here are the NVIDIA settings you may need to change:
Navigate to Manage 3D Settings in the NVIDIA Control Panel.
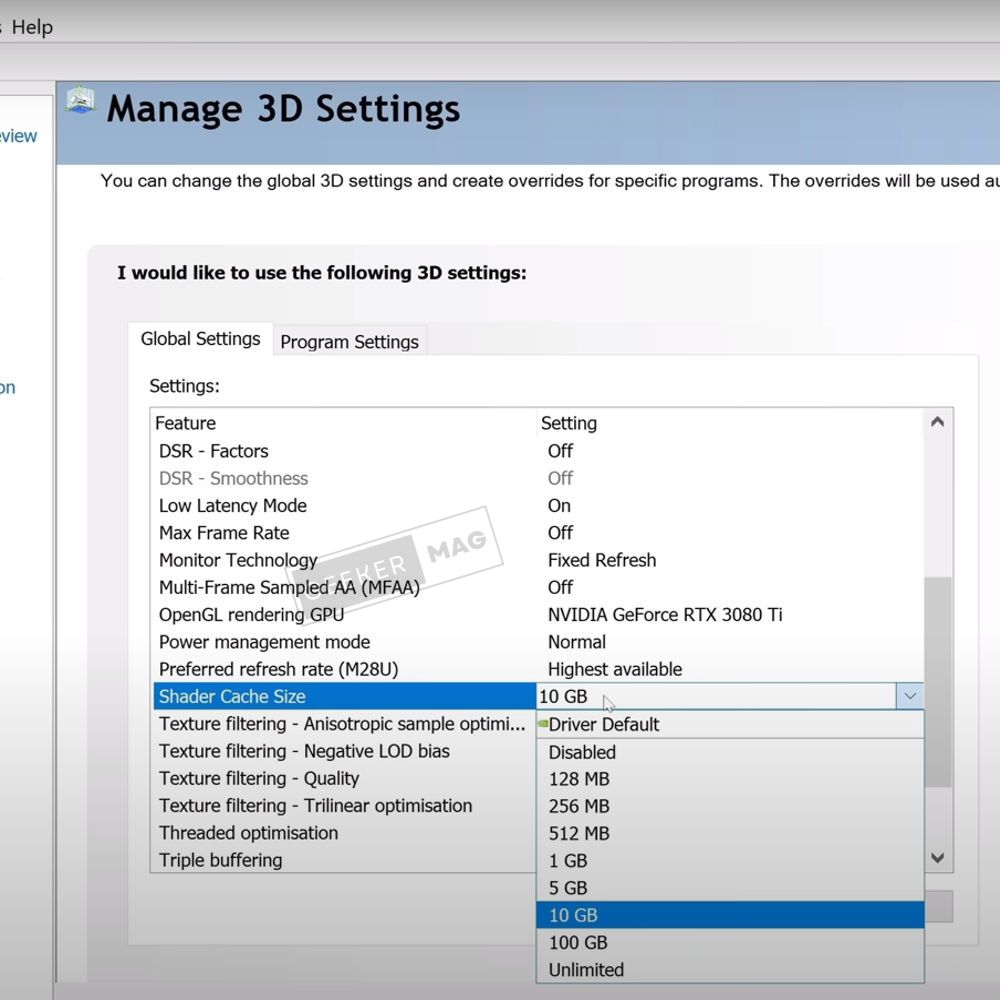
Scroll down to ‘Shader Cache Size’ and set the size to 5GB for smooth performance.
Once it’s done, click on Apply to save the changes.
9. Texture Filtering – Quality
Texture filtering gives a high-end quality, reduces the blurring or low visibility in games, and enhances gaming performance. It’s an important setting that you need to set. Follow the given steps below:
Navigate to Manage 3D Settings.
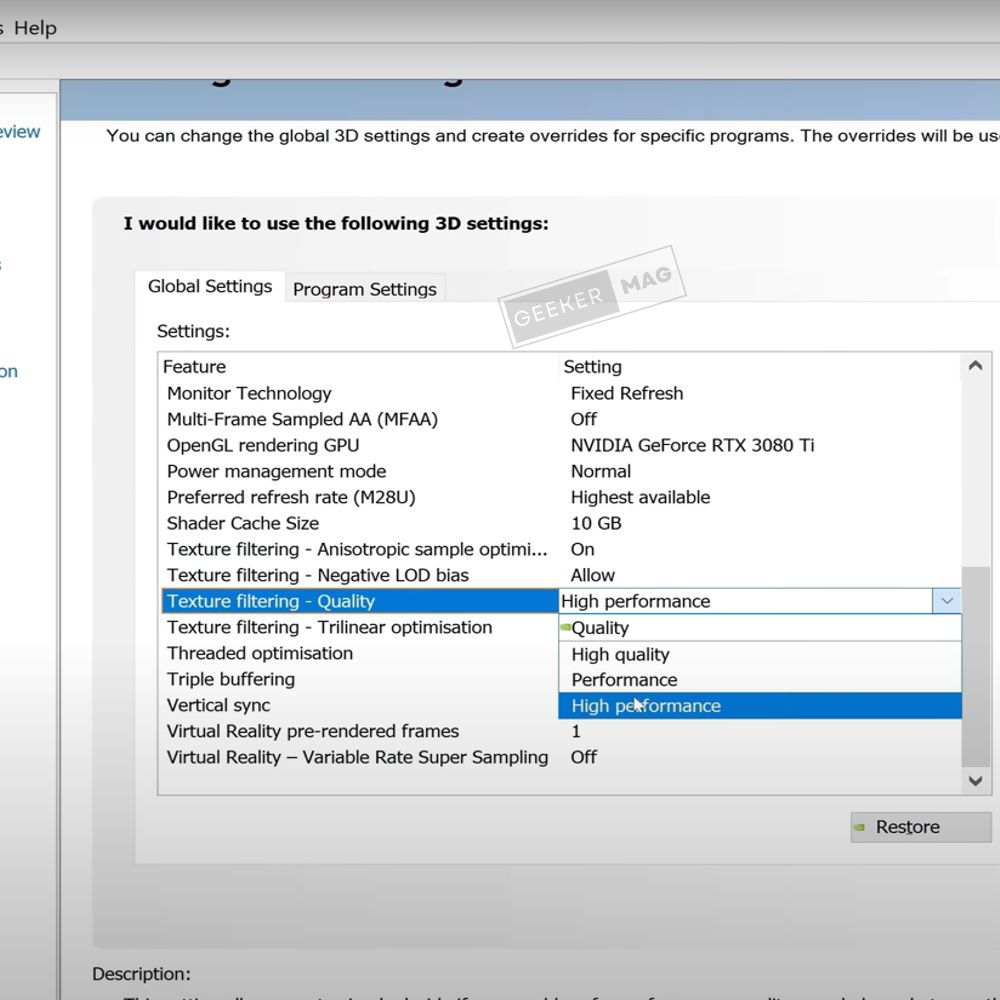
Scroll down to ‘Texture Filtering – Quality‘ and set it to ‘High Performance.’
Click on Apply to make changes.
10. Performance Thread Optimization
Thread Optimization allows your system to use multiple CPUs to enhance the gaming performance. Here’s the step-by-step process to enable it:

Open ‘NVIDIA Control Panel‘ and navigate to ‘Manage 3D Settings‘.
Scroll down to ‘Thread Optimization‘ and set to Auto.
Apply the changes in the NVIDIA control panel.
Wrapping Up!
So these are some amazing NVIDIA Control Panel Settings that you can change and enhance your gaming experience and performance in your same system. Now it’s your turn to follow the given methods, implement steps, and make changes in settings.


