It is essential to have the right display settings on Windows 10 machines as it helps in better display of the content and the clarity of photos. Higher is the resolution of the system, sharper is the content and pictures.

Changing display settings or screen resolution in Windows 10 is super easy, it is possible that not all users know how to do that. The blog post will step by step instructions to assist you.
With default settings, the system has its default screen resolution, the best for your system. You can also alter those settings according to your needs. In Windows 10, the company has changed the name of screen resolution settings to Display settings.
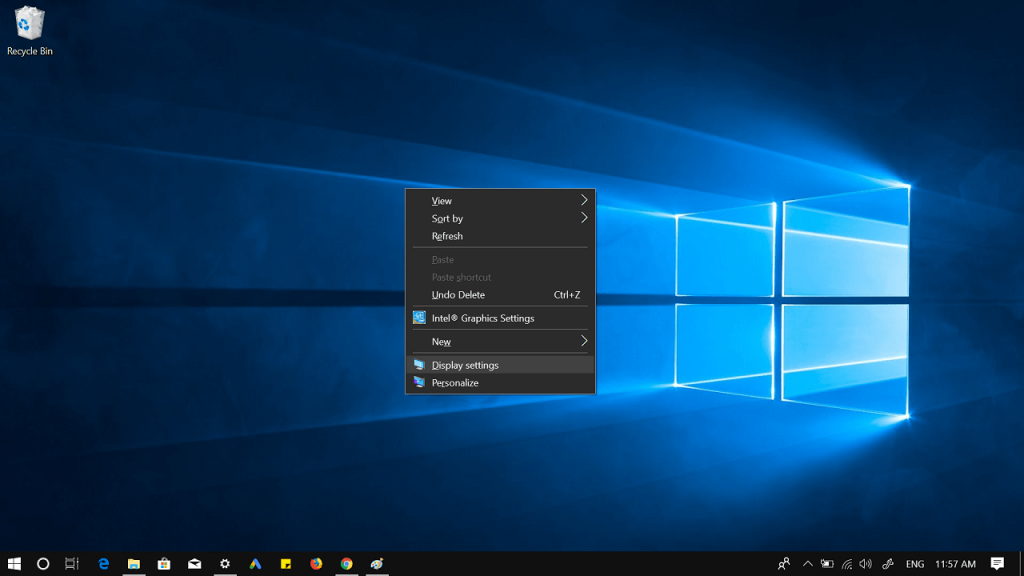
You can check this by make right click on the desktop. The contact menu will show you the same name.
How to Change Windows 10 Display Settings
Unlike earlier versions of Windows OS, the Windows 10 has separate Display settings page. Here you will find the option to manage display resolution, text size and scaling, and other settings for multiple displays.
In case, you don’t know how to manage screen resolution in Windows 10, then here is what you need to do:
1. Launch Settings app in Windows 10. For that, press the WIN + I keys.
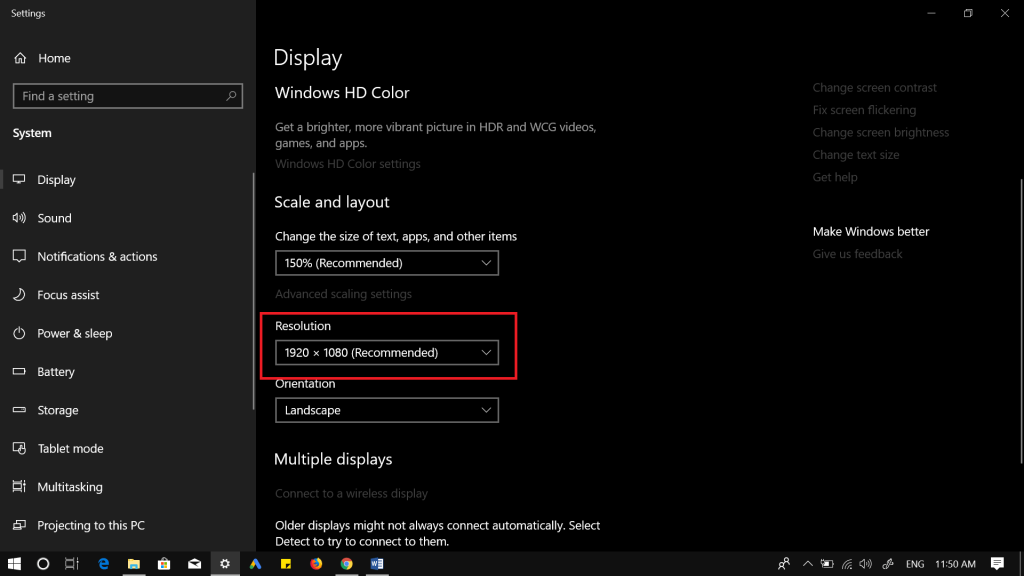
2. Click on System -> Display.
Alternatively, right click on the desktop and select Display settings from the desktop context menu. Doing this will take you to the same page.
Or
Launch Run dialog box and type “ms-settings:display” and hit enter.
3. Next, on the right panel, head over to Resolution section, you will find it under “Scale and layout.”

When you click on the Resolution drop-down, you will see all the possible screen resolution available for your screen.
Here, select the one that fits your requirements.
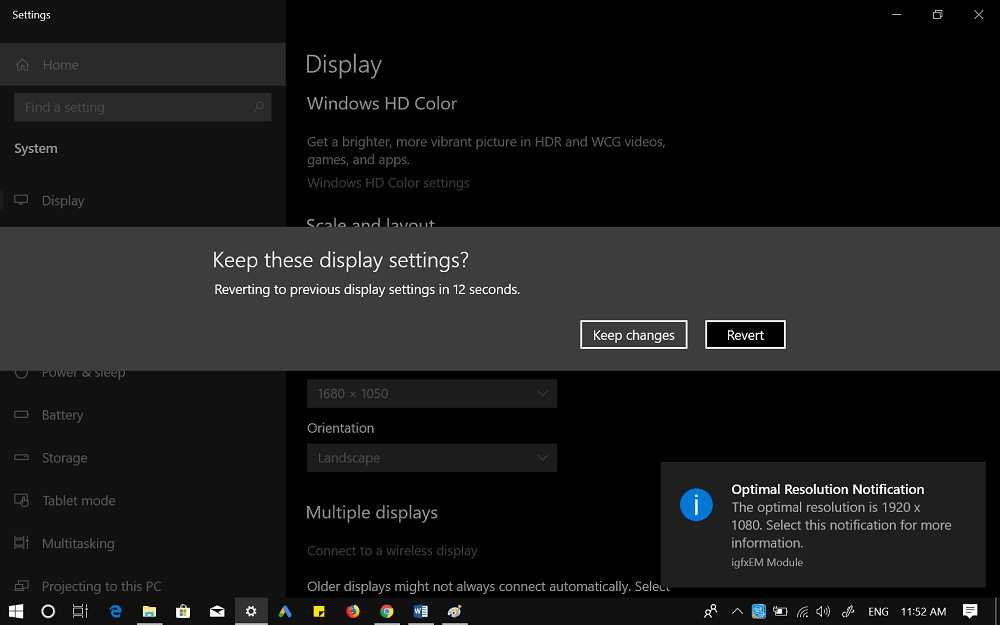
4. Once you select the resolution, other than recommended or default resolution. A pop-over will appear which gives you 15 seconds to confirm the changes.
To set the selected resolution press the Keep changes button, else Revert.

That’s it!
This is how you can change screen resolution in Windows 10. But display settings also has other settings which you can use to manage display settings in Windows 10.
- Change Brightness – Increase or decrease the brightness of the system.
- Night Light – Remember the Flu.x software? This setting offers the same functionality.
- Windows HD Color – This will help in getting more vibrant and brighter pictures in HDR and WCG videos, apps, and games.
- Change Size – This will help in changing the size of text, apps, and other things. You can also click on the Advance scaling settings.
- Orientation – Quickly change the orientation of the desktop screen. Portrait to Landscape or vice-versa.
- Multiple displays – It will help you in connecting multiple displays
Apart from that, you will also find Advanced display settings and Graphic settings which you can manage for a better experience.
In Windows 10 it is easier to manage the screen resolution, isn’t it? Apart from that, it offers various display settings which make it easier to manage the display screen.
What are your thoughts about Windows 10 display settings? Find this blog post useful? Share your thoughts in the comments.


