Seeing “DNS_PROBE_FINISHED_NXDOMAIN in Chrome browser? You’re not all, lots of users faced or facing it already. Let’s learn how to fix the issue.
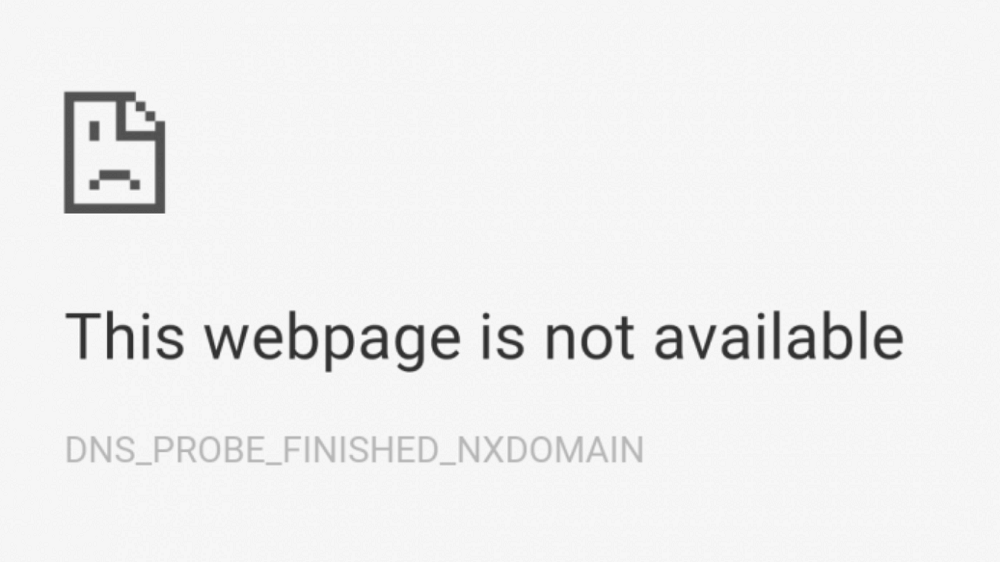
Chrome is full of annoying errors and one of the common errors which users are reporting about when they trying to reach a webpage is “This site can’t be reached” or “This webpage is not available” followed by error code: DNS_PROBE_FINISHED_NXDOMAIN.
You might be interested in reading the post on Error Code: STATUS_INVALID_IMAGE_HASH Chrome and Error Code: ‘STATUS_ACCESS_VIOLATION’ Chrome.
Fix – Chrome DNS_PROBE_FINISHED_NXDOMAIN Error
If you made up so far, then chances are you also suffering from same error message. To help you out, we decided to cover some of the possible solution to get rid from this error.
Release and Renew IP Address
Launch Elevated command prompt and execute following commands back to back:
ipconfig /release
Doing this will release your current IP address
ipconfig /flushdns
Doing this will release your flush your local DNS cache
ipconfig /renew
Doing this will renew your IP address.
Apart from this, you can also reset your IP settings and Winsock catalog using following commands:
netsh int ip set dns
netsh winsock reset
Alternatively, you can also disable and re-enable network adapter to flush and renew DNS.
Change DNS Servers
With default your ISP automatically assign DNS, but if you’re facing the same issue, then you can switch to public DNS server like Cloudflare and Google.
- Cloudflare public DNS – 1.1.1.1 and 1.0.0.1
- Google’s public DNS 8.8.8.8 and 8.8.4.4
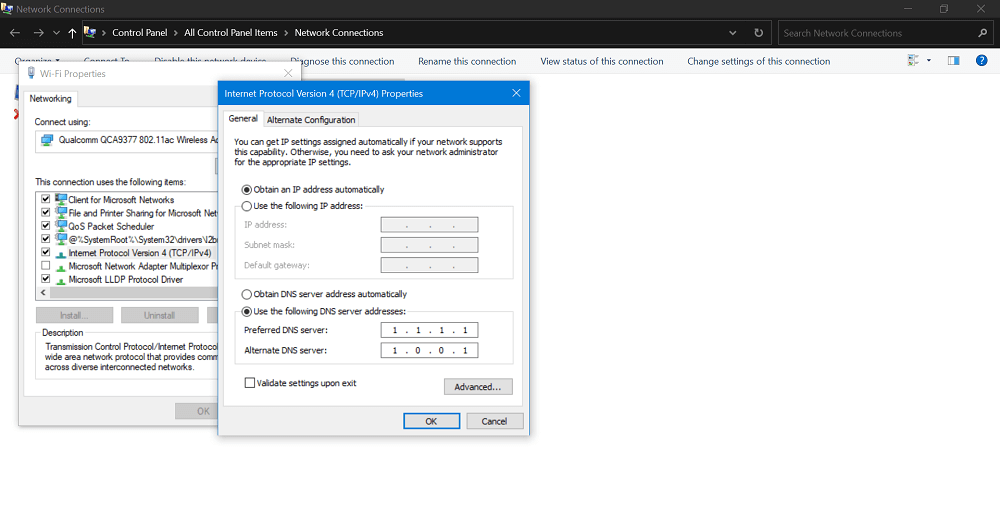
You can check our previous blog post on How to Set Cloudflare DNS in Windows 10. Users can follow same steps to set Google DNS.
3. Reset Chrome flags
Sometimes enabling experimental feature in Chrome browser lead users to this error message. In this situation, it’s good to reset Chrome flags to check if this fixes the issue.
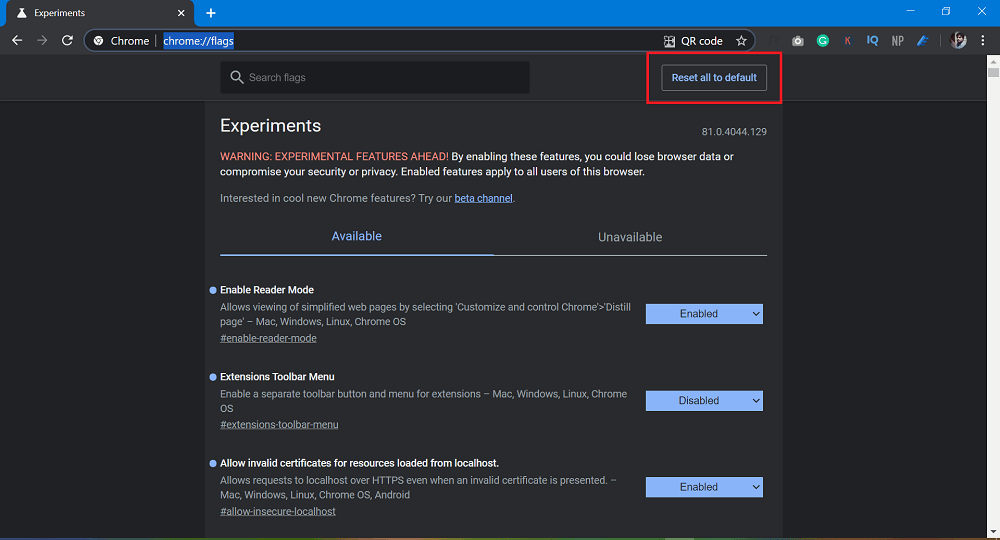
You can do so by going to chrome://flags/ and then click on the Reset all to default.
4. Temporarily disable VPN and Antivirus
If you’re using third party antivirus program or VNP service then sometimes these can override your networks settings accompanied by DNS servers. And this can also lead you to error message about which you’re reading in this blog post.
Try to disable them temporarily and see if this fixes the issue or not.
5. Reset Chrome DNS Cache
Sometimes users get see this annoying message due to corrupt Chrome DNS cache. Here’s how you can clear it:
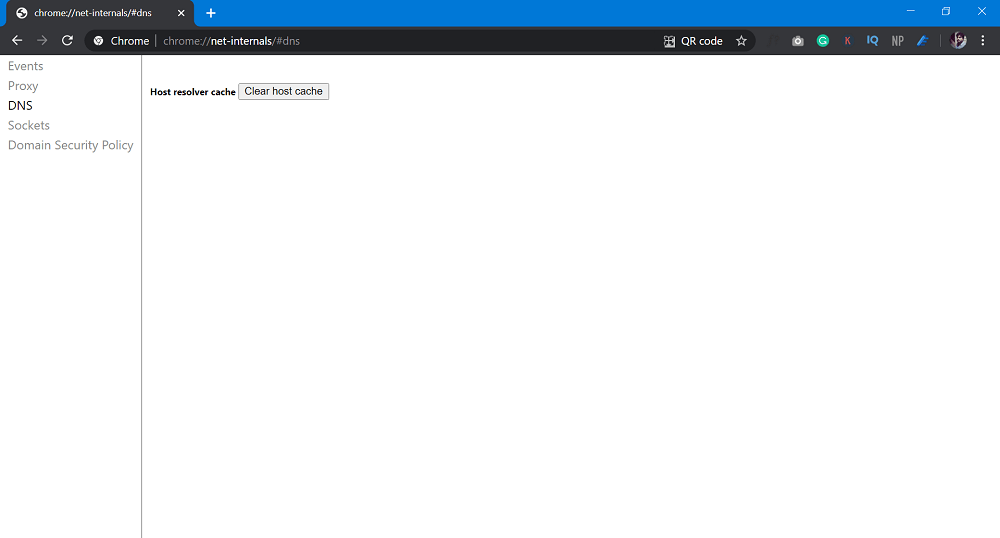
You need to go here: chrome://net-internals/#dns and click on the Clear host cache button and relaunch browser.
Reset Chrome to Default
If nothing works better for you, then last thing which you can do is reset Chrome browser to default settings. Doing this could fix the issue:
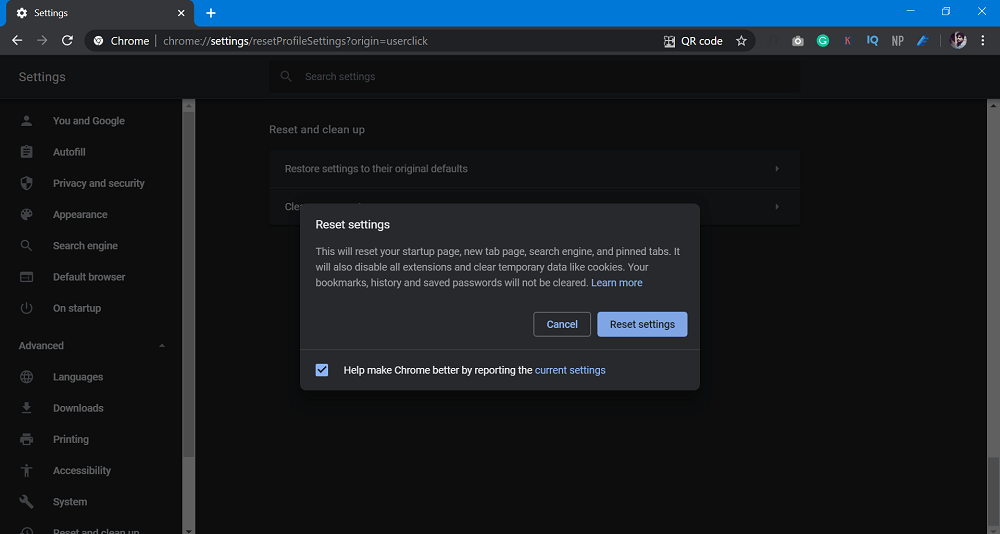
Go to chrome://settings/reset, and then click on the Restore settings to their original defaults. When quick dialog box appears, click Reset settings button.
Check out the solution on another Chrome error i.e. Error Code: sbox_fatal_memory_exceeded Chrome
That’s it! We have no doubt that one of the methods discussed in this blog post will fix the issue. If you know any other method which helped you in fixing the issue, then feel free to share in the comments.


