If are you getting the “A Driver Cannot Load On This Device” error in Windows 11, then you are not alone. Once this error message appears, its prevents the device from working properly. And affect the overall working experience which is annoying.

Usually, this error appears due to various reasons. Most of the time it appears when you’ve installed drivers manually from the manufacturer’s website or using a third-party program. Or one of the drivers gets corrupted or is outdated.
What makes this error message annoying is that it keeps on appearing whenever you boot into your PC.
How to Fix “A Driver Can’t Load On This Device” in Windows 11
Fortunately, there are possible solutions that you can apply to fix this issue. Below in this blog post, you will read about all of them. So let’s start with the first one on the list:
Update Driver
The very first thing that you can try doing is updating the driver. This issue arises due to the driver and is most probably due to an outdated driver. Updating the driver should fix the issue. You can update the driver from the Settings app by following the steps given below-
Press Windows + I key combo to open the Settings app. Here, click on Windows Update and then on Advanced Options.
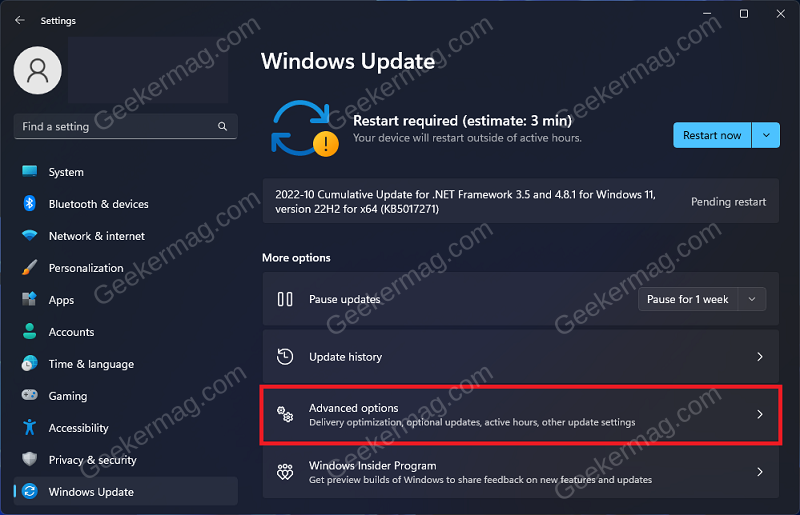
Now, click on the Optional Updates option here, and then on Driver Updates.

Check the checkboxes for driver updates available here, and then on Download & Install to install the driver.

Disable Memory Integrity (Recommended)
Another troubleshooting step to fix this issue is disabling Memory Integrity. To do so, follow the steps given below-
Press the Windows key on your keyboard, search for Device Security and click on the very first option to open it.

On the left sidebar, click on Device Security and then on Core Isolation Details.

Here, turn off the toggle for Memory integrity.

Check if you still face the issue or not. If you are still facing the issue then turn on the memory integrity toggle and move to the next step.
Run Program Compatibility Troubleshooter
Try running Program Compatibility troubleshooter if you have been facing this issue. You can do so by following the steps given below-
Open Settings by pressing Windows + I key combo. Under the System tab, click on Troubleshoot.
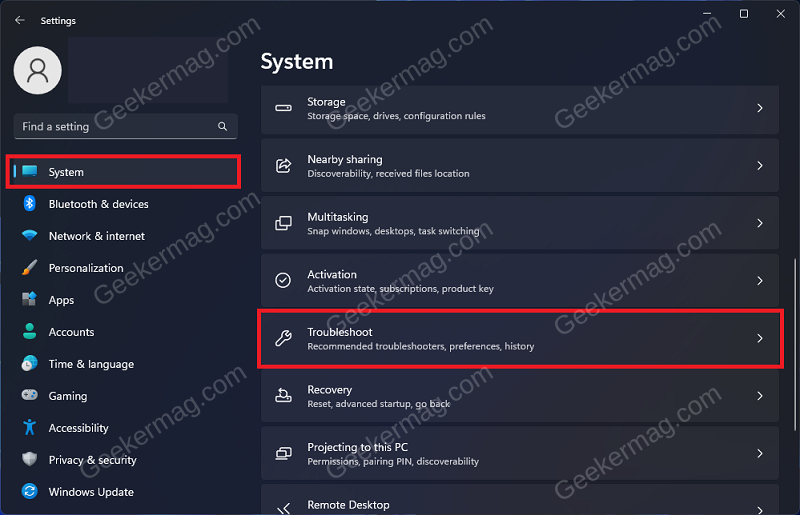
Now, click on the Other Troubleshooters option.

Click on the Run button next to Program Compatibility Troubleshooter.
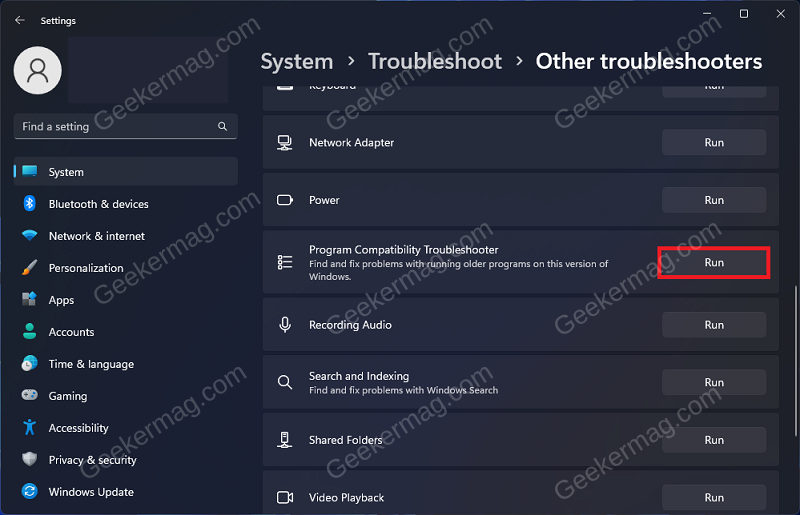
Follow the on-screen instructions to run the troubleshooter and fix the issue.
Delete UpperFilters and LowerFilters Registry
Another thing that you can try doing is deleting the UpperFilters and LowerFilters Registry keys. To do so, follow the steps given below-
Press Windows + X key combo and then click on Device Manager from the menu that opens up.

Double-click on the driver category in which the problematic driver is. Now, right-click on the problematic driver and then on Properties.

In the Properties window, click on the Detail tab.
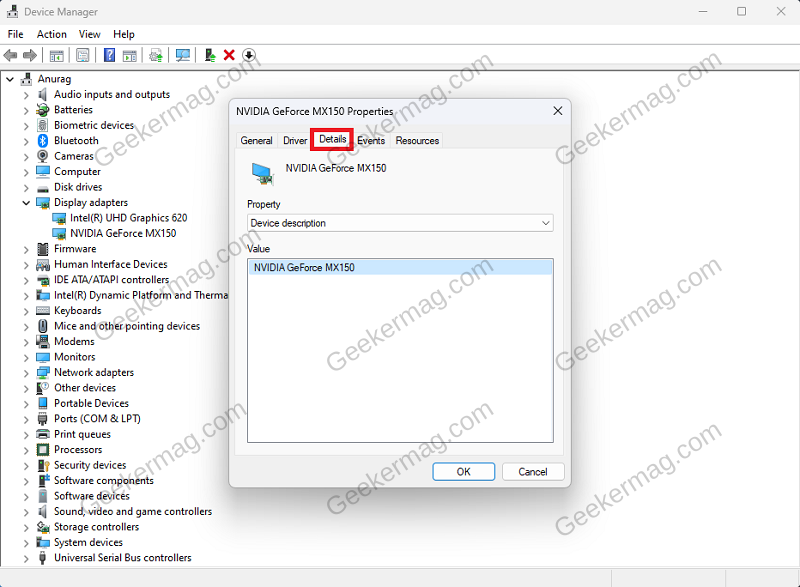
Here, under the Property drop-down menu, select Class Guid.

Now, copy the class GUID preset under the Value section as you will be needing it later.

Press the Windows key, search for Registry Editor and open it.
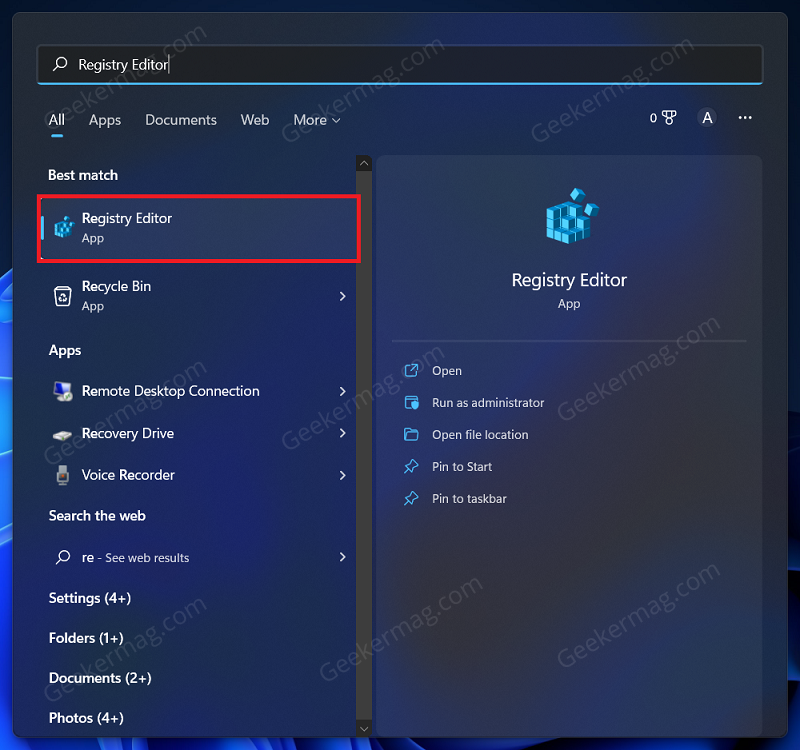
Here, head to the following address-
HKEY_LOCAL_MACHINE\SYSTEM\CurrentControlSet\Control\Class\DeviceDriverGUID
Note- At the end of the path, replace DeviceDriverGUID with the actual class GUID you copied earlier.
Here, select UpperFilters and press Delete to delete it and do the same for LowerFilters.

Note- All the class GUID will not have UpperFilters and LowerFilters values. If they are present, then delete them.
Run Hardware And Devices Troubleshooter
Lastly, we recommend you run the hardware and devices troubleshooter if you are still facing the issue. This option is not available in the Settings app, so you will have to run it through Run Dialog Box. Given below are the steps to do so-
Press Windows + R key combo to open Run Dialog Box.
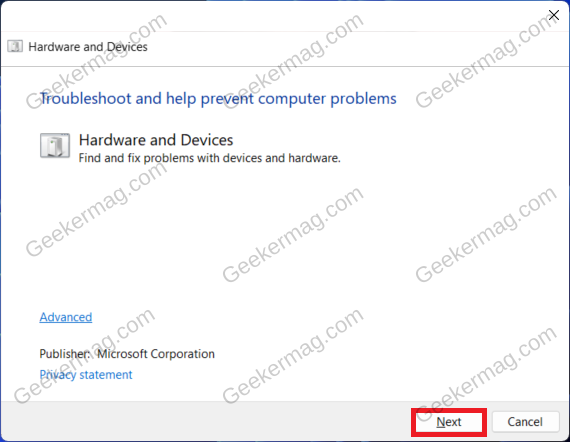
Here, enter msdt.exe -id DeviceDiagnostic and click on OK to open Hardware and Devices Troubleshooter.

Click on Next to continue ahead. Follow the on-screen instructions to run the troubleshooter.
In case, none of the solutions suggested above helps in fixing the issue, then you can perform a repair install of Windows 11 using an ISO file.
So these are the possible solutions that you can try to fix “A driver can’t load on this device on Windows 11. In case, you know other solution no mentioned in this blog post, then feel free to share with us in the comments.


