If you made upto this blog post, then it’s highly possible that you have run a Network Adapter troubleshooter and after diagnosing the issue, it showing an error message that reads “Problem with wireless adapter or access point”. Right?
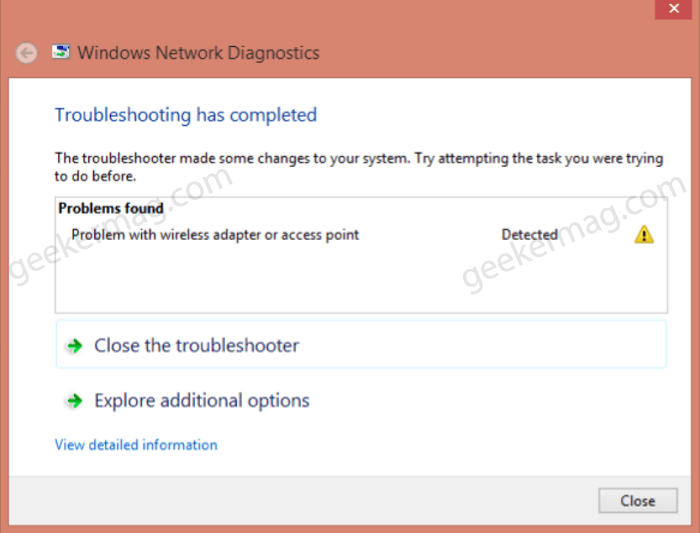
Usually, this network error occurs due to router, system hardware managing network adapter, network drivers & services managing internet connection on your device.
Fix – Problem with wireless adapter or access point in Windows 10
This is one of the most irritating network errors and lots of users face this. Fortunately, we have compiled a list of the solutions suggested by the users who were facing the same issue.
So without further ado, lets start with first solution:
Update Wi-fi Drivers
Right-click on the Windows button and from WINX menu select Device Manager.
Double-click on Network Adapter. You will get a list of all the network adapter installed on your device.
Right-click on your default network and select Update driver from the menu.
Next, you need to select Search automatically for drivers. If latest version of the driver is available, the system will download and install it automatically.
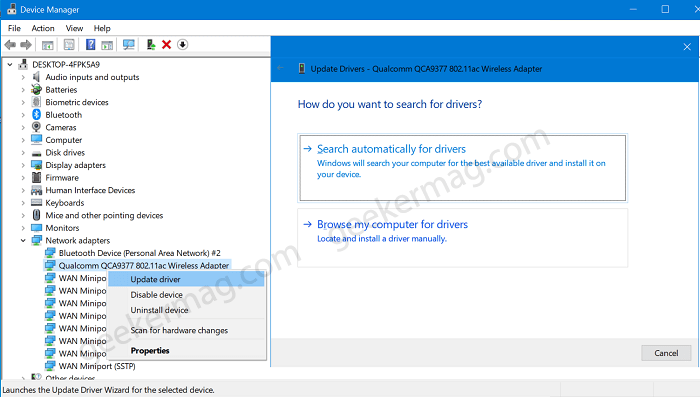
If there’s no latest version of the network driver, then you need to select Browse my computer for drivers > Let me pick from the list of available drivers on the computer
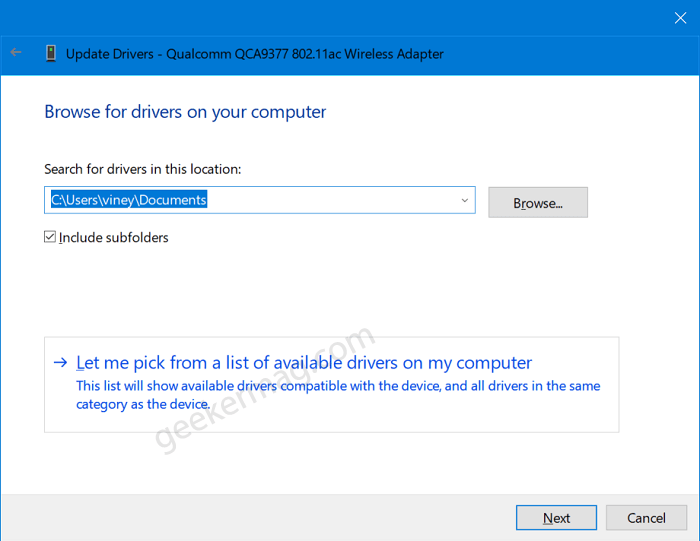
You will get a list of all the compatible drivers available on your computer. You need to select the first one in the list and hit the Next button.

Wait for system to complete the installation of the driver. After that, reboot your computer and check if this fixes the issue.
Following same procedure, you can also install other drivers from the list.
Sometimes, you have to visit the company website to download the latest version of the network driver.
Uninstall and Reinstall Wi-fi Driver
For that, you need to open Device Manager > Expand Network Adapter > Select Default Network > From the menu select Uninstall.
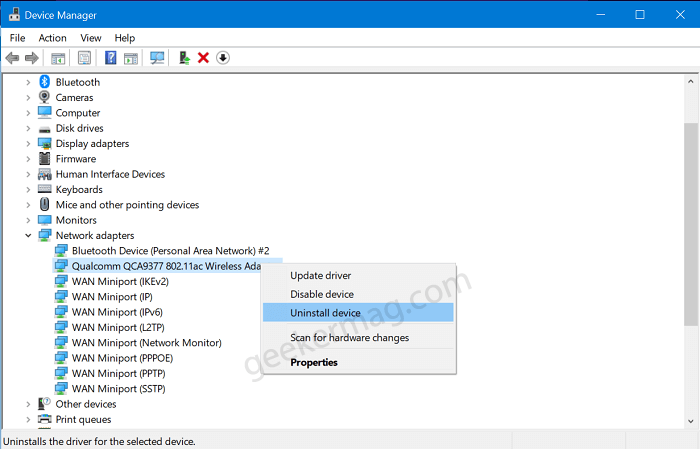
Reboot your computer. Windows 10 will automatically install the compatible driver for your network adapter.
Disable IP Helper Service
In the Start menu search type Services and when it appears in search results, click to open it.
Doing this will open the Services app where you will get a list of all the services running on your computer. You need to look for the IP Helper service.
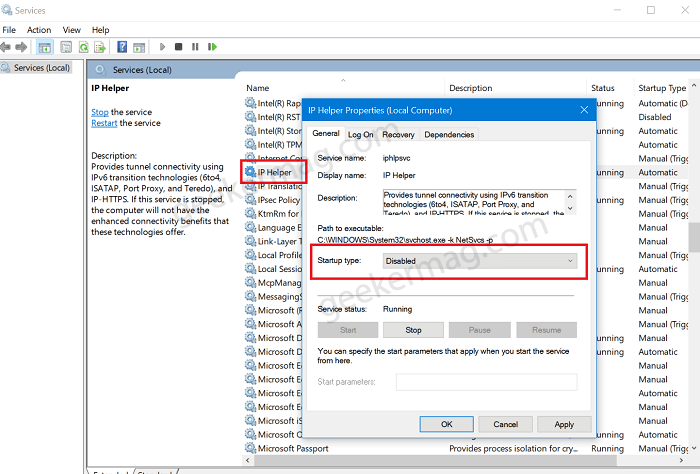
Once you find it, double-click on it to open IP Helper Properties windows. Here using Startup drop-down select Disabled, click Apply/OK
Reboot your computer.
Reset Network
Windows 10 out of the box offers users an option to reset the Network. Here’s how you can do that:
In the Start menu search, type Network reset and when the same system setting appears in search results, click to open it.

Doing this will open the Network reset setting page, where you need to click on the Reset now button.
Wait for few seconds. Once done, reboot your computer and check if this fixes the issue.


