Memory Integrity, also known as Core isolation, is a security feature that helps protect your computer from certain types of attacks by isolating critical processes and drivers in a secured region of memory.
Memory Integrity is a security feature in Windows that helps protect your computer from malware and other malicious software. It does this by preventing unauthorized changes to memory, which can be used to gain control of your computer.
While Memory Integrity is supported by most modern computers, not all the time it’s enabled out of the box. This is because it can interfere with some software, such as virtualization software and incompatible drivers.
If the Memory Integrity option is greyed out or it gives a message that Memory Integrity is disabled, you should enable it manually. This will help protect your computer from malware and other security threats.
Check If Your PC Support Memory Integrity
Check Compatibility Before enabling Memory Integrity, you need to ensure that your computer’s hardware supports it. Memory Integrity requires certain hardware virtualization features, such as TPM (Trusted Platform Module) and SLAT (Second Level Address Translation). To check if your system supports Memory Integrity:
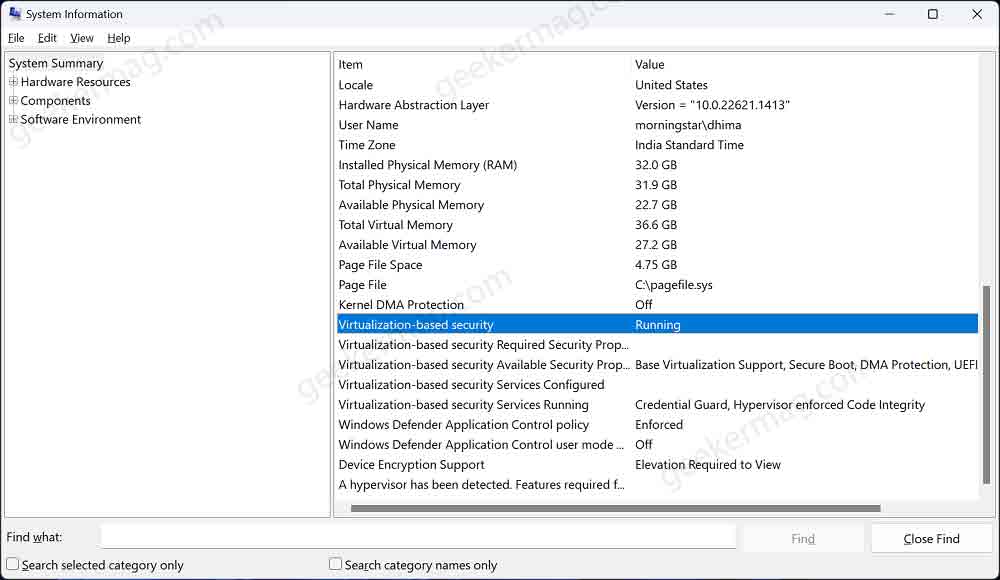
Click on the Search icon and type System information, when the same results appear, click to open it. This will open the System Information window.
Look for the line that says “Virtualization-based Security” under the “System Summary” section. If it says “Running,” your system is compatible.

If it says disable or similar, that means your PC doesn’t support this security feature and you need to upgrade the hardware.
How to Turn ON Memory Integrity in Windows 11 (ON or OFF)
On the other hand, if it says running means your system is compatible, then follow the instructions below to enable the Memory Integrity feature:
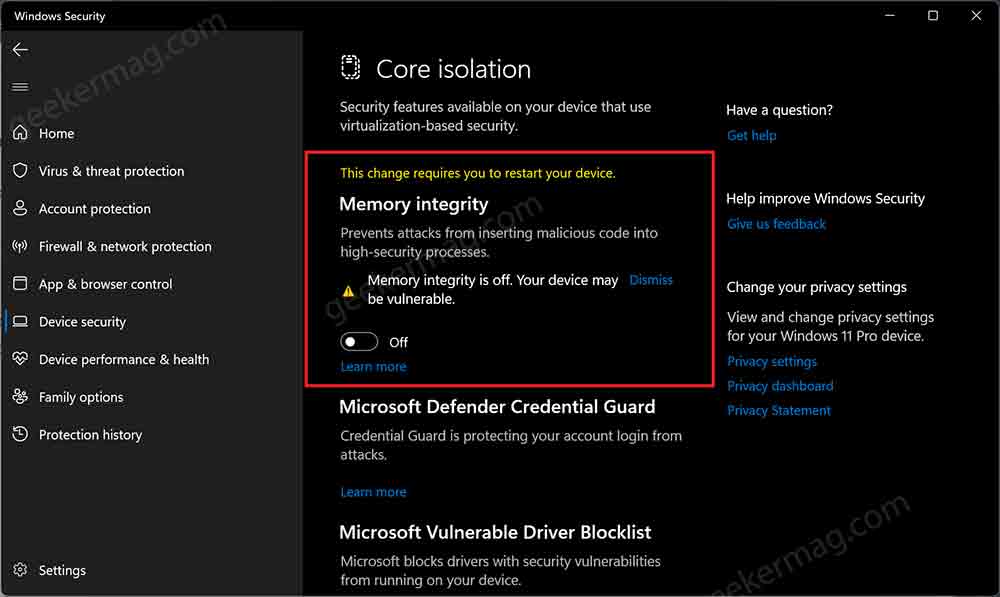
Click on the Search icon and type Windows Security, when the same app appears in the search results, click to open it.
In the Windows Security app, switch to the Device security tab on the left side.
In the Device Setting page, look for the Core isolation section and click on the Core isolation details link.

On the next page, you need to toggle ON the Memory Integrity feature. When the UAC dialog box appears, click Yes to continue
Click on the Restart Now button to apply the changes.
To verify if the Memory Integrity feature is enabled or not after the restart. Follow the steps discussed above head over to the Core isolation settings page and check if Memory Integrity is ON.
In case you want to disable Memory Integrity, then just undo the step and restart your computer.
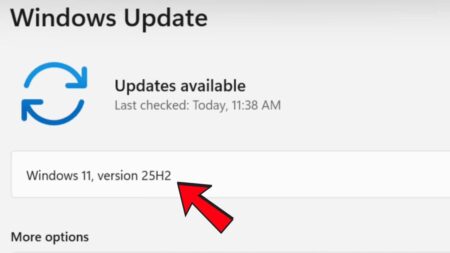
Memory Integrity is now enabled on your Windows 11 (or possibly Windows 10) computer, providing an extra layer of security against certain types of attacks.
Memory Integrity Frequently Asked Questions (FAQs)
How do I know if my computer supports Memory Integrity?
Open the System Information application on your PC and check if Virtualization Based Security feature is Running confirms that your PC supports the Memory Integrity feature. You can check the steps above in this post.
What drivers are incompatible with Memory Integrity?
Incompatible drivers with Memory Integrity in Windows 11 can include third-party manufacturer drivers, legacy hardware drivers, and tampered or modified drivers. Compatibility depends on your specific hardware and software setup.


