Microsoft Edge has a native Image Viewer feature which has been upgraded and is now loaded with an AI-based image editing feature.
Usually, when the user opens an image within the Edge browser in a new tab it opens the image with a basic image editing feature, but now the list of options includes a new ‘AI editing’ option.
When you click on this option, you will find tools like Smart Erase and Image Enhance tools and Microsoft promised that more AI tools will join the list soon.
As of writing this blog post, the AI editing option is under development and it is available behind the flags. That means interested users have to enable it manually using the feature flag assigned to it.
How to Enable and Use Edge Image Viewer AI Edit Feature
In case, you want to try the new AI editing option in the Edge Image Viewer, then here’s how you can enable it:
Before, you proceed make sure you have an updated version of Microsoft Edge on your PC.
In the Edge browser, you need to type or copy-paste this ‘edge://flags‘ in the address bar and hit enter.
In the search box type, Edge Image Viewer, and when the same feature is available in the search results, use the drop-down next to it to change the settings from Default to Enabled.
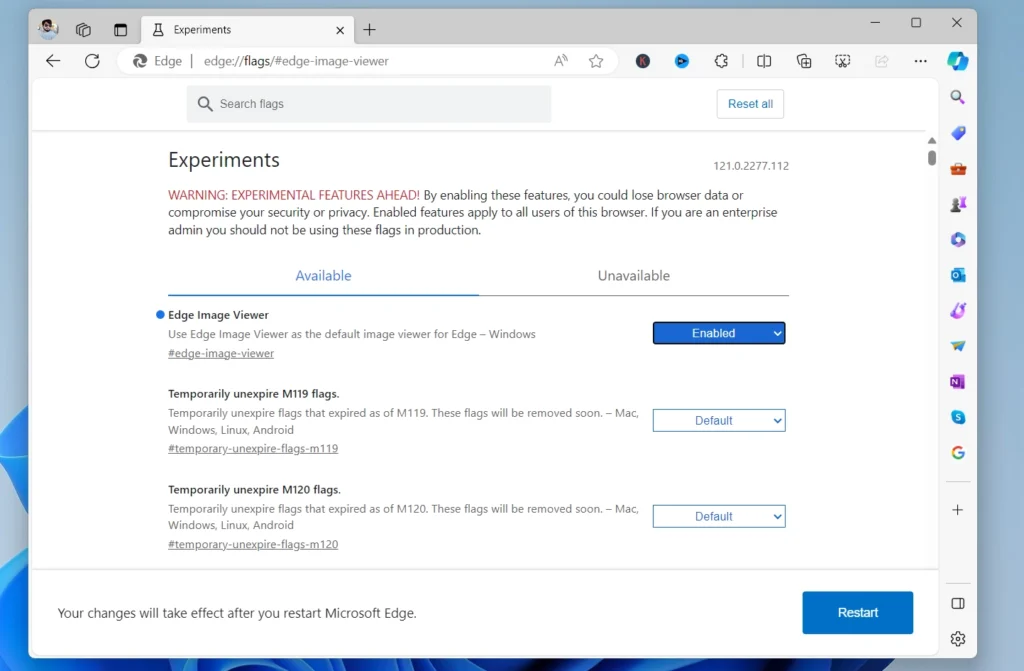
Click on the Restart button to apply the changes.
At this point, you have successfully enabled the AI Editing option in the Edge Image Viewer.
After this, if you open an image using the Edge Image Viewer. You should now see an additional AI editing option in the image viewer interface.

To use the AI editing feature in the Edge Image Viewer, click on the ‘AI editing‘ icon and this will open the same image. Here, you can use a Smart eraser and Image Enhancer tool depending on your requirements.
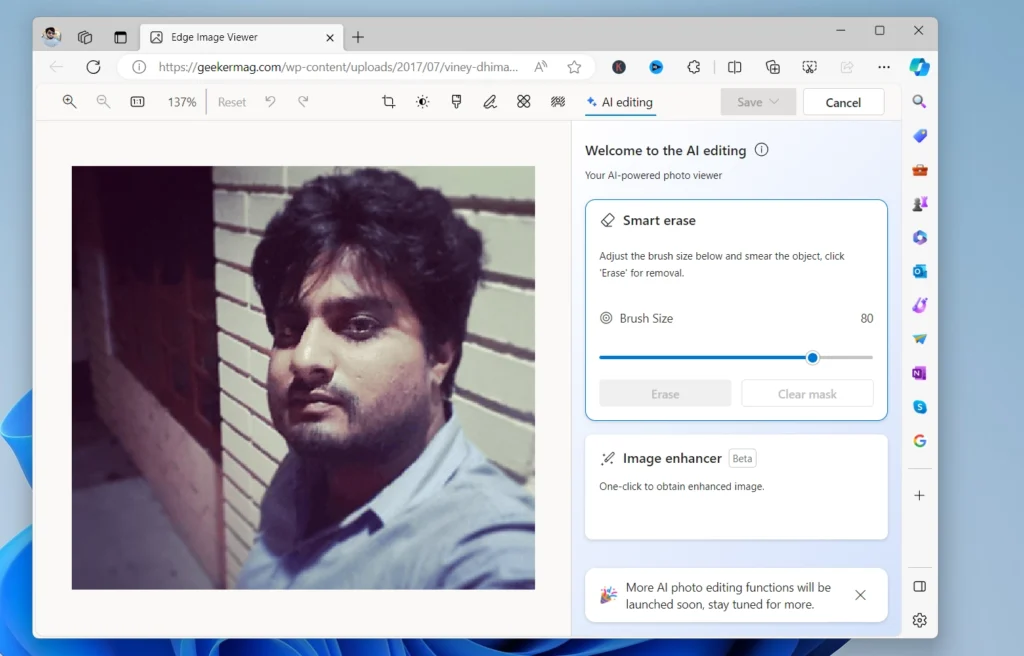
To remove the background or any particular object in the image using a Smart eraser, drag the cursor, and smear the part of the image you want to remove.
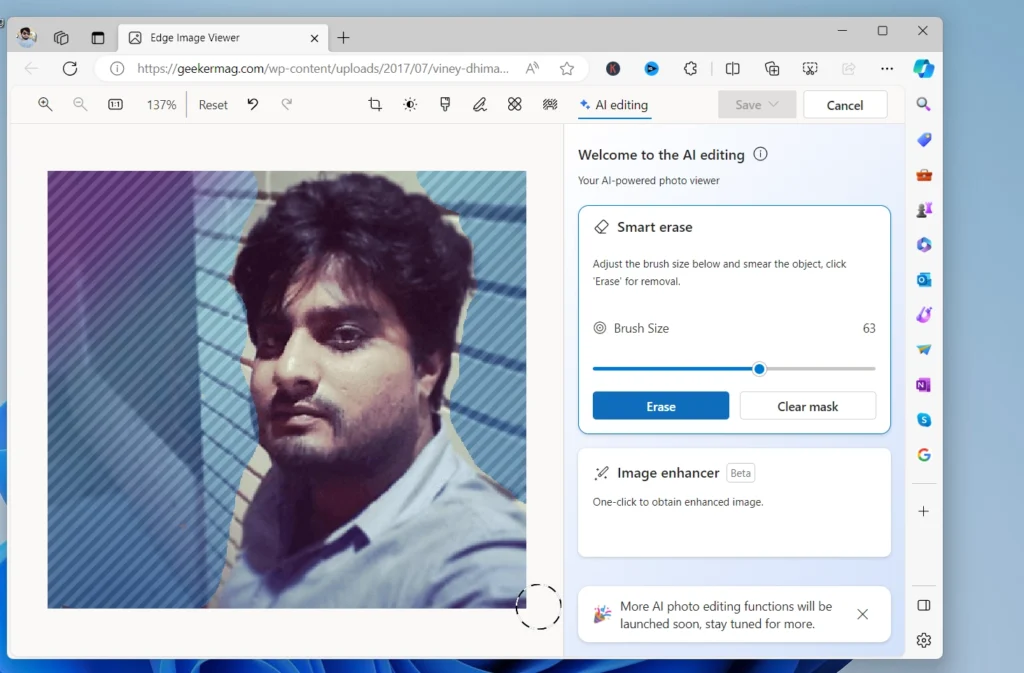
You can adjust the Brush size using the slider and then click the Erase button. You can see a notification “Picture processing in progress” at the bottom of the screen.
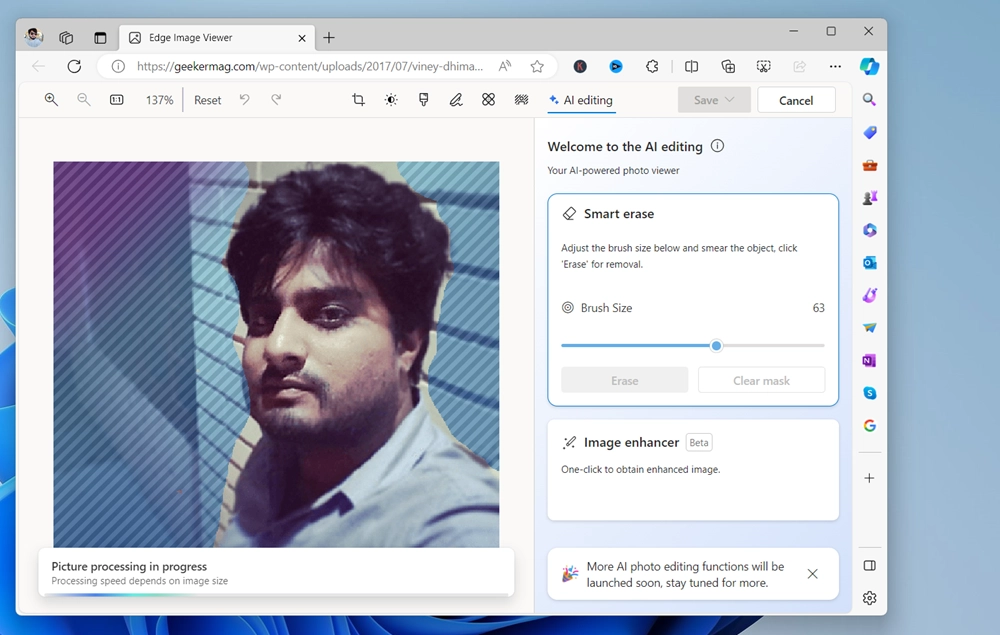
At last, the highlighted area will be removed from the image, as shown in the screenshot.
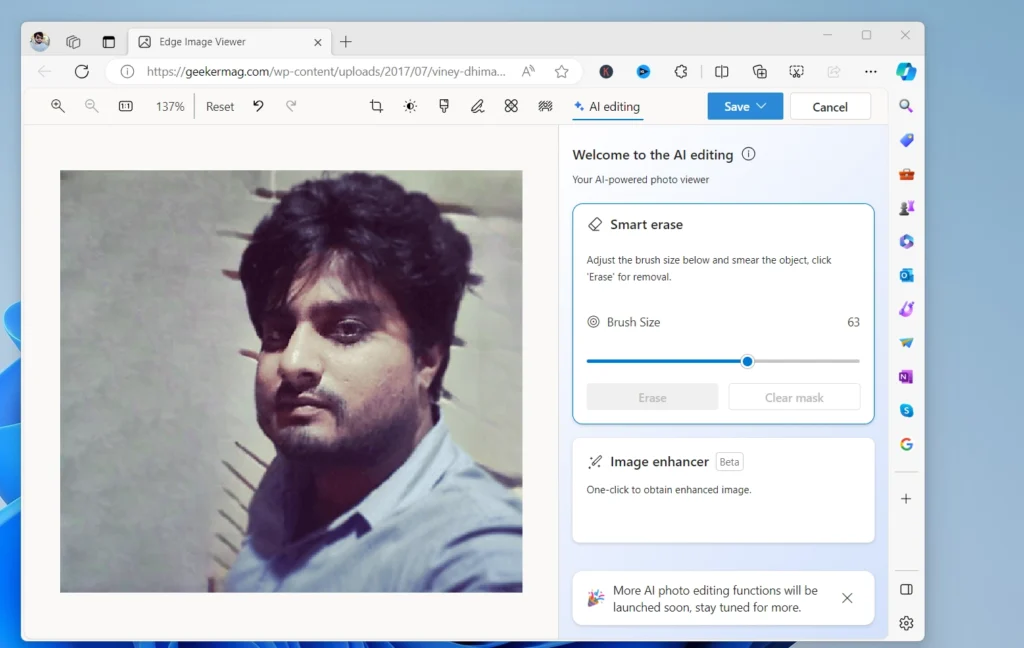
Apart from that, you can also enhance the image using the Image enhancer tool. All you need to do I to click on the same option, then click the Start button and this will instantly enhance the image.
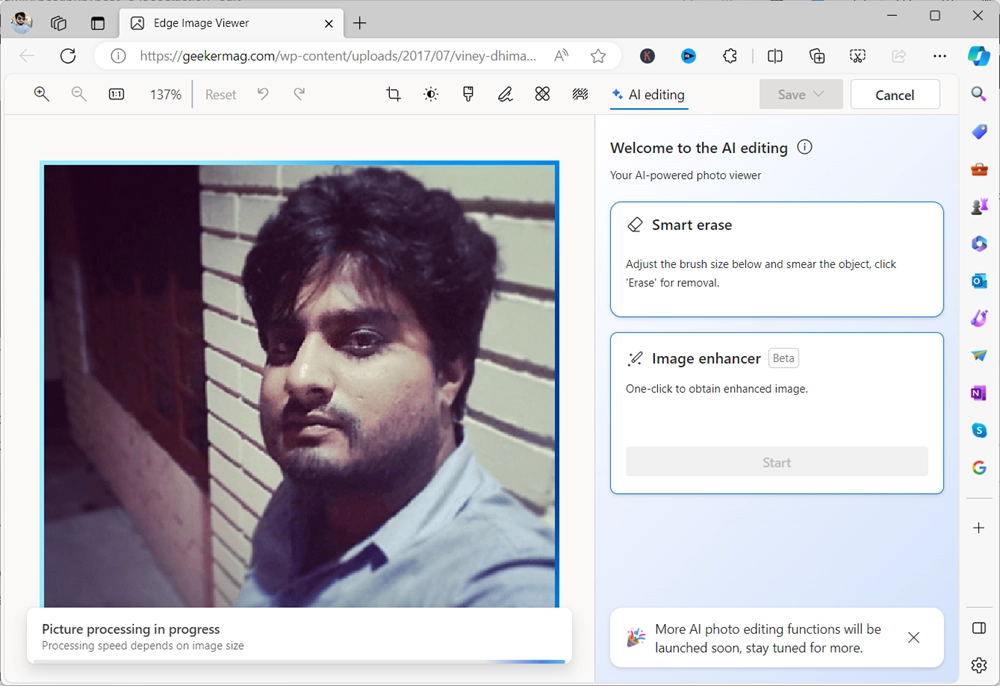
Finally, you will get the enhanced image. In my case, the result wasn’t as per my expectations. Maybe, you will get better output.

At last, after either using the Smart erase and Image enhancer, you can select Save, Save as copy, and Copy to clipboard depending on how you want to keep the image.
As discussed above, both features are under development so don’t expect top-notch results.
So why don’t explore the upgraded Edge Image Viewer loaded with AI Editing features, which may include automatic enhancements, filters, and other intelligent editing tools? Play around with the settings to get a feel for what the AI can do.
Let us know in the comment section if you find this update interesting and useful.


