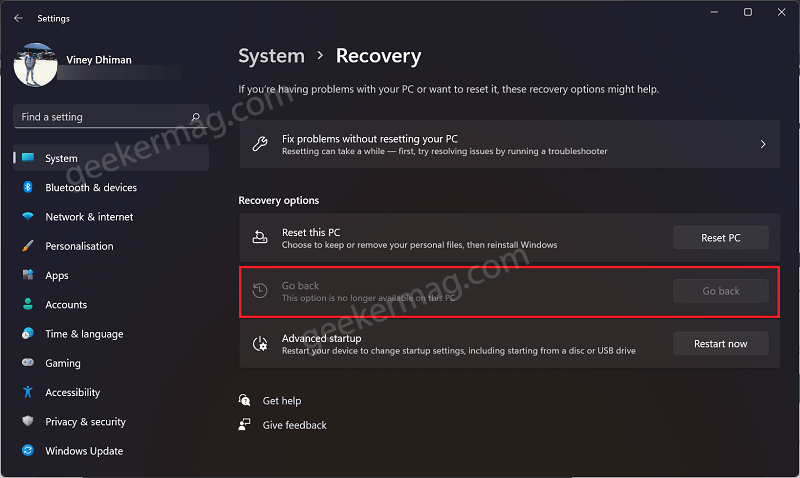
If you have recently upgraded to Windows 11 or installed a feature update of Windows 11 or if you have enrolled in Windows 11 insider program and recently installed the latest insider build. You always have the option to go back to the previous version of Windows in Windows 11 for 10 days.
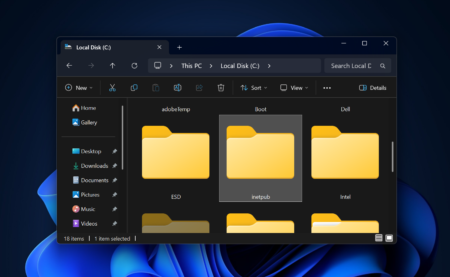
When you install the latest version of Windows, the copy of the earlier version of Windows is stored in the ‘Windows.old’ folder in the Windows installation drive. With the help of this backup, you can go back to the previous version installed on your Windows 11 PC.
Unfortunately, the option is valid for 10 days and after that time period, the backup is deleted automatically and you won’t be able to roll back to the previous version of windows in Windows 11.
How to Extend the 10 Days Rollback Period to 60 in Windows 11
In case, you’re the one for whom 10 days is not enough, then the good thing is that it is possible for you to manually set and extend a number of days to go back to the previous version of windows, and in this blog post, we will share how to do that in Windows 11.
Before that, let’s first learn how to check the number of days remaining out of 10 to go back to the previous version of Windows in Windows 11
For that, press the Windows + X key combo, and then from the menu that opens up select Windows Terminal (Admin).
When given the UAC, click on Yes to continue ahead.
In the Windows Terminal, either open Command Prompt and Windows Powershell and execute the command: DISM /Online /Get-OSUninstallWindow
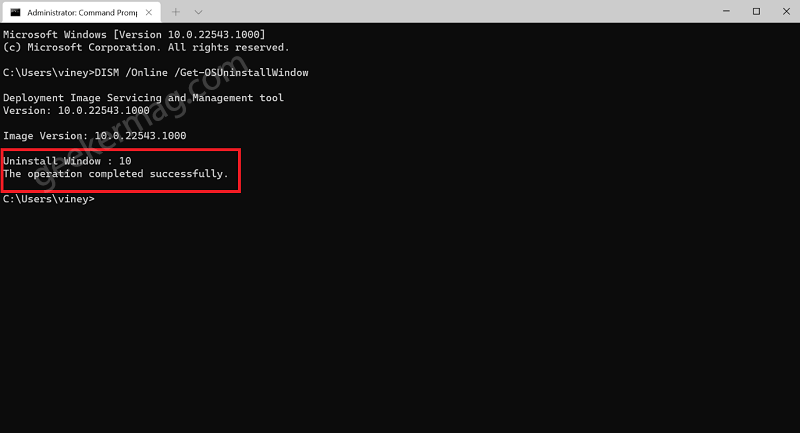
After you execute the program, you will see the number of days remaining next to the Uninstall Window option.
I have recently installed the latest update for Windows 11 and that’s why it’s showing 10 days, it could be any number between 0-10 in your case.
In case, you see “Error: 1168 with message Element not found“, then this means that the copy of the earlier version of Windows was installed in the ‘Windows.old’ folder in Windows 11 has been deleted, and you can’t go back to the previous version.
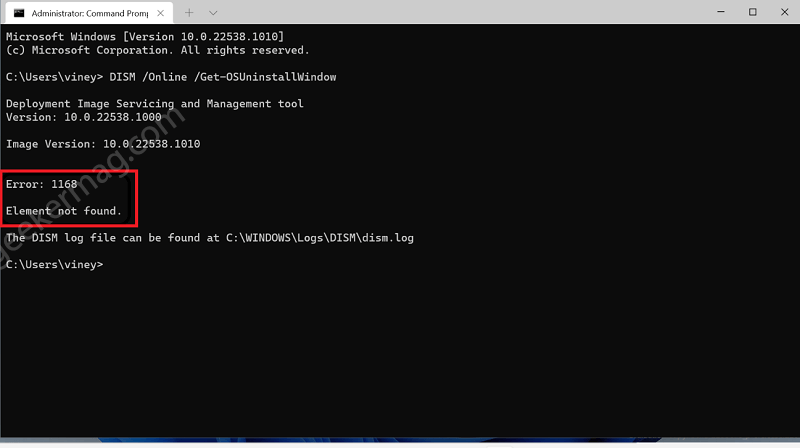
Now that, you have checked how many days are remaining to roll back, let’s learn how to set or change the number of days to go back to the previous version of Windows in Windows 11.
Before you continue, keep this in mind: You can only set the number of days to go back to the previous version of the backup stored by Windows 11. If you get the Error: 1168 then you won’t be able to set the number of days.
For that, press the Windows + X key combo, and then from the menu that opens up select Windows Terminal (Admin).
When given the UAC, click on Yes to continue ahead.
In the Windows Terminal, either open Command Prompt and Windows Powershell and execute the command: DISM /Online /Set-OSUninstallWindow /Value:<days>
Here, replace <days> with the number of days (between 2 to 60) you want to extend the rollback. For instance, let’s go for the maximum number i.e. 60 days, then the command will be: DISM /Online /Set-OSUninstallWindow /Value:60
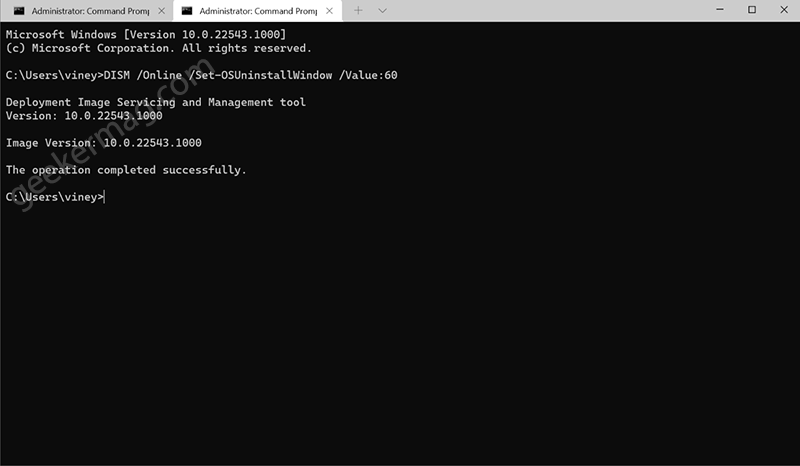
If everything goes well, you will get a message “The operation completed successfully“. You can follow the steps discussed above in the post to check the remaining days for rollback.
In case, when following any of the methods discussed above you’re receiving an Error: 87 with the message “The get-osuninstallwindow option is unknown.”, then it is possible that you’re copy-pasting a command directly or there’s some typo.
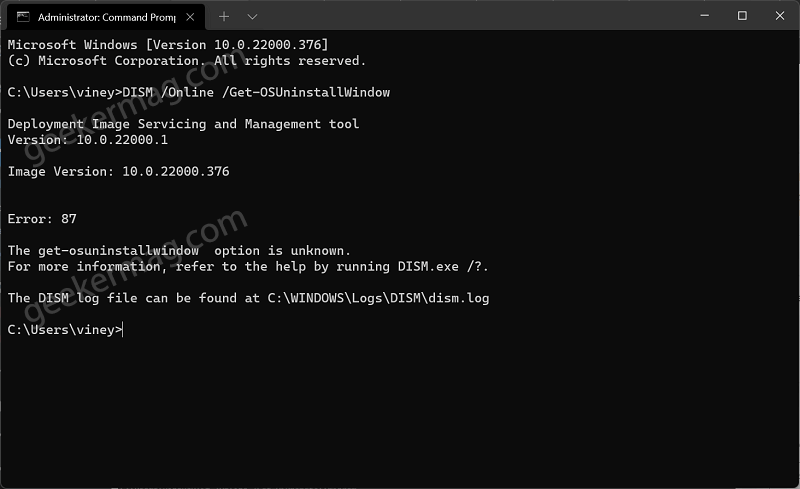
To fix this error, try to manually type the command and this should execute the command correctly and display the desired confirmation.
Use Registry Method to Extend Rollback Period in Windows 11
Alternatively, you can use a Registry hack to achieve the same thing. Here’s how you can do that:
Click on the Search icon and type Regedit, when the Registry editor appears in the search results, click to open it.
In the Registry Editor navigate to HKEY_LOCAL_MACHINE\SYSTEM\Setup
On the right side, make right-click and select New > DWORD (32-bit) Value, and name it “UninstallWindow“.
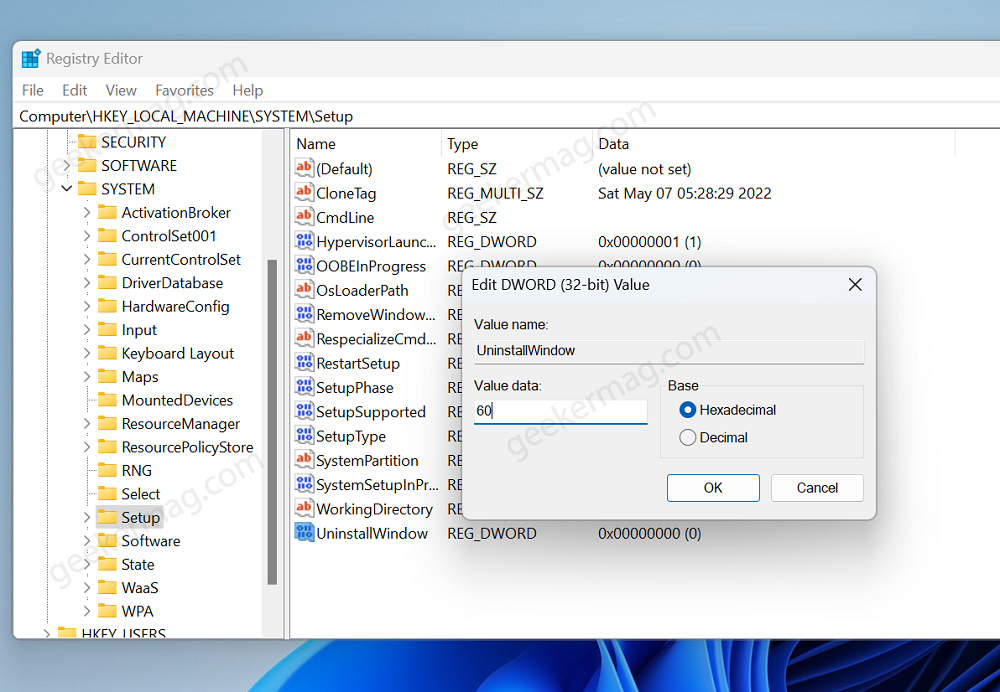
Double-click on the UninstallWindows DWORD value and set its Value data to 60 or any number between 10-60.
Close the registry editor, and restart your computer to apply the changes.
I hope this helps, thanks for reading.


