We often use Webcam for attending video calls and meetings through our Windows 11 PC, and facing any issue with it during the video conferencing can be frustrating, especially when you’re in an important meeting, it could be from a client, boss, or other.
Webcam not working properly in Windows 11 issue could be related to both inbuilt camera or an external one. Usually, you can face issues related to the webcam due to hardware failure or driver or software issues.
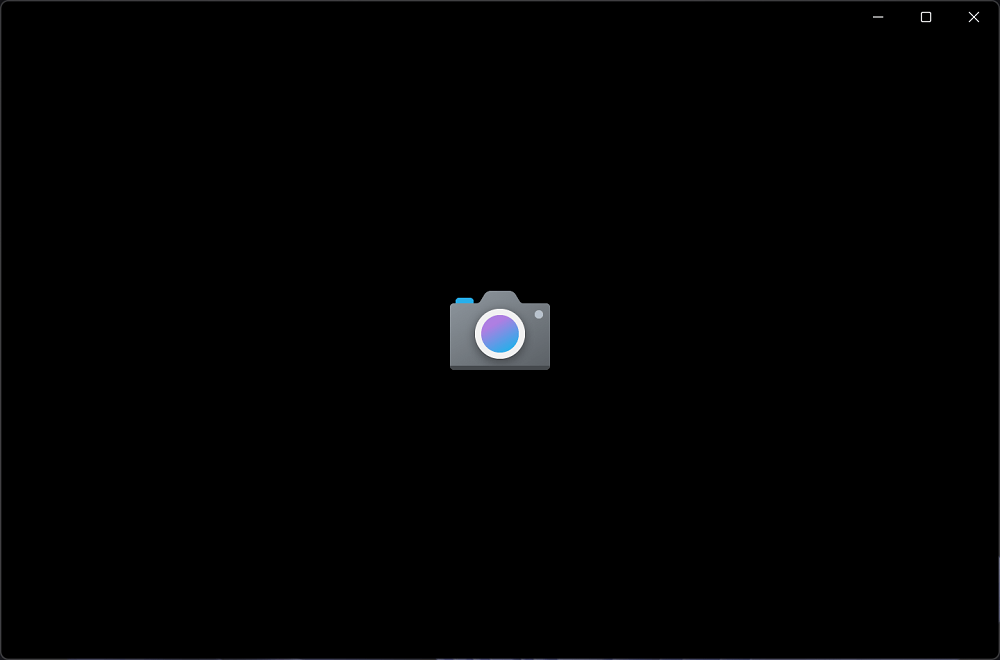
When Webcam is not working on your Windows 11 PC, it is possible that you see a black screen, the camera light is off, nothing happens when you open the camera or something weirder.
Fix – Webcam not working in Windows 11
Lots of users reported that after upgrading to Windows 11 webcam stopped working or not working properly. While other users reported that it was working earlier but stopped working mysteriously
No matter what issue you’re facing with Webcam on Windows 11 PC. Below in this blog post, you will find possible solutions to troubleshoot and fix the issue:
Run Camera Troubleshooter
If Webcam is not working on Windows 11, then you can try running the camera troubleshooter. To do so, follow the steps given below-
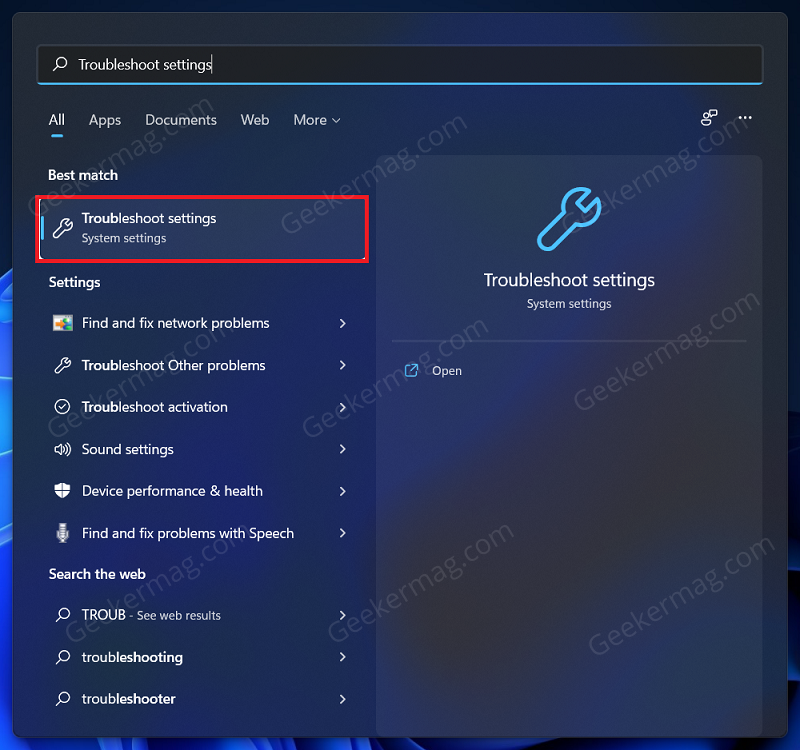
Press the Windows key to open the Start Menu. In the Start Menu, type Troubleshoot Settings and hit Enter to open the Troubleshoot Settings.
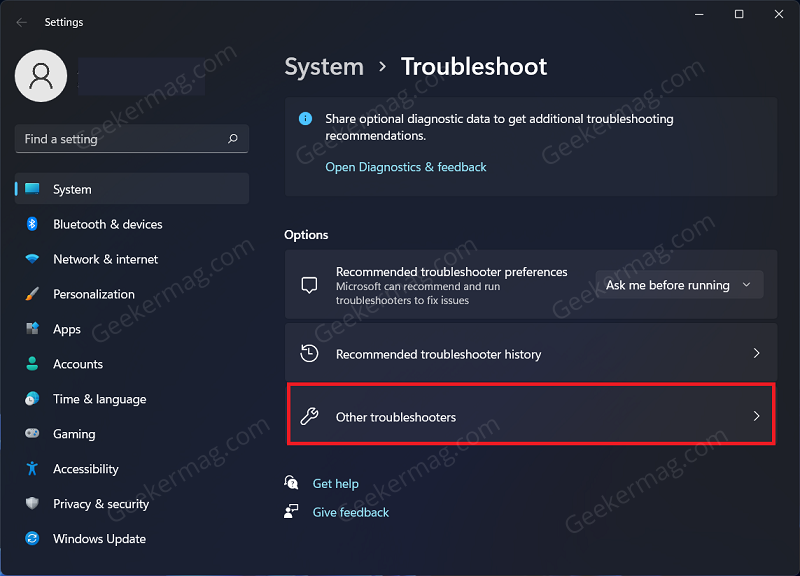
In the Troubleshoot Settings window, click on Other troubleshooters.
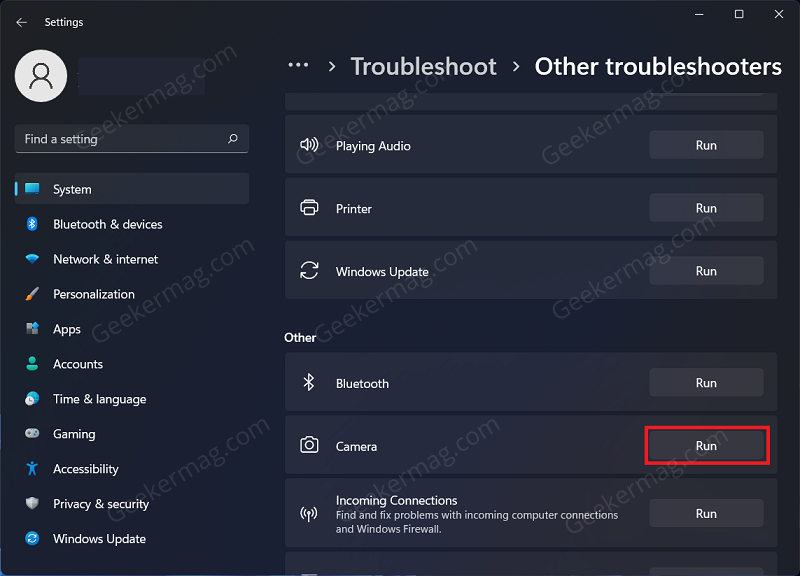
Click on the Run button right next to the Camera option.
Ensure You Have Given Access To Camera
The next thing that you have to ensure is that you have been given access to the camera. Here’s how you can do that:
Open the Settings app by pressing the Windows + I key combo.
In the Settings app, head to the Privacy & security tab from the left sidebar.
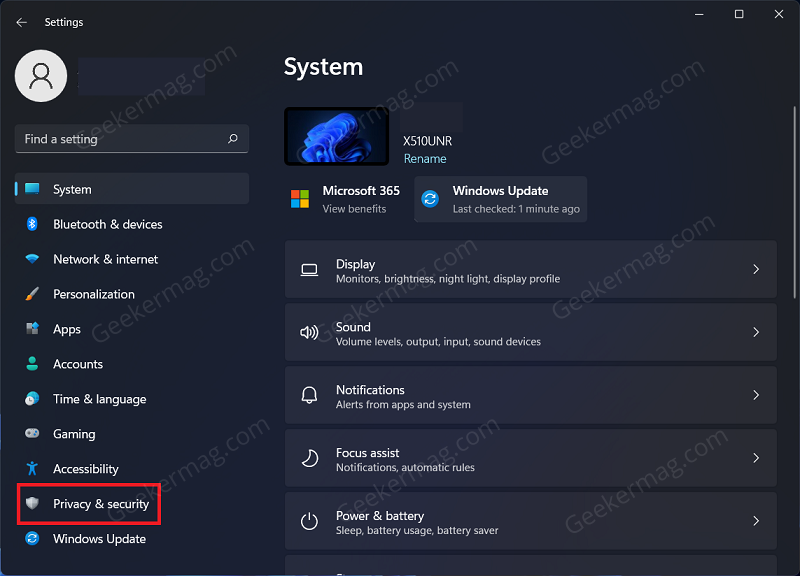
On the right side of the Privacy & Security tab, head to the Camera section.

Here, ensure you have enabled the Camera access.
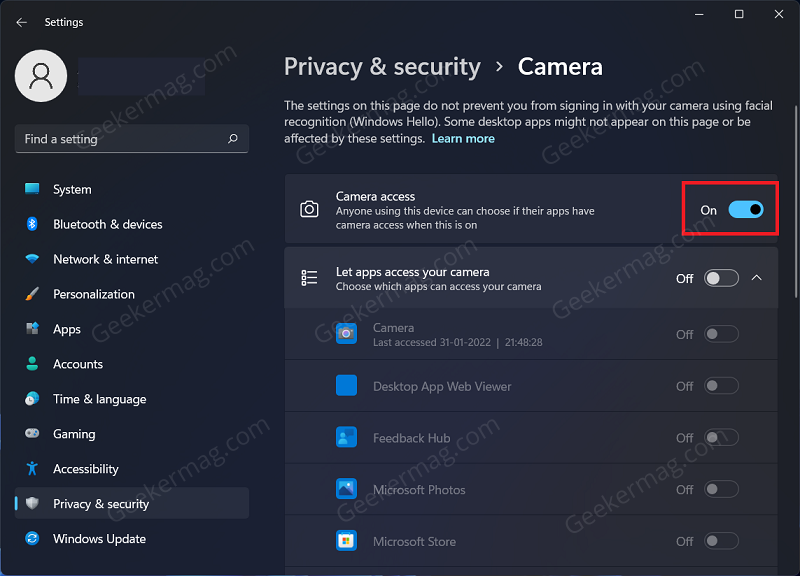
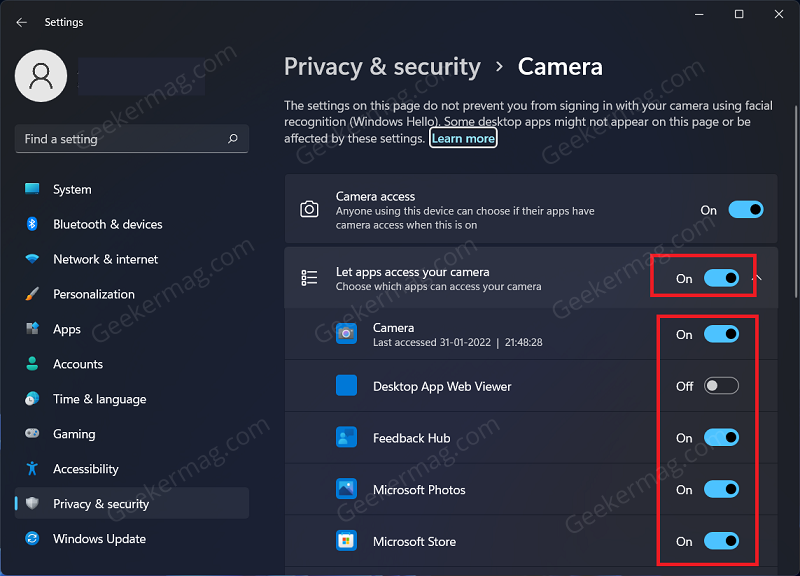
After doing so, enable the “Let apps access your camera” toggle, and then turn on the toggle for the apps for which you want to enable the camera.
Re-Enable Camera
Another troubleshooting step to fix the issue with the camera is to re-enable it.
Open the Start Menu by pressing the Windows key. In the Start Menu, search for Device Manager, and when it appears in results, click to open it.

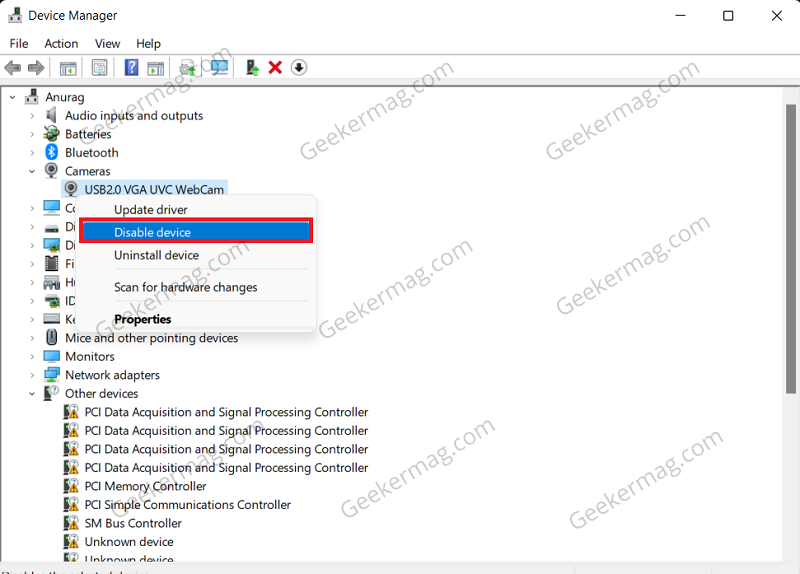
In the Device Manager, expand the Cameras section by double-clicking on it. Now, right-click on your webcam and then click on Disable device.
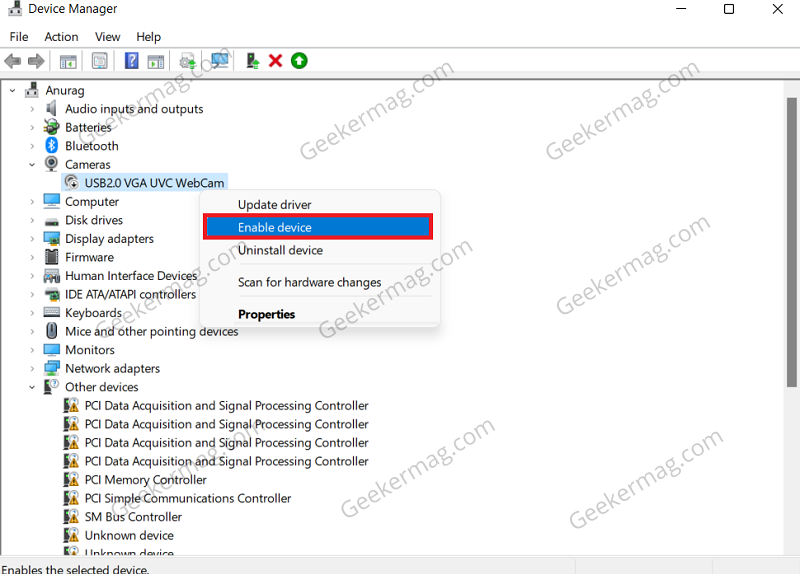
Wait for a few seconds, and then right-click on the webcam, and click on Enable device.
Update Camera Drivers
If re-enabling the camera didn’t work for you, then you can try updating camera drivers.
Press the Windows key to open the Start Menu, and here search for Device Manager. Hit Enter to open Device Manager.

In the Device Manager, expand the Cameras section by double-clicking on it.
After doing so, right-click on the webcam and then click on Update driver. Now, follow the on-screen instructions to update the camera drivers.
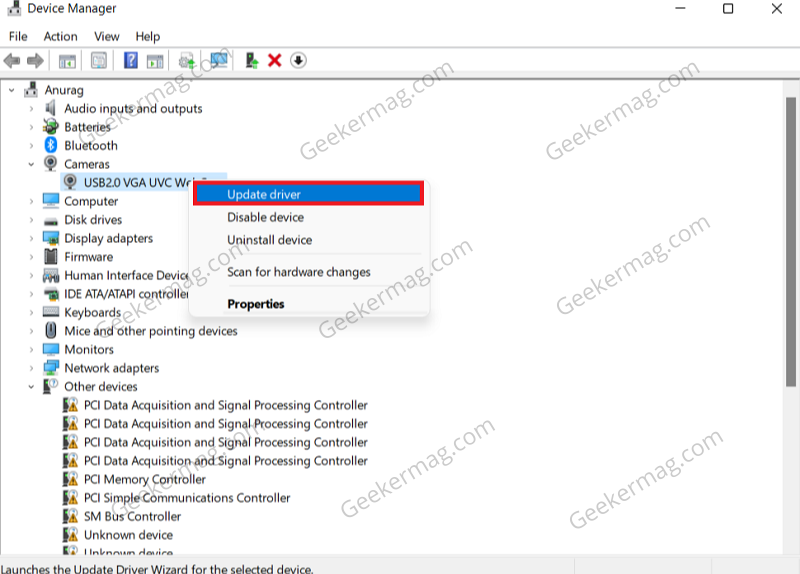
If you still face the issue with the camera, then you can try reinstalling the camera drivers. To do so, right-click on the webcam in the Device Manager, and then click on Uninstall Device.
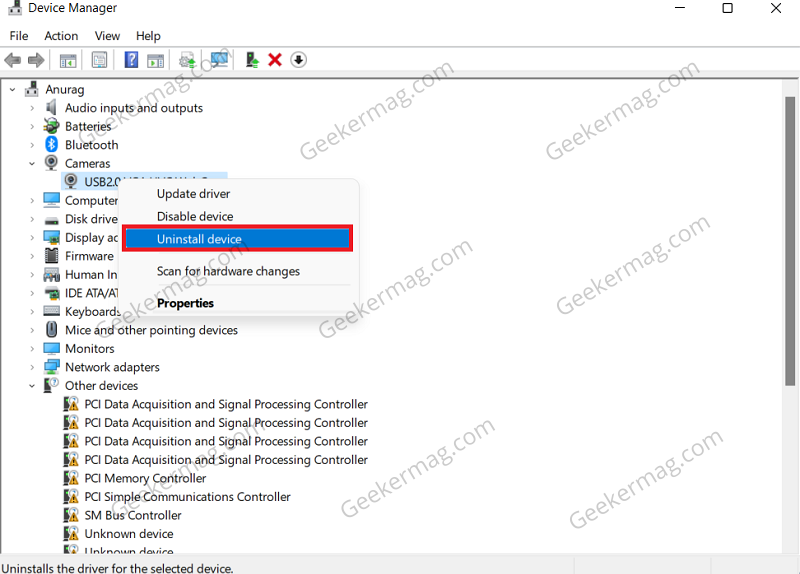
After doing so, restart your PC, and the driver will be reinstalled. This should fix the issue you have been facing.
In case, it’s not working, then head over to the device manufacturer website and download the latest drivers for the camera.
Reset Camera App
If the Webcam is still not working on Windows 11, then you can try resetting the camera app. To reset the camera app, follow the steps given below:
Open the Settings app on your Windows 11 PC by pressing the Windows + I key combo.
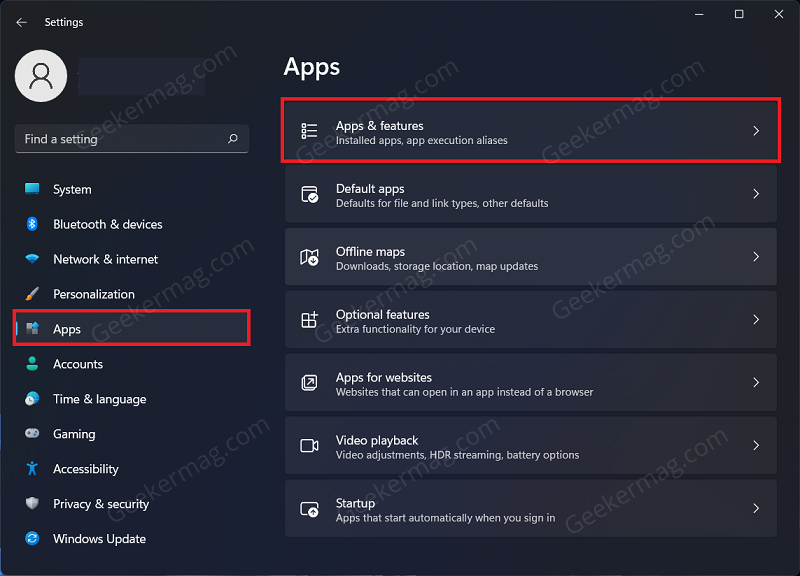
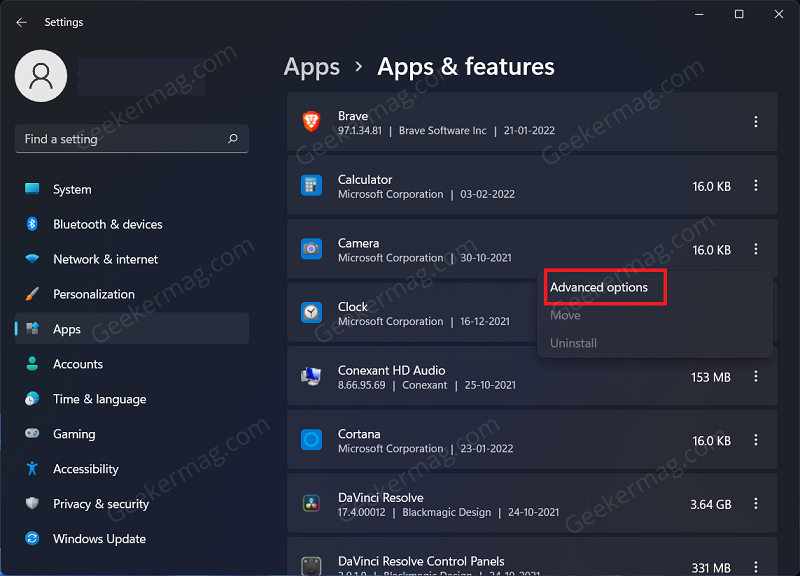
In the Settings app, head to the Apps section from the left sidebar, and then on the right side, click on Apps & features.
Search for the Camera app from the list of apps, and then click on the three dots right next to it.
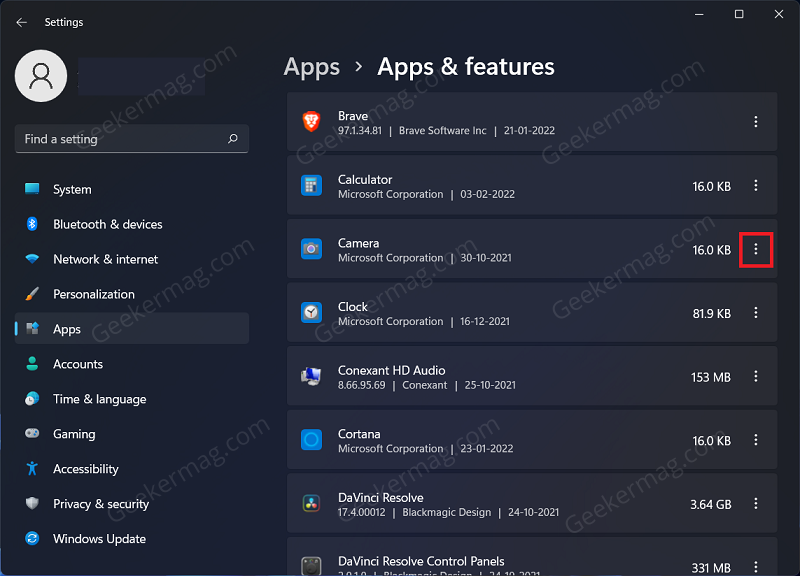
From the menu that opens up, click on Advanced Options.
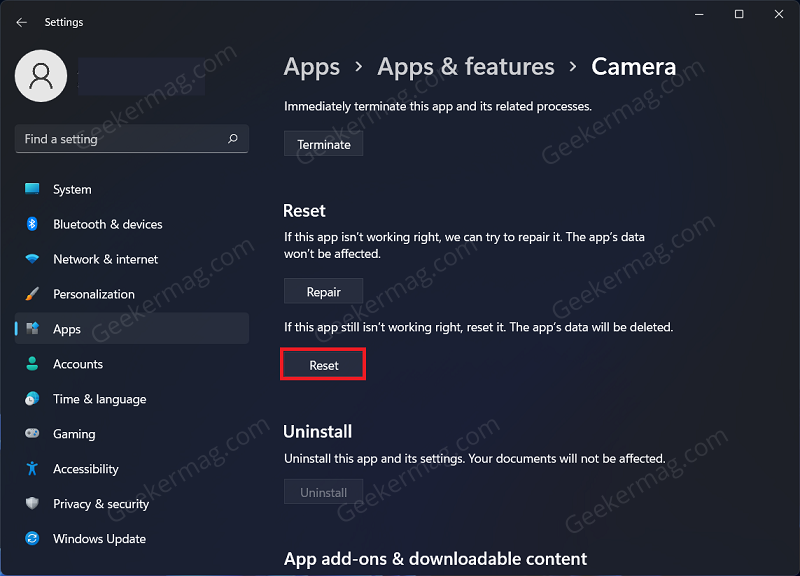
On the next window, scroll down to the Reset section, and then click on the Reset button to reset the camera app.
Update Windows
You may also face the issue due to pending Windows update. Try updating the Windows to fix Webcam not working in Windows 11.
Firstly, press the Windows + I key combo to open the Settings of your PC. On the left sidebar of the Settings app, click on the Windows Update.

Now on the right side, click on Check for Updates.
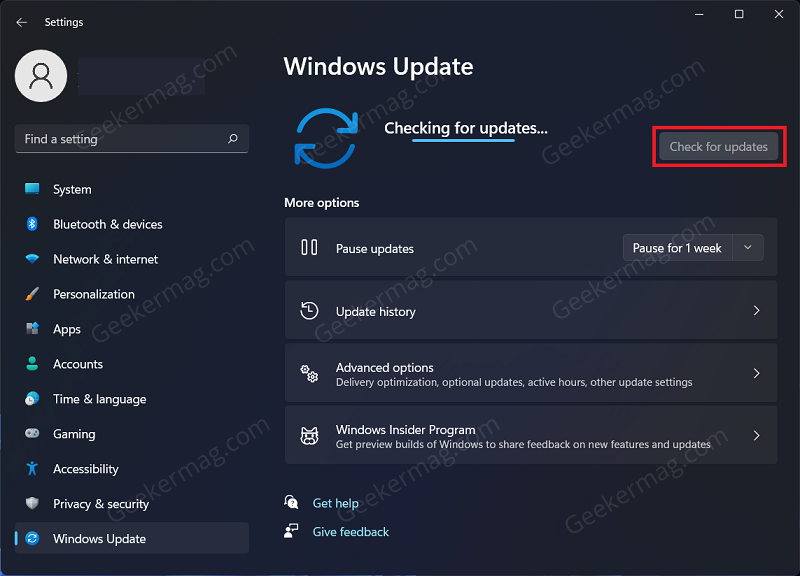
Download and install the updates you find here, and then restart your PC.
Check Hardware
If you use the external webcam, then check for the loose connection. Ensure you have connected the camera to the PC properly. Also check for the faulty cable or the ports before connecting the cable, as it can be the cause of the issue as well.
If there is no issue with the connection, then you should talk to customer support about the issue you have been facing. Contact the customer support team of the webcam you use, or of your laptop, to get the issue fixed.
Apart from that, if any of the methods discussed above fail to fix the issue, then you can repair install Windows 11 with in-place upgrade.
If this method also fails to fix the issue, then the last resort is to reset your Windows 11 PC.
In case, you know any other solution that helps in fixing the webcam on your Windows 11 PC and we fail to cover in this blog post, then feel free to share in the comments.


