Windows 11 comes with various troubleshooting tools that regularly scans potentials issues and if find any fix them automatically. Most of the time these tools fix the issues, but sometimes these tools has their limits as well.
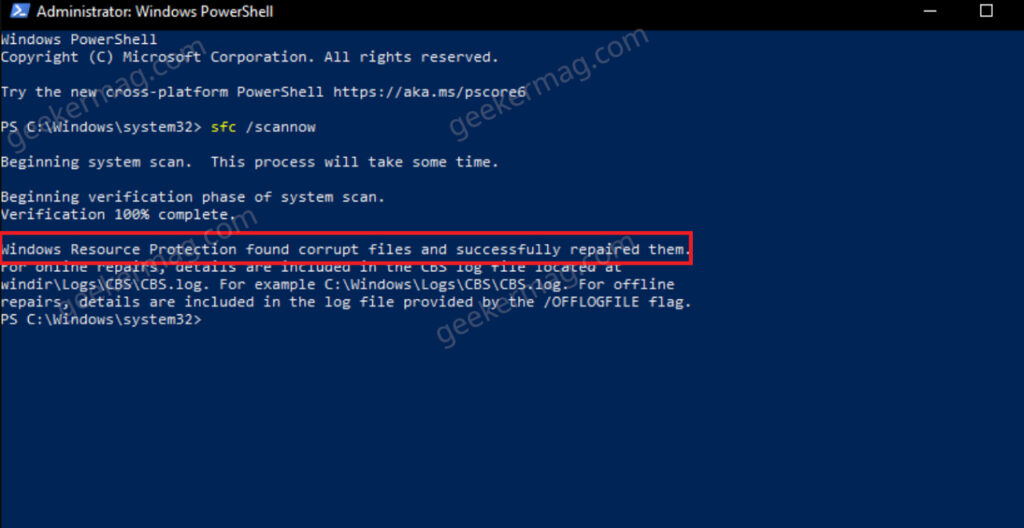
SFC (System File Checker) is a inbuilt troubleshooting tool that scan system files and fix issues related to them. Most of the time, “Windows Resource Protection found corrupt files” error message appear when SFC fails to fix the system files.
The full error message reads:
Windows Resource Protection found corrupted files but was unable to fix some.
The same error message can appear due to various issues like Outdated version of Windows OS, Interference of background processes, and maybe SFC lack resources to fix issues related to system files.
Fix: Windows Resource Protection found corrupt files in Windows 11
If you landed on this blog post, then definitely you’re seeing the same error message, right? Fortunately there are possible solutions that you can apply to fix this issue. So without further ado, why don’t read the first one:
Updates Windows To The Latest Version
Many times the issue may be caused due to outdated Windows. Updating Windows to the latest version should fix this issue.
Press Windows + I key combo to open the Settings app on your PC.
Here, on the left sidebar click on Windows Update, and then on the right side click on Check for Updates.
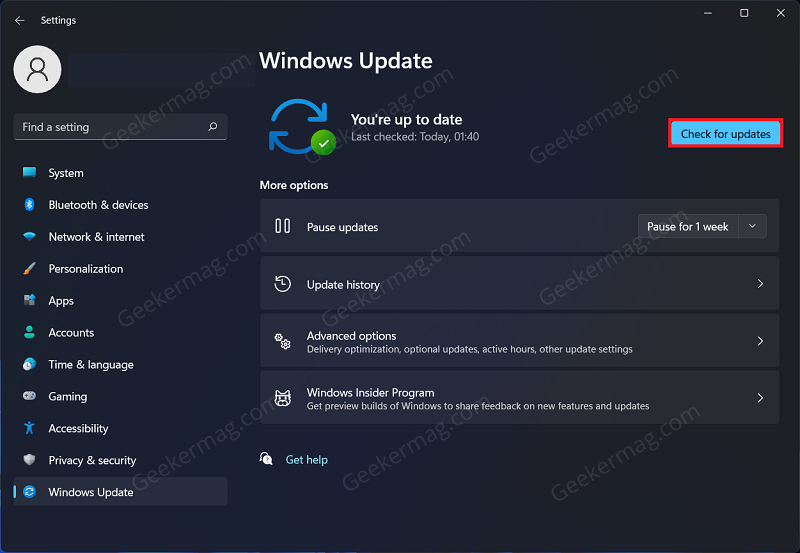
Now, download and install all the updates available here.
Once done, restart your PC and see if you still face the issue.
Run SFC Scan In Safe Mode
When in safe mode, your PC starts with minimum applications and processes. If you have been facing this problem when running the SFC normally then boot your PC into safe mode and then run the SFC scan. To do so, follow the steps given below-
Press the Windows key on your keyboard, and then in the Start Menu, type System Configuration. Click on the very first option that appears.
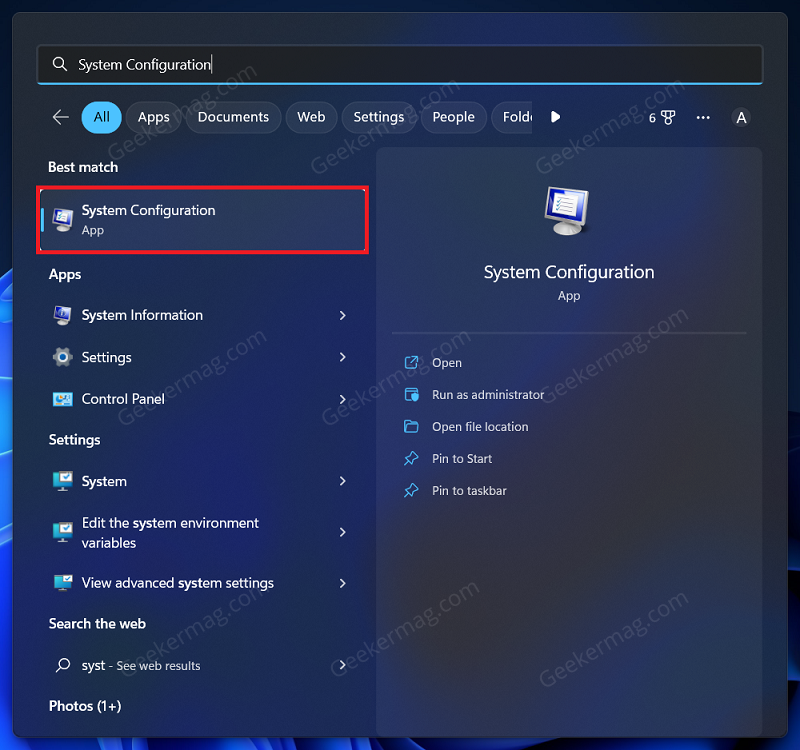
In the System Configuration window, click on the Book tab.
Under Boot Options, check the checkbox for Safe Mode and then select Minimal.
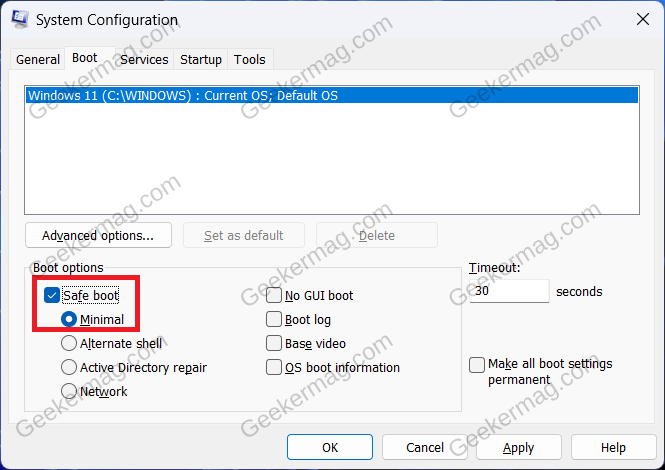
Click on Apply and then on OK. Now, restart your PC to boot into safe mode.
In the Safe mode, run the SFC scan again and this time it should fix the issue. If it fails, try the next method. Learn, how to exit safe mode.
Run DISM Scan
DISM or Deployment Image System Management scans for corrupted system files and replaces them by downloading the files from the Windows servers. You can run a DISM scan in case SFC fails to fix the issue you have been facing.
You can follow our guide to run a DISM scan and fix the issue you have been facing.
Uninstall Updates
If you start seeing this error message after installing an update, then its good to uninstall that update on Windows 11 PC. Some times updates mess up your system and cause such issues; uninstalling the update will fix it. To do so, follow the steps given below-
Open the Settings app on your PC by pressing the Windows + I key combo.
Under the Windows Update tab, click on Update History.
Next, under the Related Settings option, click on Uninstall Updates.
On the next screen, select the recently installed update and click on Uninstall.
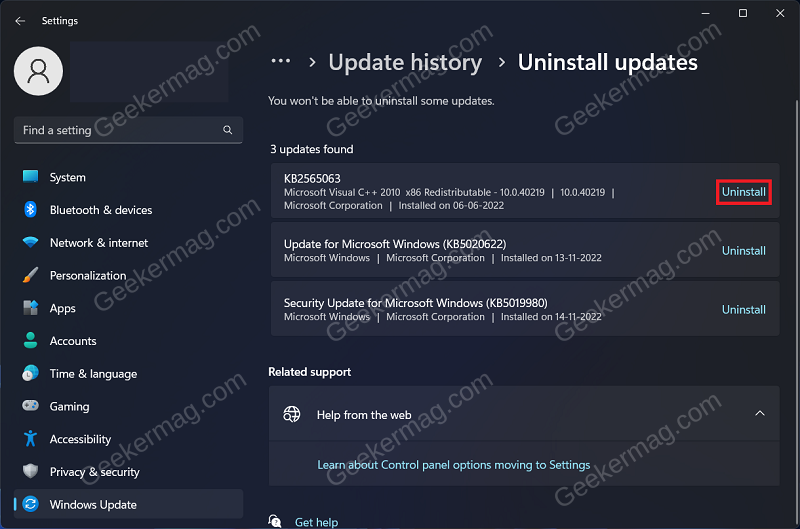
After that, reboot your computer and check if this fixes the issue.
Perform System Restore
If you started facing this issue recently after installing an application or making some changes to your system, then performing a system restore should fix it. You need to have a restore point to revert your system to. To continue with this method, follow the steps given below-
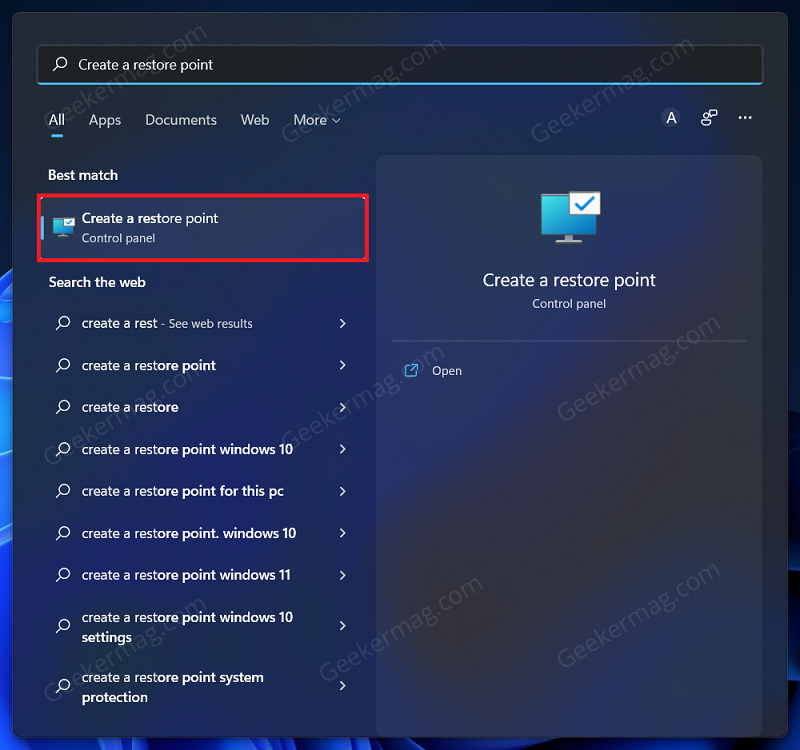
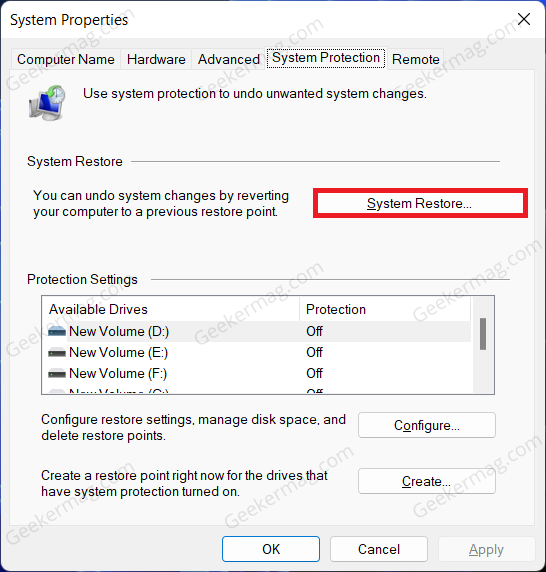
Press the Windows key and search for Create a restore Point. Click on the very first option that appears to head to the System Protection tab in System Properties.
Here, click on the System Restore button.
On the System Restore page, click on the Next button.

Now on the next screen, select the restore point and click on the Next button. In case, if you want to see what changes will be made to your system, click on Scan for affected programs button.
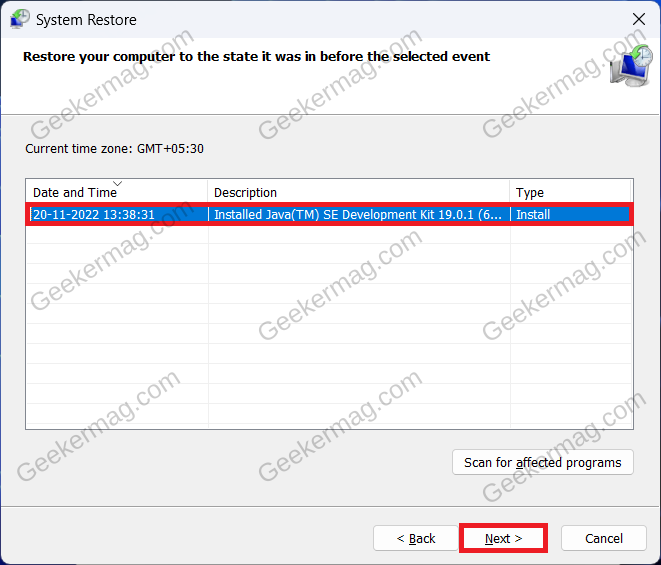
On the next screen, click on the Finish button. This will restart your PC and start the system restore.

Repair, Reset, or Reinstall
If nothing helps in fixing the issue, then a final solution that we recommend every user is to either Repair Install Windows 11, or if it fails, then Reset Windows 11, and if that also fails, then reinstall Windows 11.
So these are possible solutions that you can try to fix “Windows Resource Protection Found Corrupt Files” error message in Windows 11.
Why don’t you try these method and let us know which helps you in fixing the issue. Also, if you know any other solution, then feel free to share in the comments.


