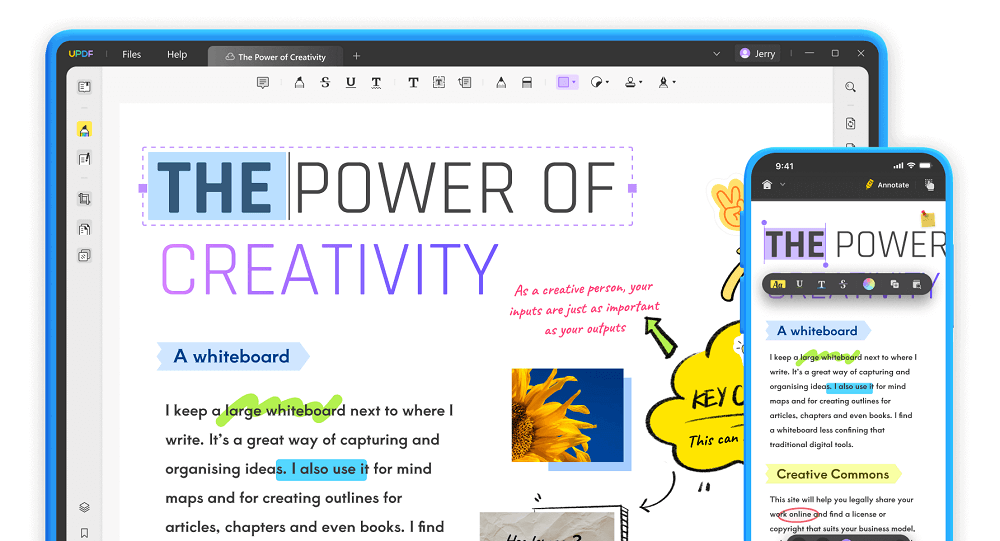
If you want to add extra text to your PDF on Mac, then adding a separate text box would do the trick. Mac users often want to fill in new content in PDF but don’t know how to add a text box to their PDF files.
Well, if you are facing the same issue, don’t panic because, in this article, we have discussed possible ways to add the text box to PDF on Mac accompanied by suggesting you the best and most suitable option for you. Continue reading the article to find out the best and most effective methods.
1. How to Add a Text Box into a PDF on Mac Using UPDF
When it comes to adding a text box into a PDF, there are many tools available, but if you are looking for the perfect option, then download UPDF. The good thing about this software is that it allows adding a text box anywhere you want.
Also, it comes with multiple features, including affordable prices, OCR function, batch processing, adding stickers, and supports one license for Mac, Windows, Android, and iPhone. What’s more, you can use the UPDF Cloud feature to access your files anywhere and protect your PDF files with a strong password.
Now, let’s discuss how to add a text box into a PDF using UPDF.
Go to the official website of UPDF and download the tool for your Mac device.
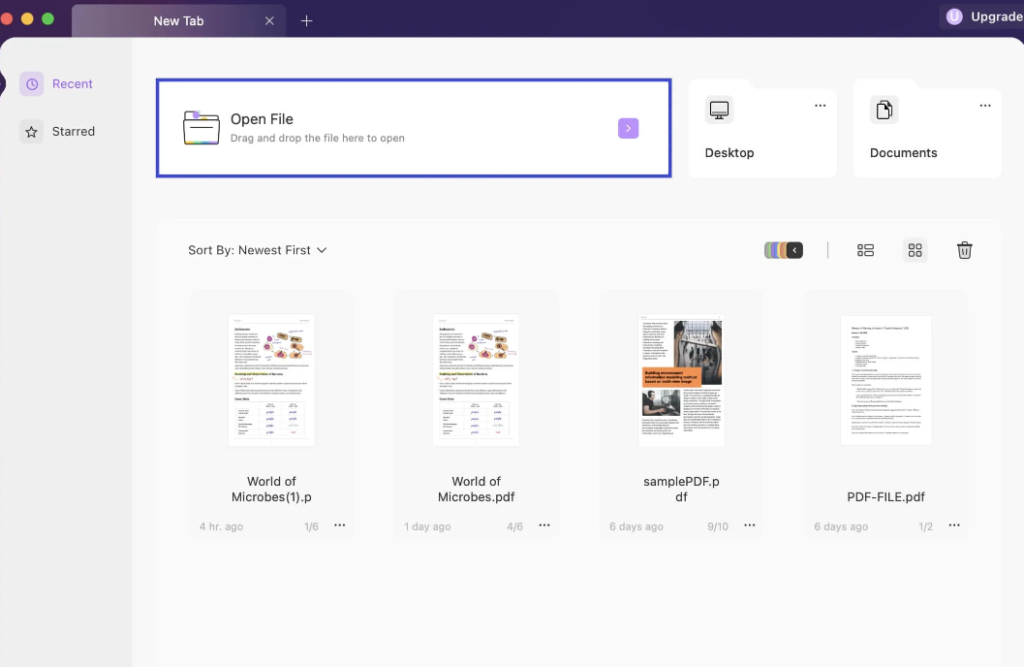
Next, launch the app and click the “Open File” button to upload your PDF where you want to add the text box. You can also drag and drop the file.
Once the file is uploaded, go to the Edit PDF option so you can turn on the editing mode of the app.
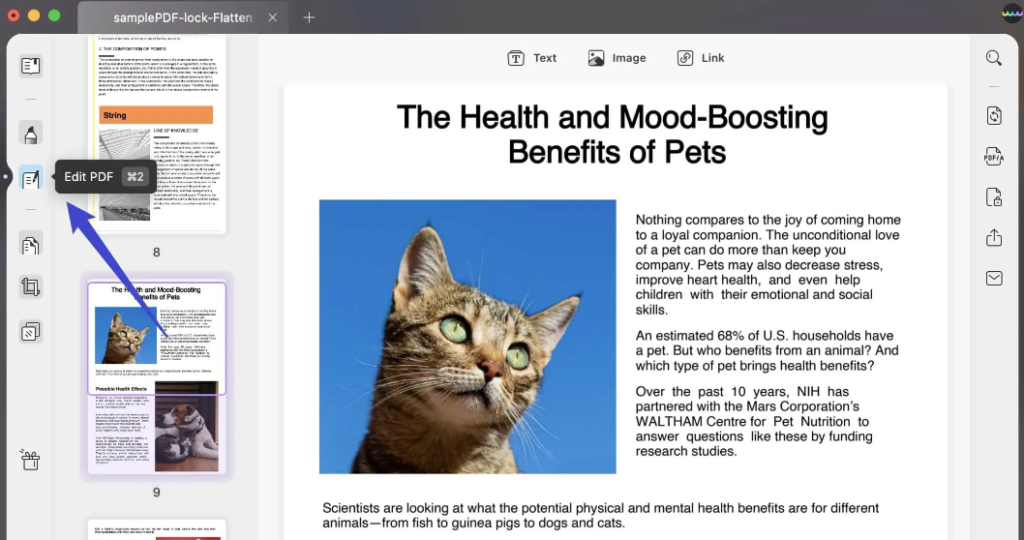
Now, click the “Text” option and choose the area where you want to add the box.

Once you have added the text box, start typing the Text. You can also adjust the font, color, and other settings.
After that, save your file and enjoy.
2. How to Add a Text Box to a PDF Using Acrobat on Mac
The second tool which you can use to add a text box is Adobe Acrobat. It is a good PDF editing application that helps in adding text boxes to a PDF file.
So, if you have missed some information and want to add it to your PDF via a text box, then you should definitely try this software. Below is a step-by-step guide that you can follow to add a text box to your PDF.
First, launch Adobe Acrobat on your Mac and upload the PDF where you want to add the text box.

On the left side, you will see the “More Tools” option, so click it.
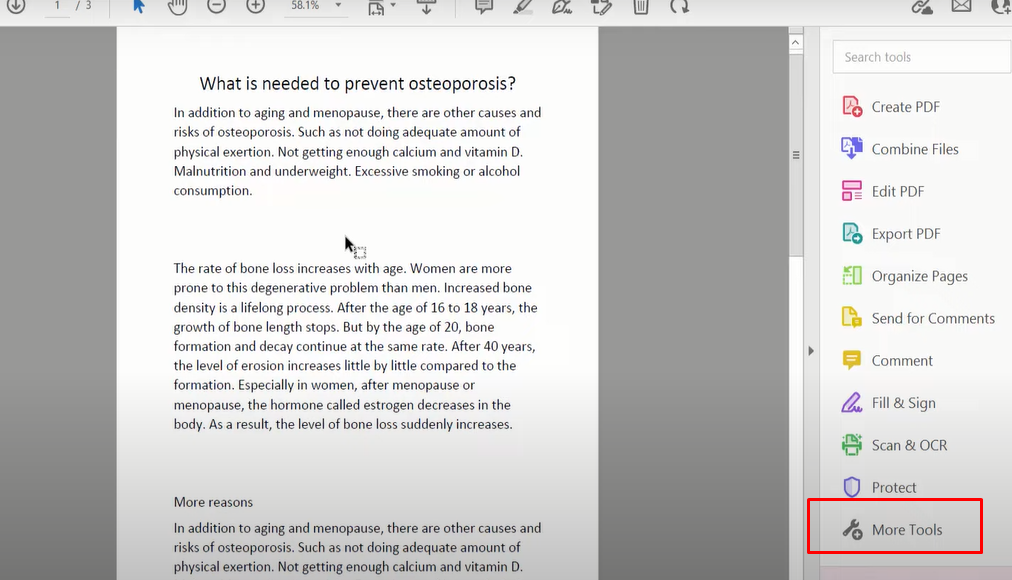
You will be redirected to a page from where you can choose the “Comment” option.

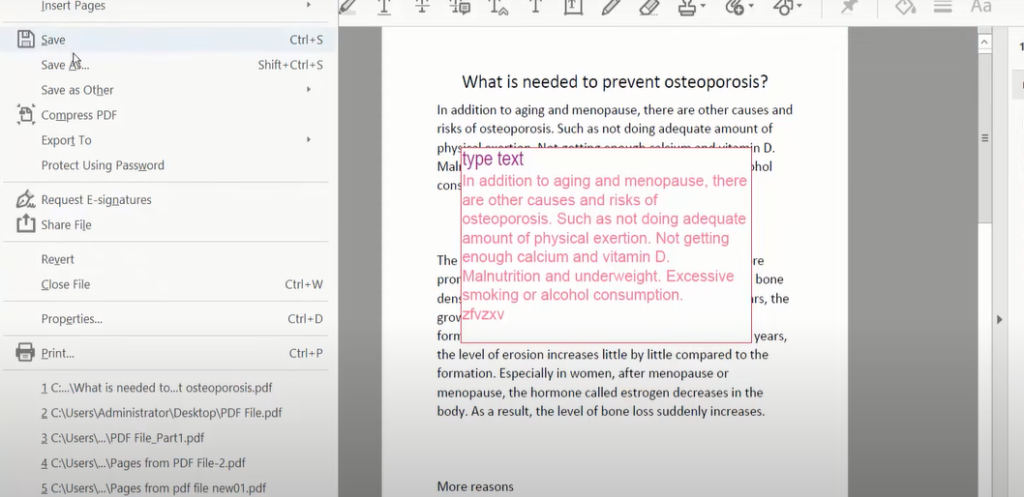
You will get different options on the menu as we want to add the text box, so click the Text icon.
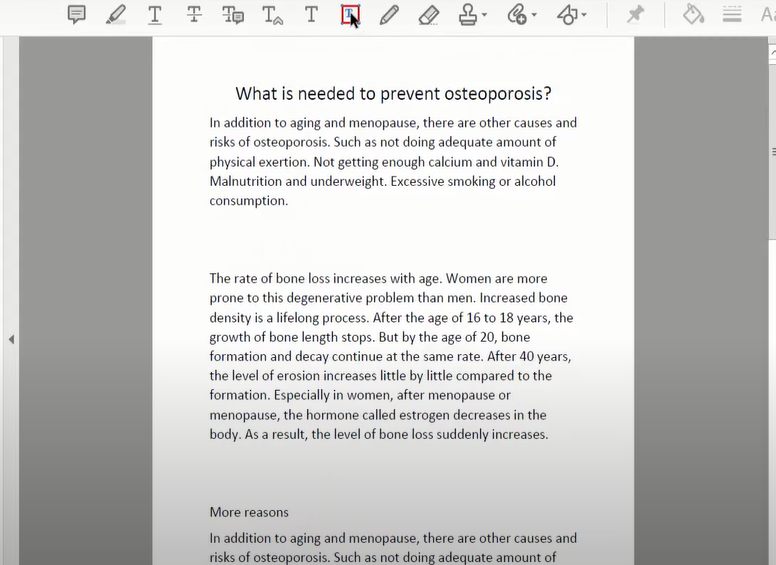
Drag the text box to the required location and start typing the text.
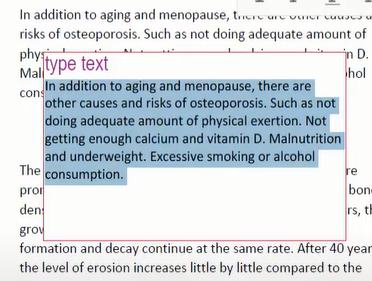
After adding text in your Text box, adjust its format, including size, color and etc.
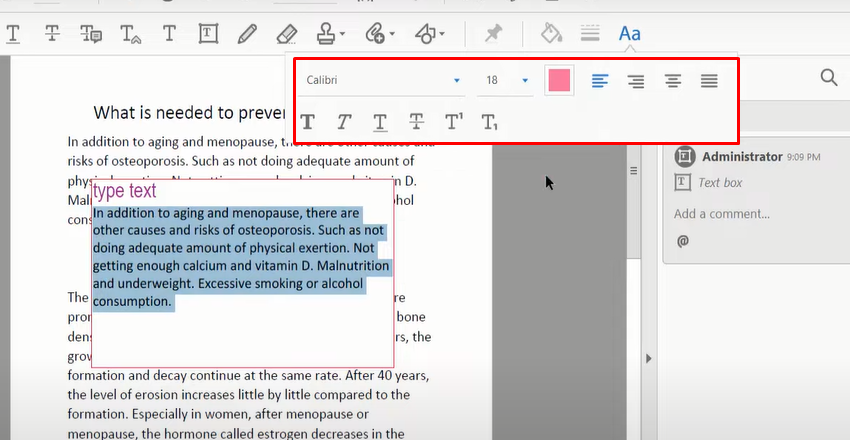
Once you are done with formatting, save the file, and you are good to go.
3. How to Add Text Boxes to PDF in Preview on Mac
If you don’t want to use other third-party apps to add Text boxes, then Mac users can try Preview, which is a built-in application used for opening PDF files.
Thanks to Preview, it is easier to add a text box with different methods; the first one is using Annotate, and the second is adding the Text box directly using the Text tool option. You can also use keyboard shortcuts to create the text field.
Let’s discuss all these methods.
1. Add Text via Annotate Option
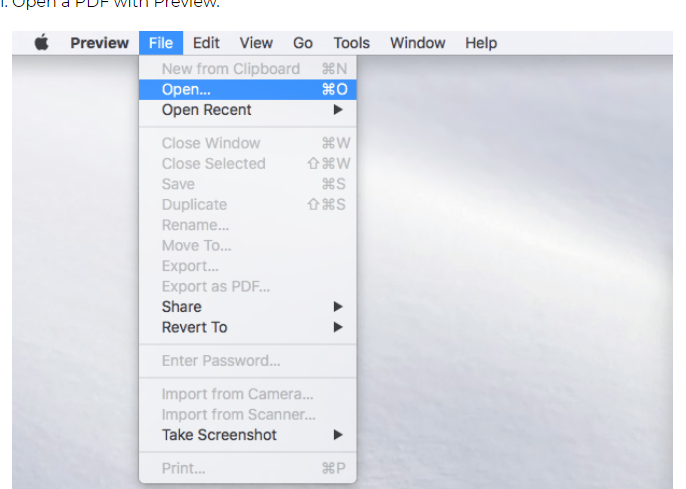
Open the Preview application, go to the File menu, and click the “Open” button to upload the required PDF file.
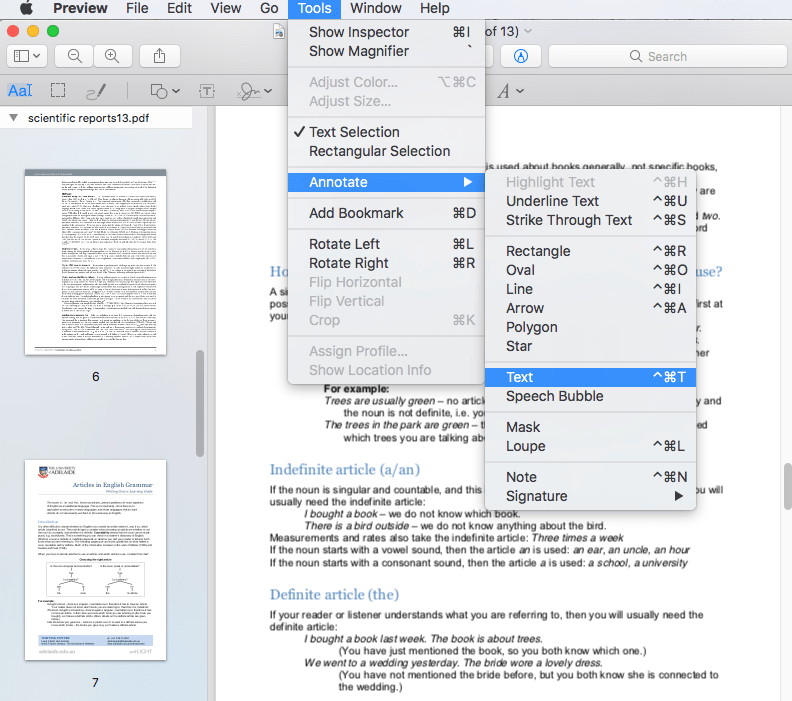
Once you have added PDF, go to the Tools option, click “Annotate,” and choose the Text button.
You will see the Text box on your PDF file, so move it to the location where you want to add the text.
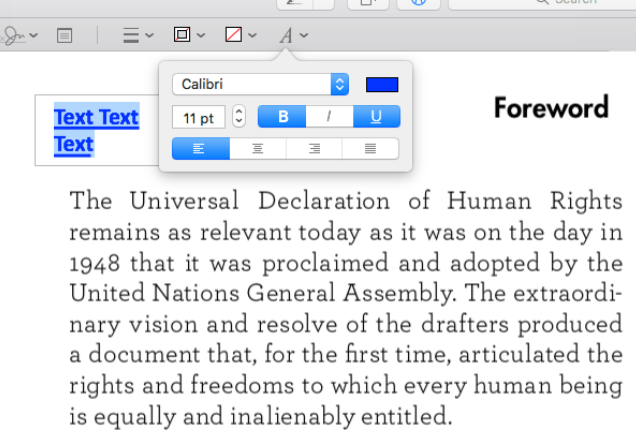
Start typing in the Text box, and don’t forget to do the formatting. You can adjust the font size, color, and much more.
Once done, again click File and save your PDF.
2. Via Markup Tool
Open the PDF file in Preview, go to the “Tools” menu, and choose the “Show Markup Tool” button.
Next, click the Text Tool icon to add the text field.
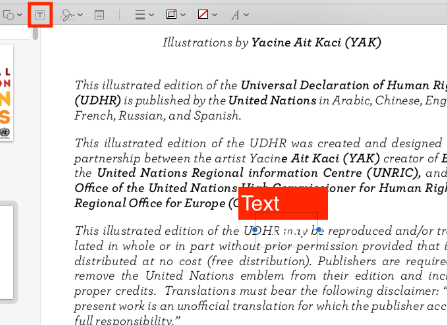
Once done, add the text in the box and start formatting it. As mentioned above, you can quickly adjust the font size and color according to your requirements.
If you want to move the text box to a different location, then bring your mouse near the border of the box and place it in your desired area.
3. Via Command
If you are in a hurry and want to save time, use the “Control + Command +T” keys to add a text box to your PDF.
So, these were the top three ways to add a Text box to PDF via Preview software. Remember that, with this app, you can only add the text box in a blank area. So, if you want to add the text box in a place where Text is already present, first remove it using the White color and then try the above methods.
4. Which Method is Better?
Below is the comparison table which will show you which way is better to add a text box to PDF.
| UPDF | Adobe Acrobat | Preview | |
| Pricing | $39.99/Year $59.99/Perpetual | Standard Version: $155.88/year Pro Version: $239.88/year | Free |
| Platforms | Windows, macOS, iOS, Android | Standard: Windows and macOS Pro: Windows, macOS, iOS, and Android | macOS |
| Edit PDF | Yes | Yes | No, it doesn’t allow you to edit the current text in your PDF. However, you can add the text box to replace the data. |
| Read PDF (Read, View, Open) | Yes | Yes | Yes |
| OCR | Yes | Standard version: No Pro Version: Yes | No |
| Organize PDF | Yes | Yes | Yes |
| Protect PDF with Password | Yes | Yes | Yes |
| Merge PDF | Yes | No | No |
| Create Text Box | Yes | Yes | Yes |
Winner: UPDF
From the above comparison table, we can conclude that the clear winner is UPDF because it provides more options as compared to Preview and Acrobat. Also, UPDF is easy to use and works on all operating systems.
So, if you want to add a text box to PDF on Mac, UPDF is the correct method for you. Below we have explained in-depth why you should choose UPDF over Preview and Acrobat
UPDF is Better in Pricing
The hefty price of Acrobat makes it difficult to afford for users, especially students. So, if you are a beginner who wants to add a text box to your PDF, then using UPDF would be the correct decision because it is less expensive and they also offer special discounts for students. Furthermore, Preview can also be an option as it is free, but it lacks functionalities.
UPDF is Compatible with all Platforms
UPDF works on multiple platforms, including Windows, macOS, iPhone, and Android. Also, you just need to purchase a single license to run the program on the devices. On the other hand, Preview is only available for Mac users.
UPDF Interface is User-Friendly
When it comes to interface, we recommend using UPDF because it has a straightforward interface. You can easily add text boxes, edit PDF files, add stickers, and more without any hassle. On the other hand, Preview and Acrobat are complicated to manage.
UPDF Has More Powerful Editing Tools
When it comes to editing and adding text box Preview wouldn’t be the right choice. Yes, that is correct. In Preview, you can’t edit the text in PDF. On the other hand, you can find all these options in Acrobat, but you have to pay extra to get these features. So, it is a good idea to use UPDF because it has more options when it comes to adding and editing a Text box, and the price is also affordable.
UPDF is Faster
As compared to Preview and Acrobat, UPDF is faster, so if you have large PDF files and want to add a text box to your PDF, then this tool will do it quickly.
Final Words
That’s it, folks! We have discussed all the possible ways to add a text box to PDF on Mac. You can try the methods according to your preferences. However, if you want a fast solution, then we suggest using UPDF because it adds the text box without causing any issues.


