BSOD errors are very common in devices running Windows 10 and other versions of Windows OS. One such BSOD error is Critical Process Died.
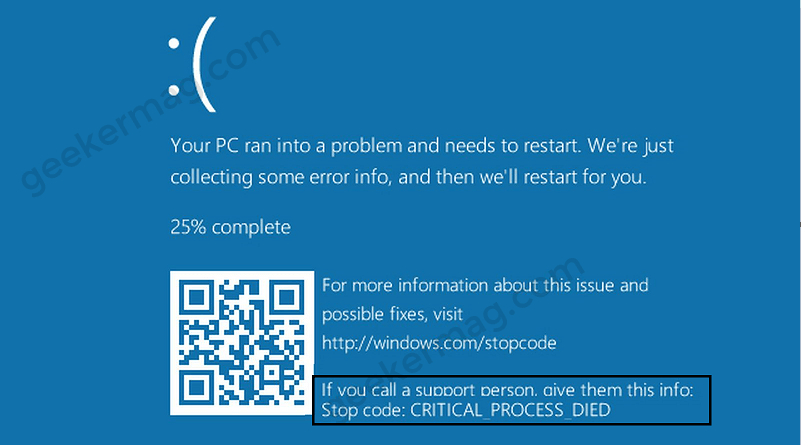
If you’re a victim of Critical Process Died BSOD, your device will stop unexpectedly and a blue screen with error code 0x000000EF accompanied by Stop Code: Critical Process Died
There are various reasons why you’re seeing Critical Process Died BSOD stop code. It may be because of corrupted Windows updates, corrupt system files, incompatible device drivers, and various others. It’s very hard to tell what is causing the issue to appear, and all you can do is troubleshoot the issue.
Well, there are several ways to fix the Critical Process Died error if you encounter it in Windows 10, and here we will be discussing some of these methods.
Run Hardware And Device Troubleshooter
You may encounter this issue due to certain hardware installed on your computer. You may try running a hardware and device troubleshooter if you face this issue.
You will have to access the Hardware and Device troubleshooter from the Command prompt as it has been removed from the Settings menu. Run the Command Prompt on your PC.
In the Command Prompt, type the command msdt.exe –id DeviceDiagnostic and hit Enter. This will open the Hardware and Device troubleshooter on your PC. Follow the on-screen instructions to run the troubleshooter.
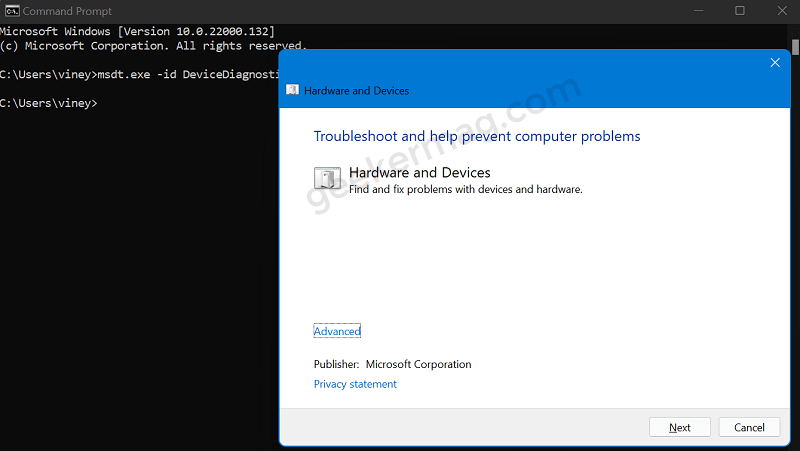
This will show you the problem with hardware if there is any. You will be able to fix the problem, and you will no longer face the Critical Process Died error.
Run DISM Scan
The above method was a basic troubleshooting step. If that doesn’t help you, then you will have to move to the next troubleshooting method, that is, running a DISM scan. DISM or Deployment Imaging and Servicing Management tool scans your PC for corrupt system image and fixes it.
If you are facing the Critical process died issue, then you may try running the DISM scan. To run DISM scan, follow the steps given below-
Click on the Search icon on your taskbar, and search for CMD. Right-click on the Command prompt from the search result and then click on Run as administrator. This gives administrator privileges to the Command prompt.
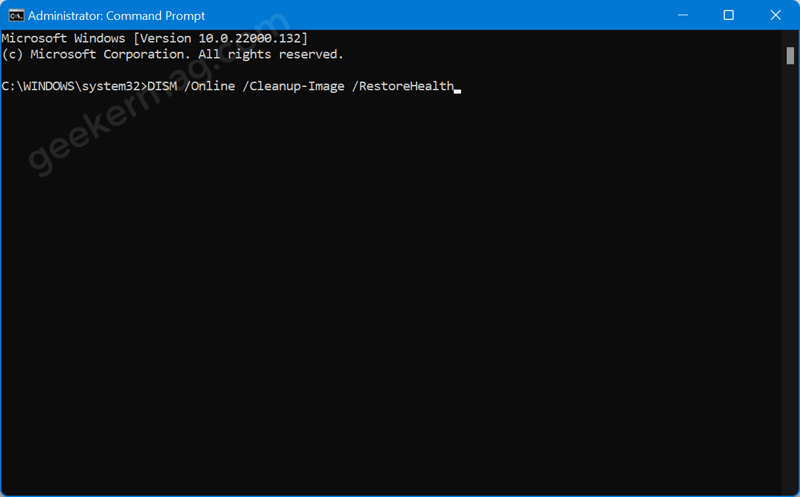
Now in the command prompt, type the command: DISM /Online /Cleanup-Image /RestoreHealth and press Enter to execute the command.
This will scan your PC for corrupt system images. This may take some time. Do not close the command prompt until the process has been completed.
Run SFC Scan
SFC of System File Checker scans your PC for corrupt system files. To run an SFC scan, follow the steps given below-
Press the Windows key on your keyboard. Now type CMD. Right-click on the Command Prompt and then click on Run As Administrator.
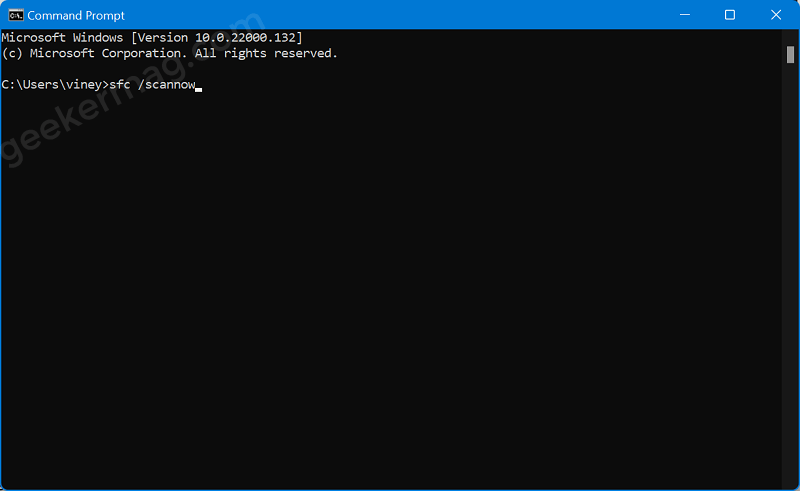
In the command prompt, type the command: sfc /scannow and hit Enter.
Scan Your PC For Virus
You might encounter this error due to malware or virus on your system. Many times virus on your PC may be the reason why you may face the issue. You should try scanning your PC with antivirus software and then check if you still get the error or not. You can use third-party antivirus software, or you may also use Windows Defender to scan your PC for the virus.
Update The Drivers
Outdated drivers may also be the reason why you are facing this issue. You can try updating the drivers, and then check if you still face the issue or not. Here’s how you can do that:
Press WIN + X key combo and when the menu appears, click Device Manager.
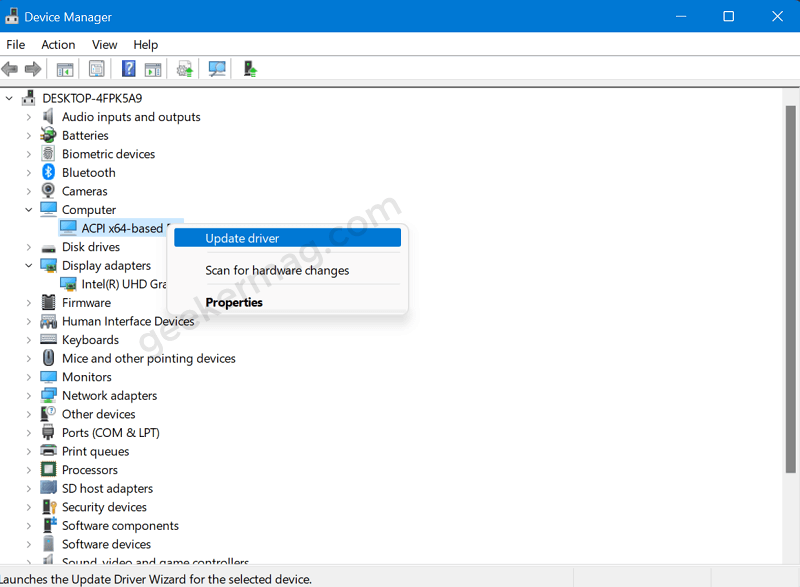
Here, you will get a list of all the devices. Check if any of it is showing a yellow exclamation mark. Update it and check if this fixes the issue.
Alternatively, you can use third-party apps like Driver Booster or DriverPack Solution to update the drivers on your PC. When you install system updates, the drivers also get updated automatically. If you are using a laptop then you can get drivers for your laptop on the official website of your laptop.
Uninstall Windows Update
If you are getting this issue after installing the Windows update, then the update might be causing the problem. You can try uninstalling the recently installed Windows update. To uninstall Windows Update, follow the steps given below-
Head to the Settings app on your PC by pressing Windows + I key combo.
Click on the Update & Security option, and then click on Windows Update.
Here you will see the Update History option. Click on it, and then click on Uninstall updates.
Now, the next Window will show all the updates you installed on your system. Select the problematic update, and then click on Uninstall.
After uninstalling the update, try restarting the PC, and check if you get the error or not.
Perform A Clean Boot
You can perform a clean boot to see if that fixes the issue. Clean boot is a start-up mode that uses minimum drivers, programs, and processes. To perform a clean boot, here’s what you need to do:
Check out our detailed post on how to perform a Clean boot in Windows 10.
Press the Windows + R key combo, and then in the Run dialog box, type msconfig and then click on OK.
This will open the System Configuration app. Here head to the Service tab.
Now, uncheck the Hide All Microsoft Services checkbox, and then click on Disable All.
After doing so, head to the Startup tab and click on Open Task Manager.
Head to the Startup tab in the Task Manager.
Now, select the programs here, and click on Disable to disable them. Do this for all the programs individually.
Once, done restart your computer and your issue should be solved.
Reset Your System
If any of the above methods didn’t help you, then you should try resetting your PC. To reset your PC, follow the steps given below-
Head to the Settings app on your PC.
Click on Update & security.
Now head to the Recovery section in the left sidebar.
Click on Reset this PC.
You will see a screen with two options- Keep My files and Remove Everything. Select any of the options as per your preference.
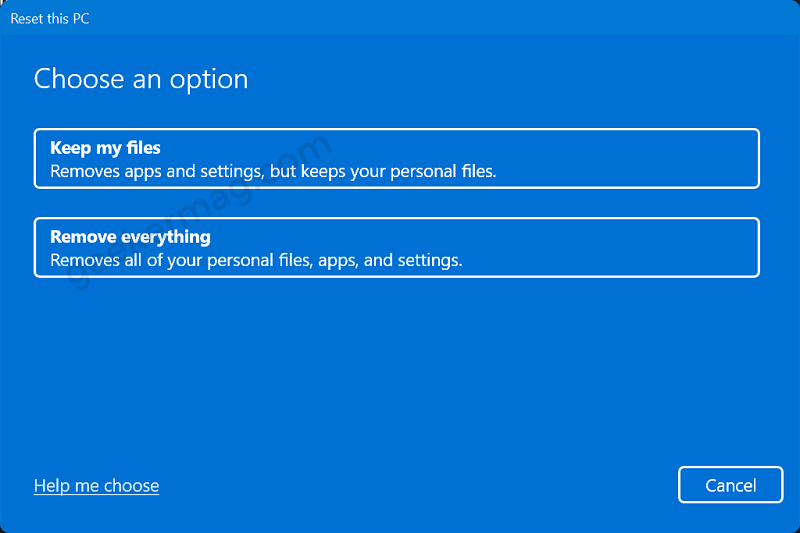
Follow the on-screen instructions and you will be able to reset your PC.
You can either try reinstalling Windows 10 on your PC and check if that solves the issue or not. Reinstalling Windows should most probably fix the issue for you.
Update Your BIOS
If you still encounter the issue, then you should try updating your BIOS. BIOS may be the root cause of the issue if you still face it even after trying all the above methods. To update your BIOS, you should read your Computer’s guide to do so.
That’s how you can fix the Critical Process Died error in Windows 10. If your problem isn’t solved yet, then you should take your PC to the IT technician and get it repaired.
