Some users reporting that mysteriously Bitlocker blocked their hard driver and asking them to enter a 32-digit recovery key to unlock the hard drive.
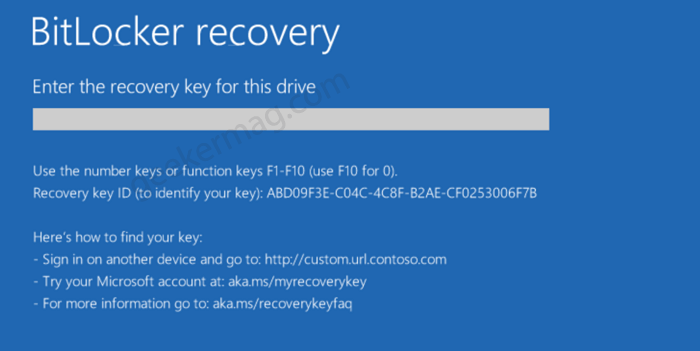
Now there’s a problem, the majority of the users have never installed or set up Bitlocker. While some users reporting that it’s a brand new laptop used and managed by themselves. So there’s no chance that someone else enabled BitLocker on their laptop.
These users already visit Microsoft account that linked with their Windows 10 device to recover Bitlocker recovery keys, they didn’t find any because it never set up. This Bitlocker recovery key issue is very popular among users who own dell laptops.
Fix – Bitlocker need Recovery key that’s never installed in Dell Laptop
After checking various forums and dell support pages where the majority of users have discussed the same issue and of course, solutions that help them in fixing the issue. In the following blog post, we will share solutions to BitLocker recovery key bypass.
Restart your device when dell logo appear, press F2 key to open BIOS configuration.
Here, you need to head over to the Security tab and click on (+) icon to expand more options, and then select PTT Security.
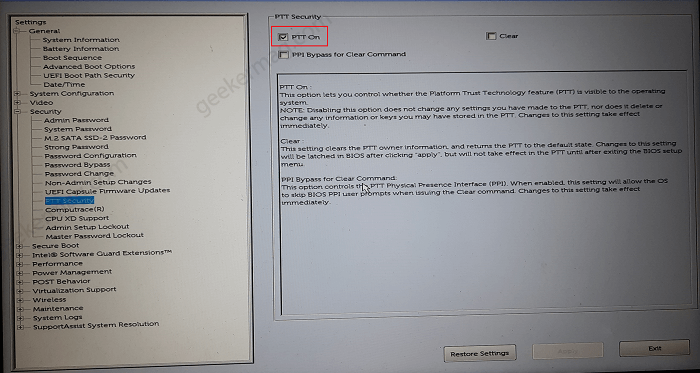
On the right side, check the box for Platform Trust Technology (PTT) or Trusted Platform Module (TPM) and then click Apply/OK.
After that, head over to Secure boot option. Click on (+) icon and unlock more options.
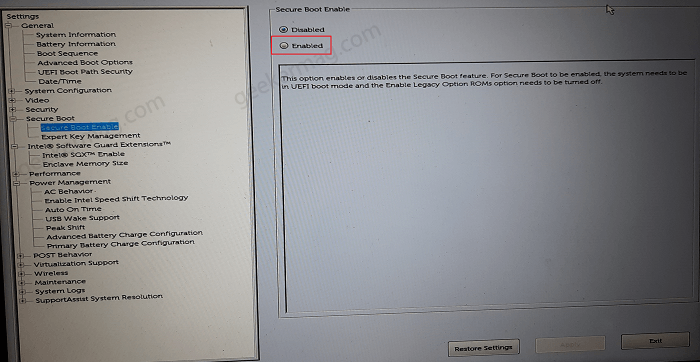
Under this, you need to make sure that ‘Secure Boot enabled‘ option is enabled. If disabled, select Enabled and then click Apply.
After that, select Expert Key Management and then click the Restore settings button and then select the Factory settings option from the dialog box.

Click OK/Apply and then click Exit to button.
After doing this windows should load normally without asking for BitLocker recovery keys.
In case, you’re using device from another manufacturer, then you can visit your device BIOS and then try to perform steps to fix the issue.
That’s all about this blog post. Why don’t you try this workaround and let us know if this fixes the issue for you. In case, you know any other solution, then feel free to share in the comments.


