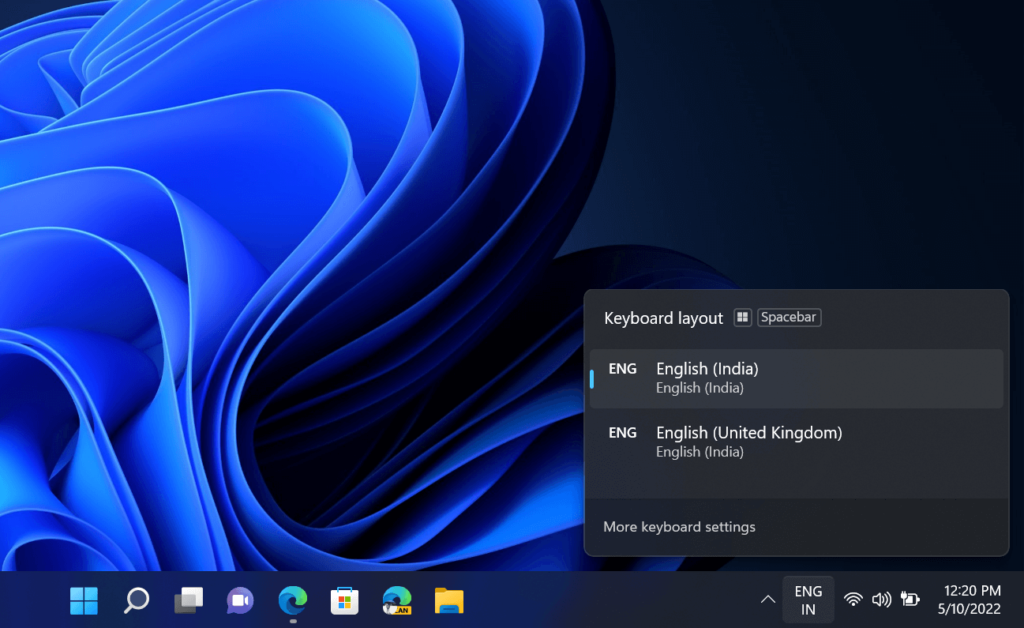
Windows 11 allow you to easily add a new keyboard layout for different languages. It’s useful especially when you have to deal with different languages at Home and Office. Once you add a Keyboard for different languages, you can easily switch between by pressing WIN + Space key combo.
Sometimes you want to remove a particular keyboard layout from Windows 11. It’s because you no longer need it, re-add it because it’s not working properly, or whatever reason you have. Fortunately, that is also super easy to do.
How to Fix “Can’t Remove a Keyboard Layout” in Windows 11
However, some users facing issues when trying to remove the keyboard layout in Windows 11. And if you made up to this blog post, then you’re one out of them for sure. Learn how to fix the “Can’t Remove a Keyboard Layout” issue in Windows 11.
Use Windows 11 Settings App to Remove Keyboard Layout
Open Windows 11 Settings with Windows + I button on your keyboard and then go to Time & language settings.
Click on the Language & region option on the right side.
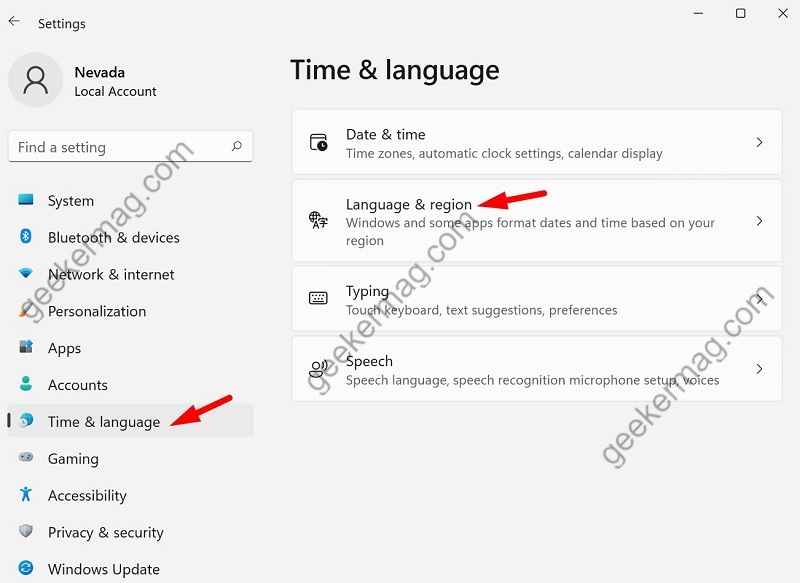
In the language section, choose the language layout that you want to remove and click on the three-dot icon.
Then click on the Remove option from the menu.
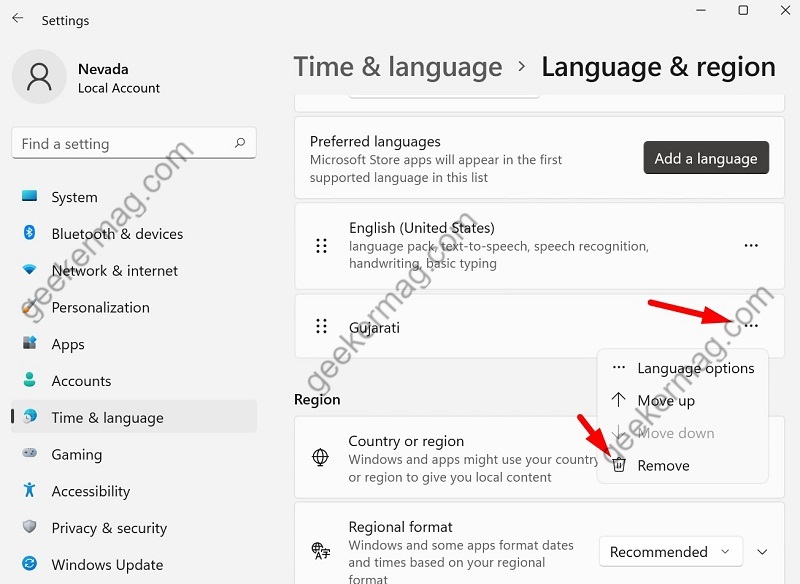
Now the selected keyboard layout will be removed from your Windows 11.
Fix 2: Use Registry Editor to Remove Keyboard layout
If method 1 is not working for you then you can use the registry editor to remove the keyboard layout.
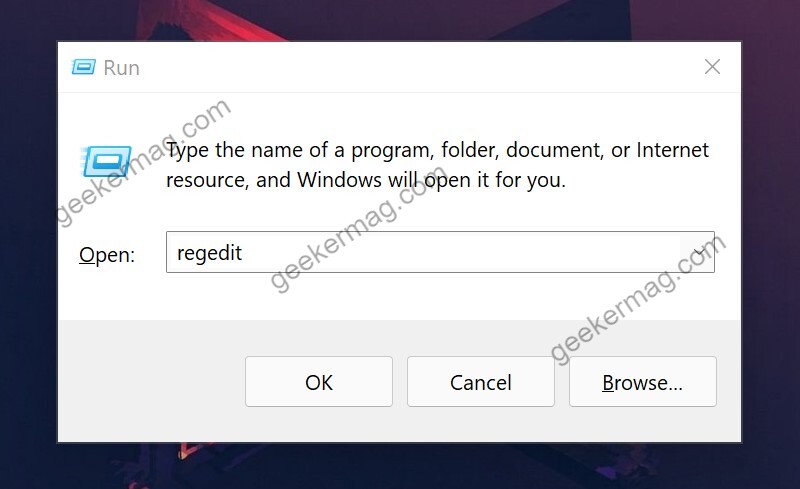
Press Windows + R key on your keyboard to open the Run command tool. In Run type regedit and press enter to open the Registry Editor.
In the Registry Editor, navigate to this location:
HKEY_CURRENT_USER\SYSTEM\Keyboard Layout\Services\Preload
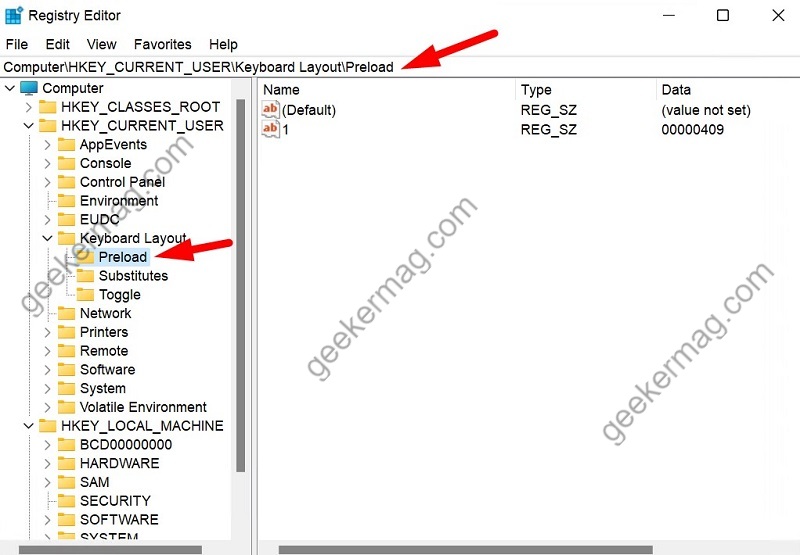
In the right sidebar, you will see values. Each key represents a keyboard layout for a different language.
To check which key is for which layout, click here. Copy the key value and search for it on the website.
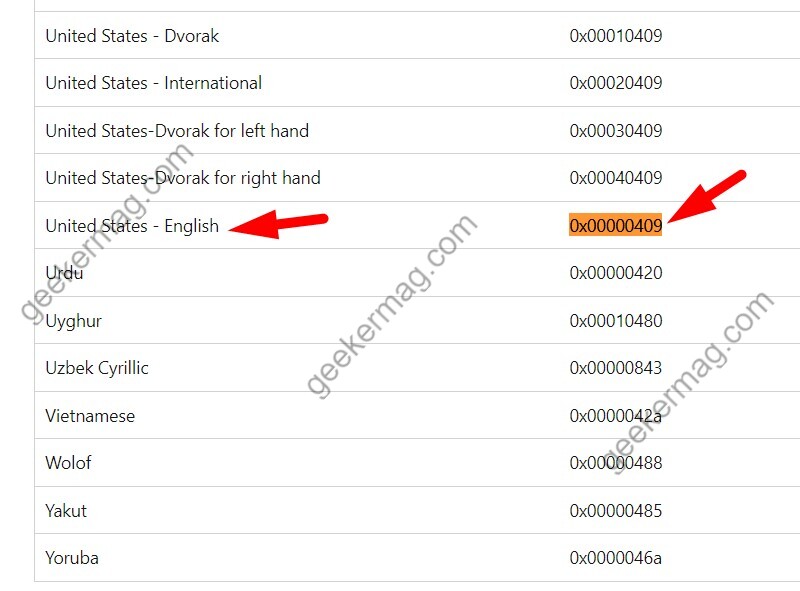
Once you found the key to delete, right-click on it and choose delete.
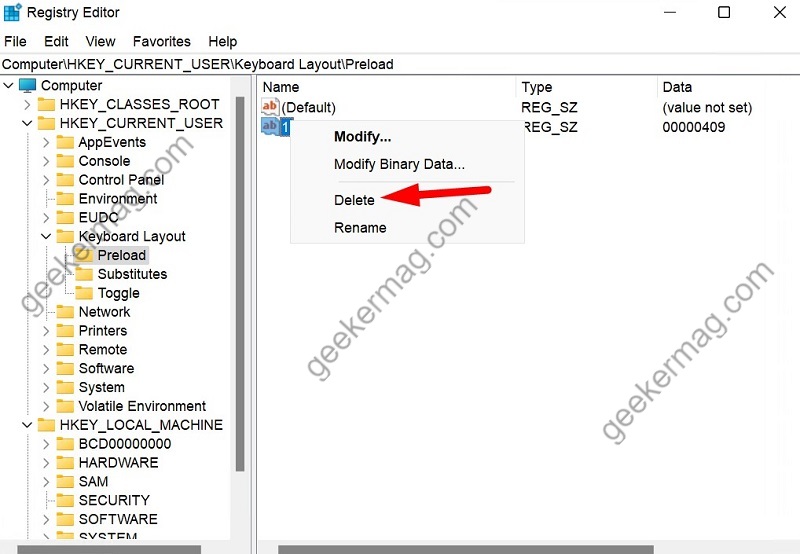
For example, we like to remove the English keyboard layout. Its value data is 00000409.
Close Registry Editor and reboot your system. You will see that the keyboard layout will be removed.
I hope the solution suggested in this blog post helps you in fixing the Can’t remove keyboard layout issue in Windows 11.


