Microsoft has set TPM 2.0 as the basic requirement to upgrade to Windows 11. All the latest PC comes with TPM 2.0, especially if you have purchased a laptop or desktop after 2016. The feature is available since 2011 but at that time manufacturers bake it in business computers.
If you don’t know TPM means Trusted Platform Module, it’s a tiny chip integrated on the motherboard. Its purpose is to keep credentials, encryption keys, and sensitive data.
If you’re planning to upgrade or install to Windows 11 on your PC, then before doing that it is very important to check whether your PC has TPM 2.0 or not. Otherwise, upgrade or installation process with fail to install This PC Can’t Run Windows 11.
How to Check If Your PC has TPM 2.0 [Different Ways]
If you made up to this blog post, then it is possible that you also want to confirm if your device support TPM security or not, right? Fortunately, there are various ways to confirm if your device comes with TPM support or not.
Using TPM Management
You can take the help of TPM Management to figure if your device support TPM or not. Here’s how you can do that:
Press the Windows + R key combo to open the run dialog box.
In the run dialog box, type tpm.msc and click on OK. This will open TPM Management On Local Computer window.
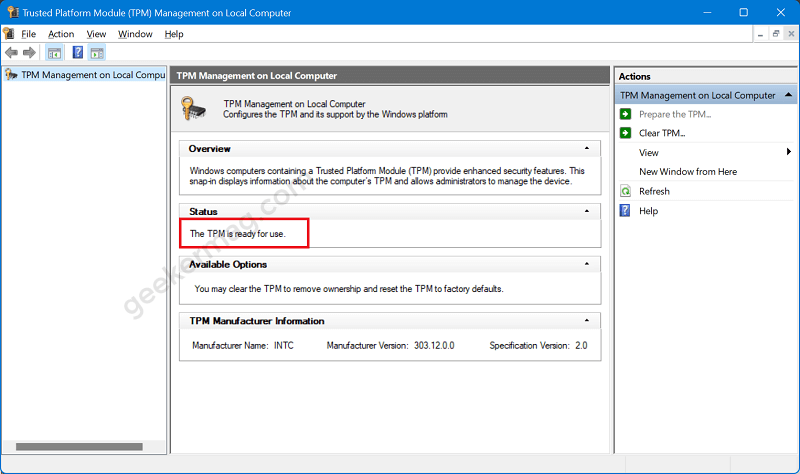
You will be able to find the version of TPM under the TPM manufacturer information section.
Using Device Manager
You can easily find out if your device supports TPM 2.0 or not using Device Manager. Here’s what you need to do:
Click on the Search icon on the taskbar, then search for Device Manager and when it appears in search results, click to open it.
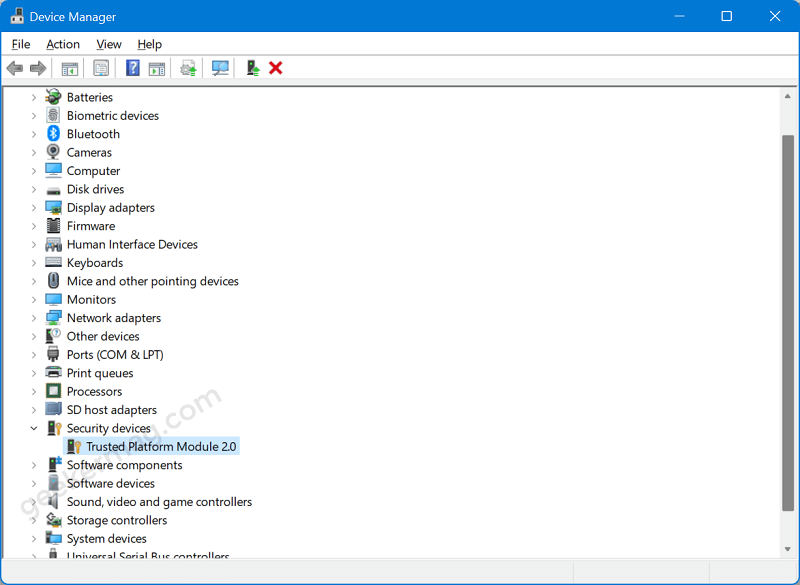
Navigate to Security devices and expand the option by double-clicking on it.
If you find the Trusted Platform Module 2.0 device listed under it, then it confirms that your device support TPM.
Using Command Prompt
With Command Prompt, you can perform various tasks. The good thing is that you can also find if your device supports TPM by executing a single command. Here’s how you can do that:
Launch Elevated Command Prompt.
For that, press the Windows key and search Command Prompt. When it appears in search results, right-click and select Run as administrator
In the Command prompt, type the command: wmic /namespace:\\root\cimv2\security\microsofttpm path win32_tpm get * /format:textvaluelist.xsland hit Enter.
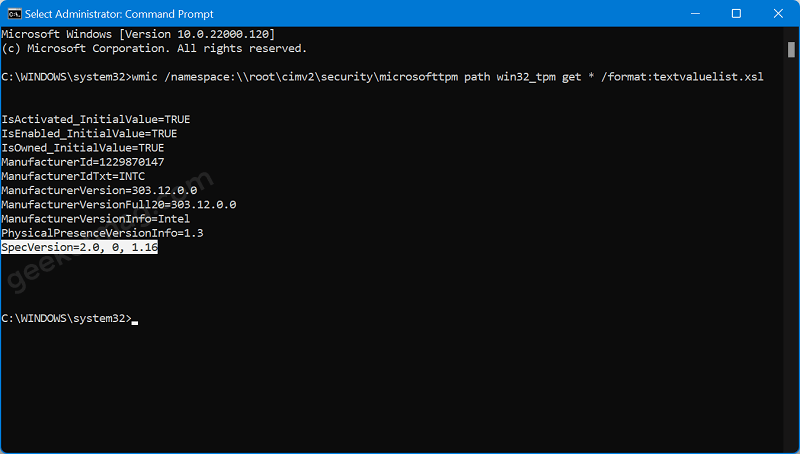
Instantly, it will through some information on the screen. Here, look for SpecVersion and you will be able to find the TPM version on your PC.
If SpecVersion= 2.0 then your PC has TPM 2.0.
Checking TPM Version Using Windows Security
Windows Security comes preinstalled in Windows 10 out of the box. Microsoft has added a dedicated setting page where you can easily find out if your device has the support of TPM or not. Here’s how you can do that:
Click on the Search icon in the taskbar. Here search for Window security and open it.
On the left side, click on Device Security.
On the right side, click on the Security processor details under the Security processor section.
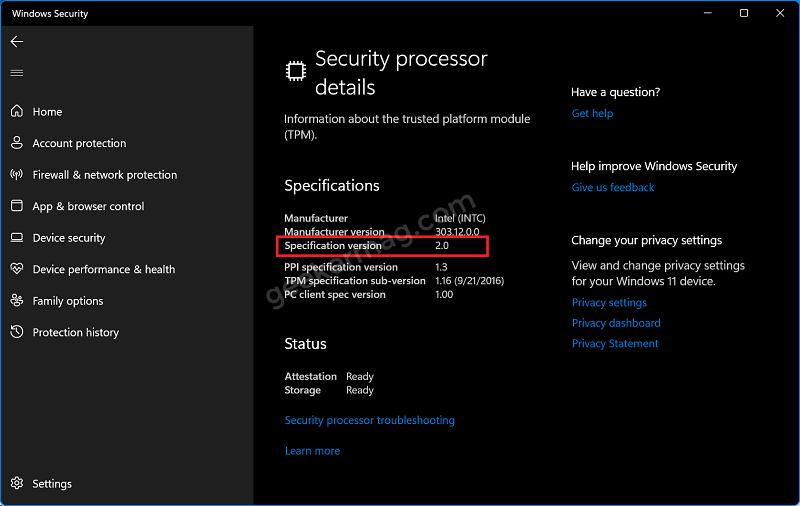
Here, under the Specification section look for the Specification version, if it is 2.0, then your PC has TPM 2.0.
Using BIOS
You can also take the help of the BIOS setting to find out if your device comes with a TPM chip or not. Here’s how you can do that:
Enter BIOS on your Windows 10 PC. For that, shut down your PC.
After your PC has been shut down, press the power button. As soon as your press the power button, you will have to access BIOS. You can do so by pressing the F1, F2, F10, F12, or DEL keys.
The key to access BIOS can vary depending on your PC. You can search on the internet for the key to access BIOS on your PC.
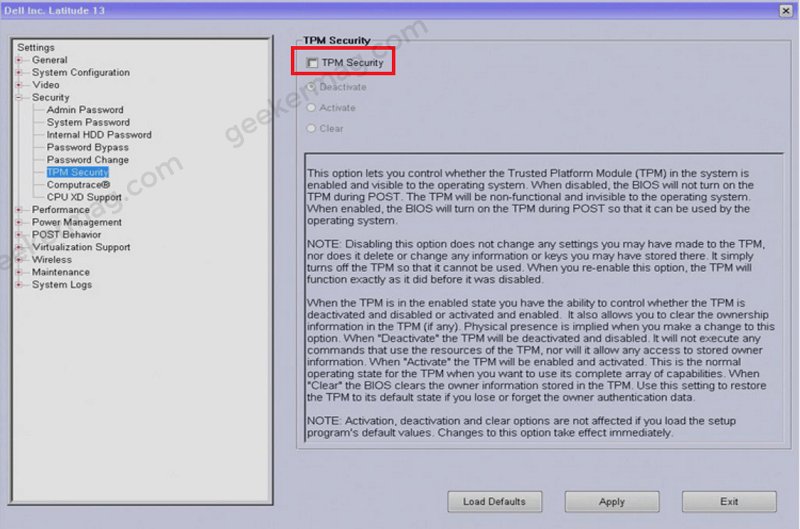
Head to the Security tab in the BIOS menu.
In the Security tab, search for Security chip type. If the Security chip type is TPM 2.0, then it means your PC has TPM 2.0.
In some devices, you might find PTT instead of TMP.
So these are some of the possible ways using which you can find out if your PC comes with TMP 2.0 support or not. If you know any other way, then feel free to share with us in the comments.


