Creating a Group in Outlook.com is super easy, and in this blog post will share with steps on how to delete Groups in Outlook.com
With the help of Groups feature in Outlook.com, users can easily connect with a group working on the same purpose. It is a very handy tool which Microsoft has added to Outlook, and users will definitely going to take advantage of this feature.
But what to do with a group once the purpose for which it is created is done? It is a good idea to save important data to your computer and delete it. But the question is how to delete a group in outlook.com.
Although creating a group in Outlook.com is easy, some users might find it challenging to delete a group. And if you made up so far, then you’re one out of them.
Don’t worry! We here to help and in upcoming lines, you will learn exact steps to delete an Outlook group.
How to Delete Group in Outlook.com
1. Visit Outlook.com and login to your account.
2. On the left pane, head over to Groups category and click on the Group which you want to delete.
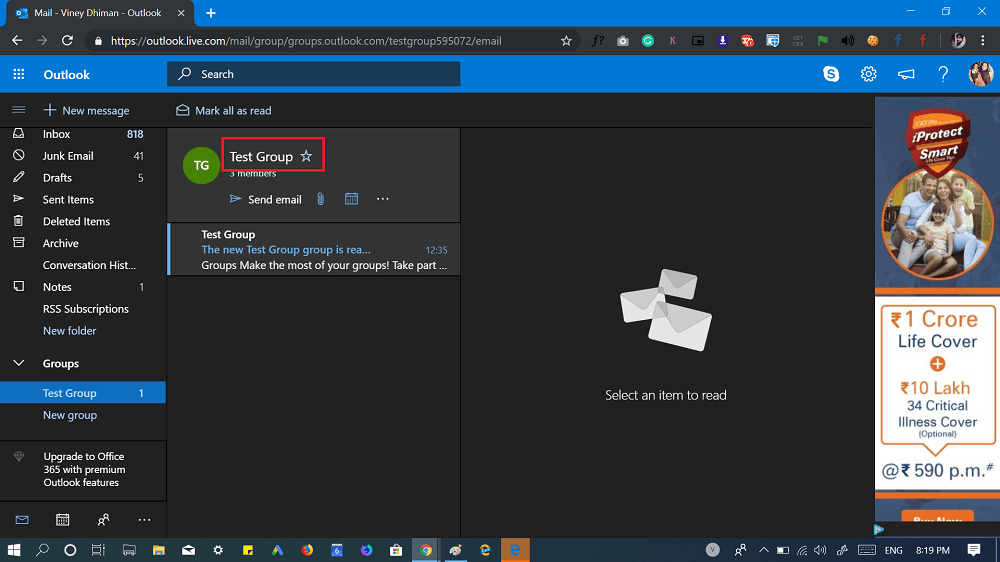
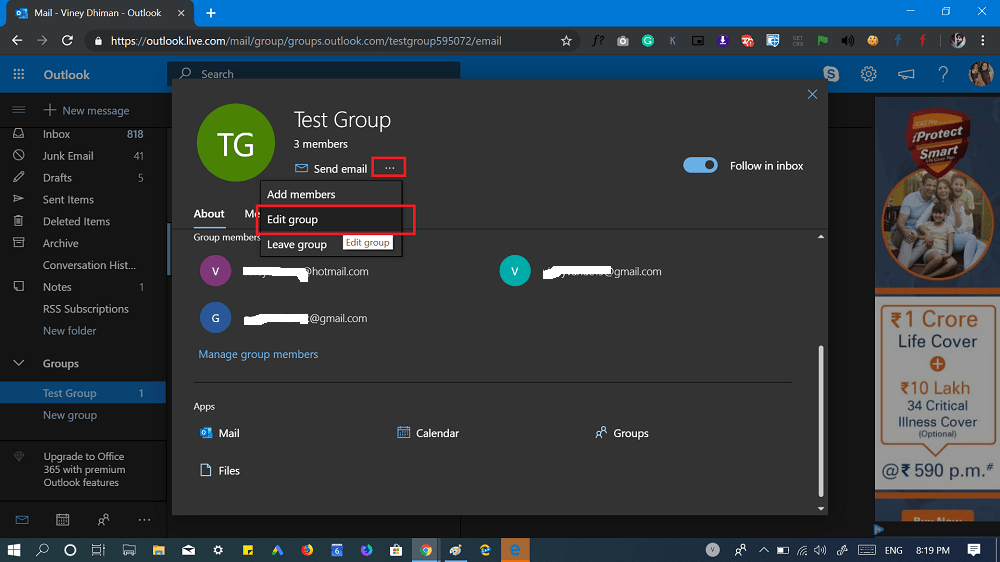
3. On the right pane, you need to click on the Group name. A dialog for same will open showing you complete information about the group. The information includes Group member names, Apps, and other related information.
Here, you need to click on the (…) More options next to ‘Send email’ option and select ‘Edit group.’
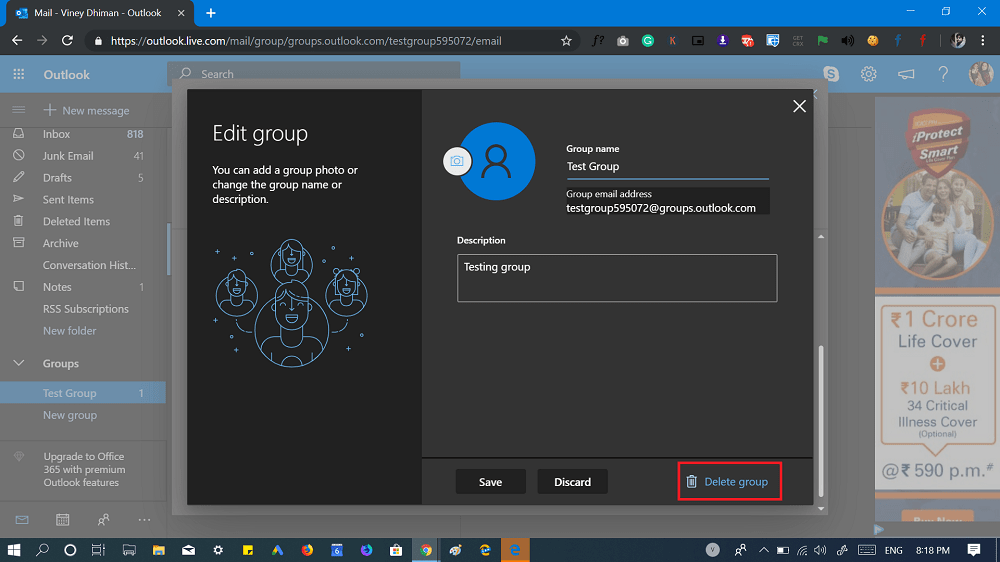
4. In the next screen, you will find the ‘Delete group‘ option available at the bottom left corner. Click on it, and you’re done.
5. A quick dialog box will open up informing you about what you’re going to lose if you delete group. Here, check the box for “I understand that all content of the group will be deleted.” and then click on the Delete button.
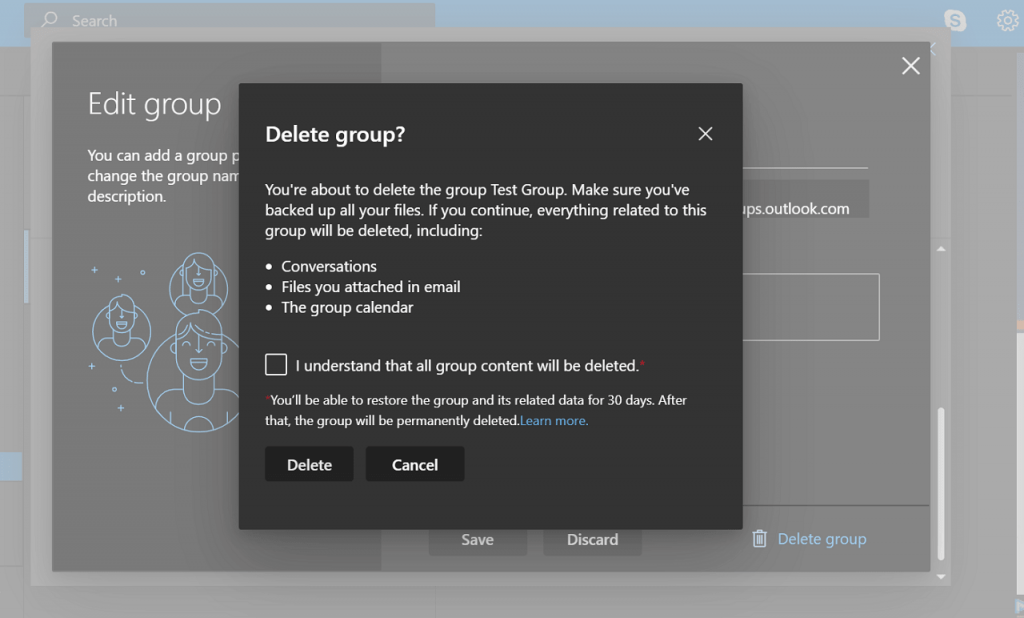
That’s it! Your Outlook Group will be deleted.
What is your reason behind deleting a Group in Outlook.com? Find this blog post handy? We would like to hear from you.


