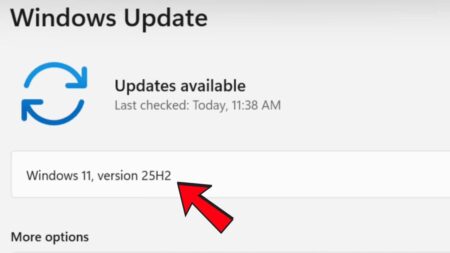
Microsoft has finally released the Windows 11 version (22H2) 2022 Update. In this blog post, you will learn possible ways how to install Windows 11 on your PC/Laptop.
Last year, when Windows 11 was rolled out, rounded corners, a new start menu, a centered taskbar, new desktop backgrounds, cool animations, and new sounds, were the main highlights.
With Windows 11 22H2 update brings the possibility to group icons in the Start menu, drag-drop functionality on the Taskbar, File Explorer with Tabs, Taskbar overflow, New Snap layout drop-downs, and even more.
Starting September 20, 2022, the company has already started rolling out Windows 11 version 22H2 to eligible devices. You need to keep in mind, the company is performing the rollout of the update in different phases. So it’s highly possible that you might not see an upgrade to Windows 11 option in Windows Update settings.
If can’t wait to try Windows 11, then the first thing you need to make sure if your device meets the minimum requirement to install Windows 11 includes:
- Processor: 1 gigahertz (GHz) or faster with 2 or more cores on a compatible 64-bit processor System on a Chip (SoC)
- RAM: 4 gigabytes (GB)
- Storage: 64 GB or larger storage device
- System firmware: UEFI, Secure Boot capable
- TPM: Trusted Platform Module (TPM) version 2.0
- Graphics card: Compatible with DirectX 12 or later with WDDM 2.0 driver
- Display: High definition (720p) display that is greater than 9” diagonally, 8 bits per color channel
- Internet connection and Microsoft accounts: If you’re running Windows 10 Home edition, then you need to have Microsoft Account to install it. Learn How to Install Windows 11 Home without Microsoft Account or Internet Connection.
You can also make use of Microsoft PC Health Check to figure out if your Windows 10 device can run Windows 11 or not.
![[Detailed Guide] How to Install Windows 11 22H2 on New PC | Laptop 1 this pc can run windows 11](https://geekermag.com/wp-content/uploads/2021/06/this-pc-can-run-windows-11.png)
If Yes, you will see a dialog with the message “This PC can run Windows 11“. Apart from that, if NO, then “This PC Can’t Run Windows 11“.
Once you get the green signal from the app, then you can head over to Settings > Update & Security > Windows Update. Here on the right side, check if you’re seeing the message “Upgrade to Windows 11 is ready- and it’s free”
![[Detailed Guide] How to Install Windows 11 22H2 on New PC | Laptop 2 upgrade to windows 11 ready 1](https://geekermag.com/wp-content/uploads/2021/10/upgrade-to-windows-11-ready-1.png)
Here, click on Download and Install button and let the system complete the upgrade process.
If not, click on Check for update button and let the system check if any update is available. If you won’t see the same message, then it is highly possible that an update is not available for your device.
In this situation, you can force an upgrade to Windows 11 using Windows 11 Installation Assistant. For detailed instructions, check out the post on How to upgrade from Windows 10 to Windows 11.
In case, the PC health Check application is showing your device is incompatible due to TPM (it requires 2.0 or above), but your device is running TPM 1.2 then there’s a workaround to install Windows 11 on Unsupported PC.
Install Windows 11 on a New or Laptop using USB
Apart from the upgrade option, you can also install Windows 11 on your PC. Installing Windows 11 is super easy. There are two ways to do that. You can either upgrade from Windows 10 to Windows 11 using ISO image or clean install Windows 11. Let’s start with the first method:
Before doing that, you need a few things:
- Windows 11 ISO Image – Check, how to download ISO Image of Windows 11
- Windows 11 Bootable Installation Media – Learn, Two Ways to Make Windows 11 Bootable USB
- USB Flash Drive 8GB or Above, we need this to create bootable Windows 11 Installation Media
Now that, you’re all set to install Windows 11. There are two ways to do that. You can either upgrade from Windows 10 to Windows 11 using ISO image or clean install Windows 11. Let’s start with the first method:
Upgrade from Windows 10 or Windows 11 21H2 to Windows 11 22H2
Once you have the ISO images of Windows 11, double-click to mount it.
![[Detailed Guide] How to Install Windows 11 22H2 on New PC | Laptop 3 Preparing Windows 11](https://geekermag.com/wp-content/uploads/2021/06/preparing-windows-11.png)
Next, click on the Setup file and when the UAC dialog box appears, click Yes to continue. Doing this will instantly show you Preparing Windows 11.
![[Detailed Guide] How to Install Windows 11 22H2 on New PC | Laptop 4 Windows 11 Setup File](https://geekermag.com/wp-content/uploads/2021/06/install-windows-11.png)
Windows 11 Setup window will appear, click Next to continue.
![[Detailed Guide] How to Install Windows 11 22H2 on New PC | Laptop 5 Applicable notices and license terms windows 11](https://geekermag.com/wp-content/uploads/2021/06/notices.png)
Application Notices and License terms window will appear, click Accept to continue.
![[Detailed Guide] How to Install Windows 11 22H2 on New PC | Laptop 6 Ready to install WIndows 11](https://geekermag.com/wp-content/uploads/2021/06/read-to-install-windows-11.png)
Next, you need to wait until the “Ready to Install Windows 11” dialog appears. Here, you can click the “Change what to keep” link to customize the installation of Windows 11.
![[Detailed Guide] How to Install Windows 11 22H2 on New PC | Laptop 7 Choose what to keep in windows 11 installation](https://geekermag.com/wp-content/uploads/2021/06/choose-what-to-keep.png)
Under this, you will find three options:
- Keep Personal files and apps – You will be able to manage settings
- Keep Personal files – Your settings and apps will be deleted, except for files
- Nothing – Everything will be deleted; Settings, files, and apps.
![[Detailed Guide] How to Install Windows 11 22H2 on New PC | Laptop 8 Install Windows 11](https://geekermag.com/wp-content/uploads/2021/06/install-windows-11-1.png)
Once done, click on the Install button. After installation is completed, you will be presented with the new Windows 11 OOBE screen.
Clean Install Windows 11 (22H2) 2022 Update On New PC
Now that you made it upto this section we assume that you’ve a bootable Windows 11 USB Drive, right? The process of installing Windows 11 on a PC and Laptop is the same as you install Windows 10. Here’s what you need do to:
Insert USB Drive into the PC or laptop
Reboot your device and when it turns on keep pressing the boot key to bring the Boot Options Menu on your device so that you can select Windows 11 bootable device to start the installation.
![[Detailed Guide] How to Install Windows 11 22H2 on New PC | Laptop 9 Select Bootable Windows 11 USB from the boot menu to install Windows 11](https://geekermag.com/wp-content/uploads/2021/06/boot-menu-windows-11.png)
The different devices have different keys to bring Boot Options Menu. You can try any of these: Esc, F9, F12, F10, etc.
Select the Windows 11 USB drive from the Boot Options Menu. Doing this will instantly take you to Windows 11 Installer screen.
![[Detailed Guide] How to Install Windows 11 22H2 on New PC | Laptop 10 Enter your language and other preferences](https://geekermag.com/wp-content/uploads/2021/06/Windows-setup.png)
Select Language to install, Time and Currency format, and Keyboard or input method, and then click Next.
![[Detailed Guide] How to Install Windows 11 22H2 on New PC | Laptop 11 Install now button in Windows 10 installer](https://geekermag.com/wp-content/uploads/2021/06/Install-Now.png)
Click on Install Now button.
![[Detailed Guide] How to Install Windows 11 22H2 on New PC | Laptop 12 activate windows](https://geekermag.com/wp-content/uploads/2021/06/activate-windows.png)
In Activate Windows screen, enter the product key of Windows 11. Since its not officially available and we’re testing it without product key, click on “I don’thave a product key” and select Next.
![[Detailed Guide] How to Install Windows 11 22H2 on New PC | Laptop 13 select edition of Windows 11](https://geekermag.com/wp-content/uploads/2021/06/select-edition-of-Windows-11.png)
Select the edition of Windows 11 of your choice. You need to select the one of which you have a key.
![[Detailed Guide] How to Install Windows 11 22H2 on New PC | Laptop 14 select terms and condition for windows 11](https://geekermag.com/wp-content/uploads/2021/06/terms-and-conditions.png)
Select Terms and conditions of Windows 11, click Next.
![[Detailed Guide] How to Install Windows 11 22H2 on New PC | Laptop 15 Select the drive where you want to install Windows 11](https://geekermag.com/wp-content/uploads/2021/06/create-installation-drive.png)
Here, you need to select the drive where you want to install Windows 11. In case, you have the fresh drive, then click on the New option and then create the Drive.
![[Detailed Guide] How to Install Windows 11 22H2 on New PC | Laptop 16 where do you want to install Windows 11](https://geekermag.com/wp-content/uploads/2021/06/create-new-drive.png)
Create new drive in which you want to install the Windows 11.
![[Detailed Guide] How to Install Windows 11 22H2 on New PC | Laptop 17 select new partition for installing Windows 11](https://geekermag.com/wp-content/uploads/2021/06/select-installation-drive.png)
Select the drive where you want to install Windows 11 and then click Next.
![[Detailed Guide] How to Install Windows 11 22H2 on New PC | Laptop 18 Windows 11 installation](https://geekermag.com/wp-content/uploads/2021/06/windows-11-installing.png)
Now you will following screens back to back, follow the instructions as suggested:
![[Detailed Guide] How to Install Windows 11 22H2 on New PC | Laptop 19 Installing Windows 11](https://geekermag.com/wp-content/uploads/2021/06/installation-done.png)
![[Detailed Guide] How to Install Windows 11 22H2 on New PC | Laptop 20 Windows need tor restart to continue](https://geekermag.com/wp-content/uploads/2021/06/restart-to-continue.png)
![[Detailed Guide] How to Install Windows 11 22H2 on New PC | Laptop 21 Getting ready screen Windows 11](https://geekermag.com/wp-content/uploads/2021/06/getting-ready.png)
![[Detailed Guide] How to Install Windows 11 22H2 on New PC | Laptop 22 Just a moment screen windows 11](https://geekermag.com/wp-content/uploads/2021/06/just-a-moment.png)
![[Detailed Guide] How to Install Windows 11 22H2 on New PC | Laptop 23 Is this the right country or region for Windows 11](https://geekermag.com/wp-content/uploads/2021/06/select-country-or-region.png)
Select Country or Region and then Click Yes
![[Detailed Guide] How to Install Windows 11 22H2 on New PC | Laptop 24 Is this the right keyboard layout or input method for windows 11](https://geekermag.com/wp-content/uploads/2021/06/keyboard-layout.png)
Select the Input method and then click Yes.
![[Detailed Guide] How to Install Windows 11 22H2 on New PC | Laptop 25 Add a Secondary keyboard](https://geekermag.com/wp-content/uploads/2021/06/second-keyboard-1.png)
Add a Secondary keyboard if you want, else click on Skip
![[Detailed Guide] How to Install Windows 11 22H2 on New PC | Laptop 26 How would you like to set up this device windows 11](https://geekermag.com/wp-content/uploads/2021/06/setup-personal-account-1.png)
Select whether you want to setup this device for Personal use or Work or School and then click Next.
![[Detailed Guide] How to Install Windows 11 22H2 on New PC | Laptop 27 Add your microsoft account to Windows 10](https://geekermag.com/wp-content/uploads/2021/06/login-microsoft-account.png)
Here, you need to Add Microsoft account for Windows 11. You need to enter your Microsoft Account credentials and click Next.
![[Detailed Guide] How to Install Windows 11 22H2 on New PC | Laptop 28 Set a pin of Windows 11](https://geekermag.com/wp-content/uploads/2021/06/create-pin.png)
Click on the Create Pin button and then enter PIN of your choice and select Next.
![[Detailed Guide] How to Install Windows 11 22H2 on New PC | Laptop 29 Select Privacy Settings in Windows 10](https://geekermag.com/wp-content/uploads/2021/06/choose-privacy.png)
Select Various Privacy Settings in Windows 11 and then click Next.
![[Detailed Guide] How to Install Windows 11 22H2 on New PC | Laptop 30 Personalized suggestion for Windows 11](https://geekermag.com/wp-content/uploads/2021/06/customize-experience.png)
The above screen will show you various tips and suggestion that you might want to turn ON, select the one you want and then click Accept. You can make these changes later too. So, you can skip this too.
![[Detailed Guide] How to Install Windows 11 22H2 on New PC | Laptop 31 Save space on your PC with OneDrive](https://geekermag.com/wp-content/uploads/2021/06/select-one-drive.png)
Here, select where you want to store the files. One Drive or locallly
![[Detailed Guide] How to Install Windows 11 22H2 on New PC | Laptop 32 please keep your PC on and pluggedin](https://geekermag.com/wp-content/uploads/2021/06/keep-pc-on.png)
![[Detailed Guide] How to Install Windows 11 22H2 on New PC | Laptop 33 This might take a few minutes in Windows 10](https://geekermag.com/wp-content/uploads/2021/06/this-might-take-few-minute.png)
Once all is done. You will be presented with a new Windows 11 OOBE setup screen. Now you can eject the USB drive and complete the on-screen instructions to complete the installation of Windows 11.
Check out YouTube video on How to Install Windows 11
This is how to Home screen of Windows 11 looks like:
There are various sections of Windows 10 that you might love to check:
In case, after upgrading to Windows 11 from Windows 11, if you figure out Windows 11 is not your cup of tea and would like to stay with Windows 10, then you can Downgrade Windows 11 to Go Back to Windows 10.
That’s all about this blog post on how to install Windows 11. Why don’t you give it a try and let us know your opinion in the comments.



![[Detailed Guide] How to Install Windows 11 22H2 on New PC | Laptop How to Install Windows 11 on any PC or Laptop](https://geekermag.com/wp-content/uploads/2021/06/Windows-11-start-menu.png)
