Before jumping on to the process to enable DNS over HTTPS (DoH) in Windows 11, one must take a deep understanding of all the related elements and variables of the same phenomenon.
Why one must use DNS over HTTPS (DoH)?
DoH (Domain Name System) over HTTPS is a protocol for conducting remote domain name system enquiries over HTTPS. Besides preventing eavesdropping, this protocol further helps to improve user privacy and security.
Discussing DNS (Domain Name System), it can be deemed as a protocol used by the computer that converts human-readable names into IP addresses. Because the DNS protocol does not use HTTPS, anybody with the appropriate device can snoop into your data easily.
This person may even hijack your DNS traffic and make it seem as though you’re interacting with legitimate resources or websites. That is why, wherever possible, you should use DNS over HTTPS (DoH).
On the other hand, enabling DNS over HTTPS (DoH) may go tricky, given to the list of new features and settings it’s coming aboard with.
Yet, Windows 11 is been deemed as the best system for all the beginners and that’s why one can see so much hype and anticipation around its probable release later this year. The settings app is Windows 11 is updated with capability to manage DNS over HTTPS and due to this reason it become easier to enable it.
How to Enable DNS over HTTPs (DoH) in Windows 11
In case, you want to use it, then lets proceed with the list of steps to enable DNS over HTTPS (DoH) in Windows 11
Click on the Start button and select Settings from the Start menu. You can use WIN + I key combo to do the same.

On the left switch to “Network & internet” tab and then on the right side, select the network it could Ethernet or Wireless connection. For that, click on the Properties options.
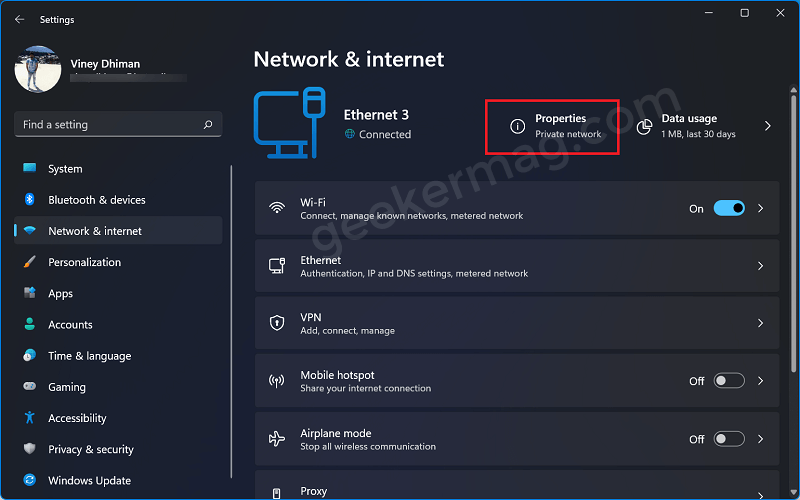
Note – You’ll have to setup each profile if your system has more than one Network device, such as Wired and Wi-Fi devices.
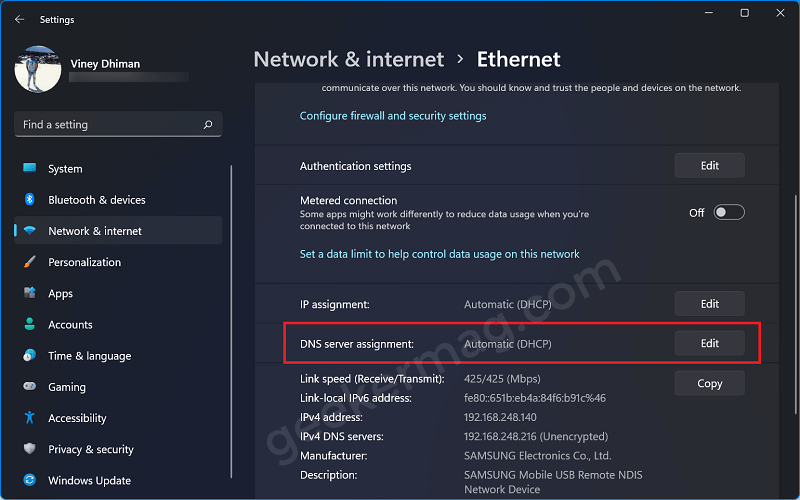
Scroll down to DNS server assignment option and then click on Edit button. Edit network IP settings dialog box will open with.
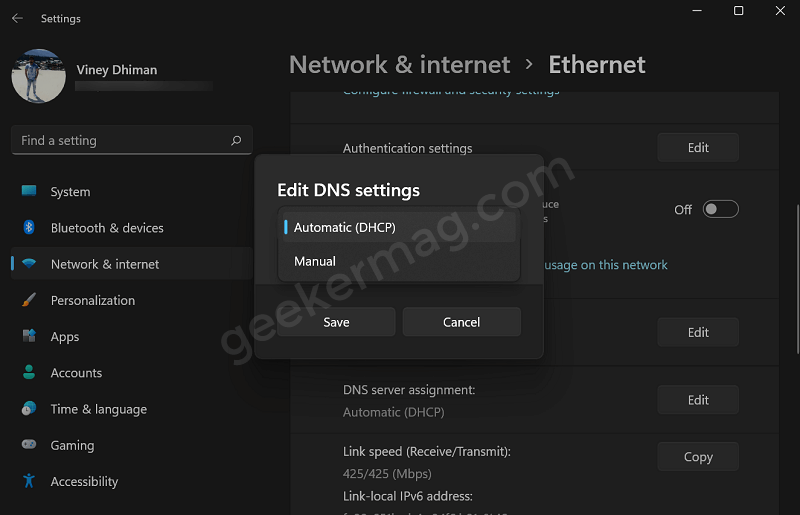
Switch from Automatic to Manual.
Next, turn ON option for IPv4 and IPv6, put in your Preferred DNS and Alternate DNS server IP addresses.
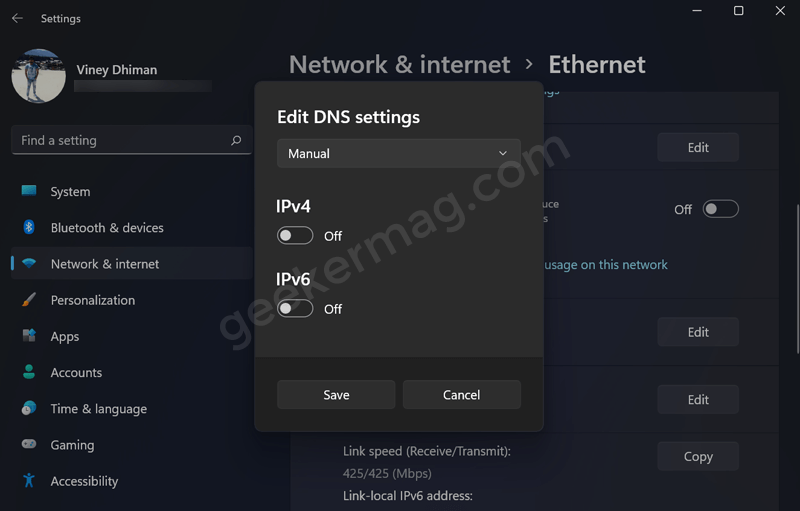
You can try public DNS servers from Google and Cloudflare that support DoH:
- IPv4 addresses (8.8.8.8 Perfered DNS, and 8.8.4.4 Alternate DNS
- IPv6 addresses (2001:4860:4860::8888 Perfered DNS, and 2001:4860:4860::8844 Alternate DNS)
Cloudflare
- IPv4 addresses (1.1.1.1 Perfered DNS, and 1.0.0.1 Alternate DNS)
- IPv6 addresses (2606:4700:4700::1111 Perfered DNS, and 2606:4700:4700::1001 Alternate DNS)
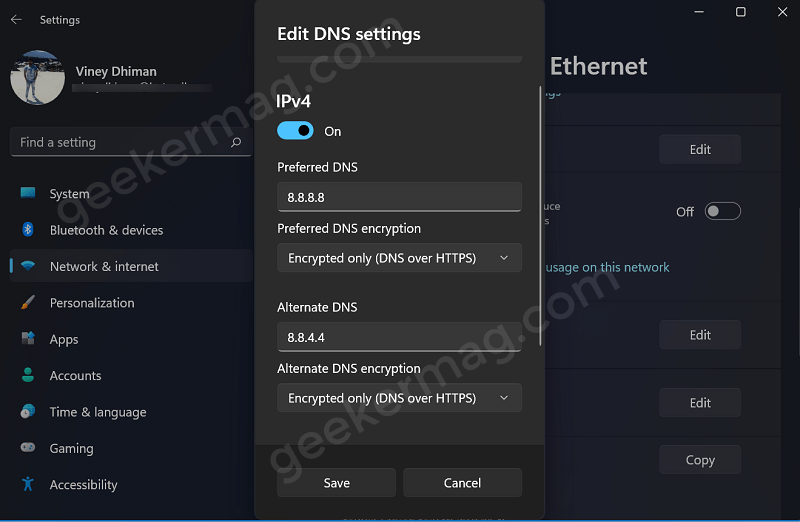
Select Encrypted only (DNS over HTTPS) before saving the IP address change.
Note – If your device is connected to wireless connection it is possible that you might not see Encrypted only (DNS over HTTPS this option.
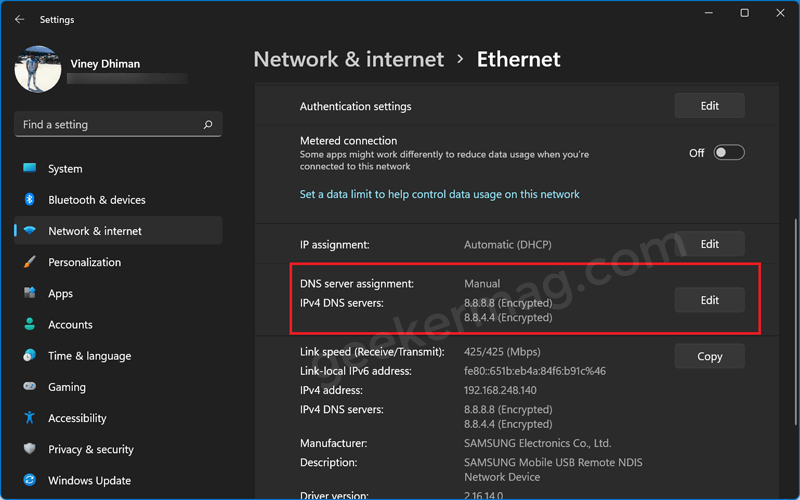
Tap on save and exit. You have successfully enabled DNS over HTTPS (DoH) in Windows 11.
Please Note: the abovementioned process works for all types of network interfaces- Wired network interface, Wi-Fi network interface or any other available options in the list.
This article demonstrated the process to enable DNS over HTTPS (DOH) on Windows 11. Please share your comments below in case you experience any issues or errors during the entire procedure.


