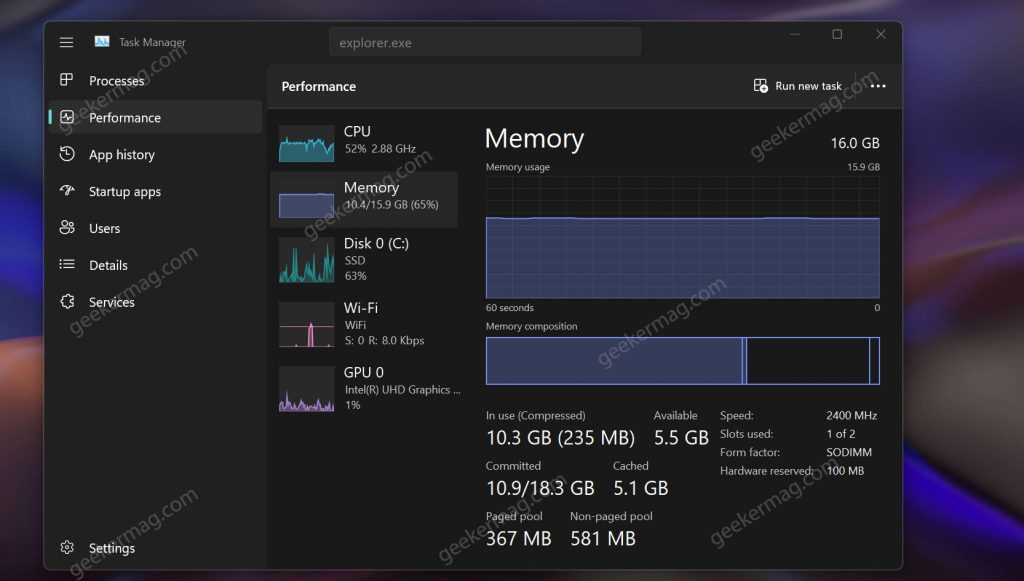
Microsoft recently rolled out Windows 11 22H2 update. Although it’s home to the most awaited features, users who have installed the Windows 11 22H2 update experience High Memory Usage issue.
High Memory Usage issue on Windows PC is very common especially after installing a major update. When the PC is affected by High Memory Usage issue, certain programs may not work on your PC properly. You may experience lag during multi-tasking or you may face various similar issues.
In short, High Memory Usage issues disrupt the performance of the PC and if you landed on this blog post, then it’s possible that you’re facing the same issue.
How to Fix High Memory Usage after installing Windows 11 22H2
Below in this blog post, you will find out possible troubleshooting steps using which you can fix High Memory Usage in Windows 11 22H2. So without further delay, let’s get started:
End Unnecessary Tasks and Disable Startup Apps
The very first thing you should try doing is ending unnecessary tasks and disabling startup apps. To do so, follow the steps given below-
Press Ctrl +Shift + Esc to open Task Manager on your PC.
Here, under the Processes tab, select the app/task that you are not using. Click on End Task to close the program.
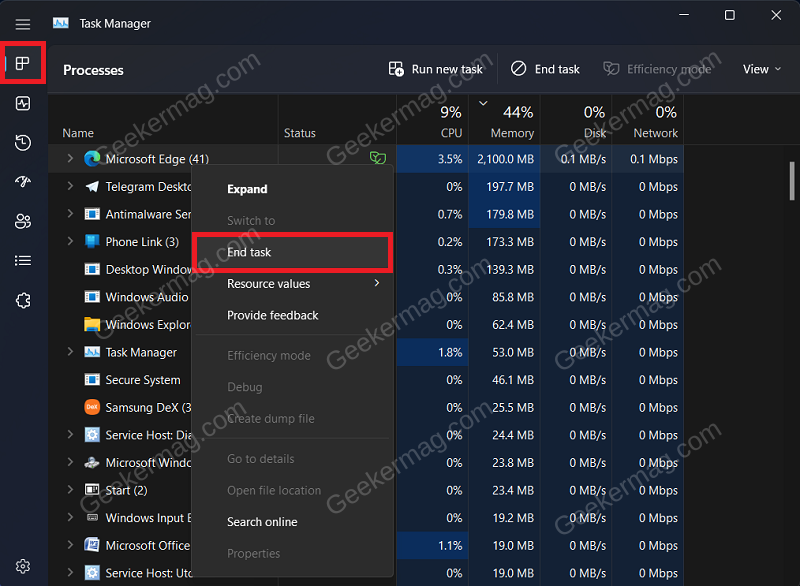
Do this for all the apps that you are not using.
Now, head to the Performance tab.
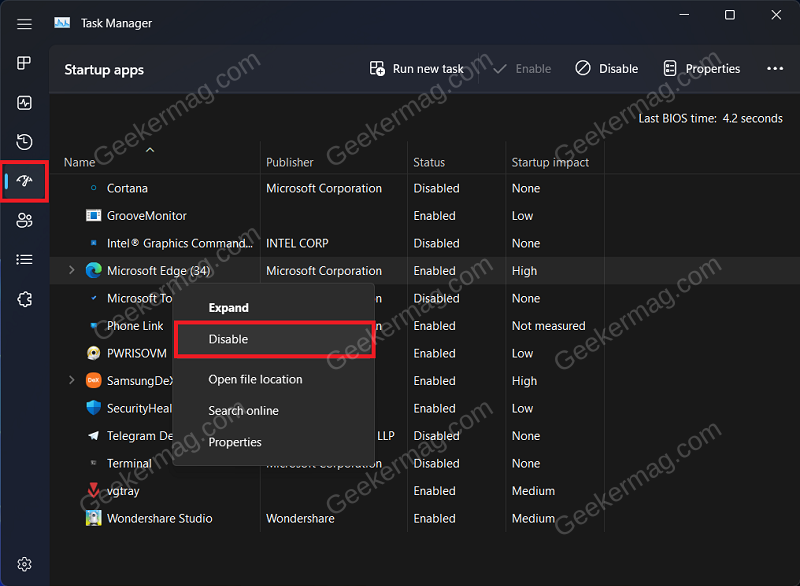
Here, right-click on unnecessary startup apps, and click on Disable. One-by-one disable all the unnecessary startup programs.
Change Performance Settings
We recommend you switch your performance settings to Best Performance. This will optimize your PC to improve performance and fix high memory usage. This can be done by following the steps given below-
Press the Windows key to open the Start Menu. Here, search for View Advanced System Settings and click on the very first option that appears.
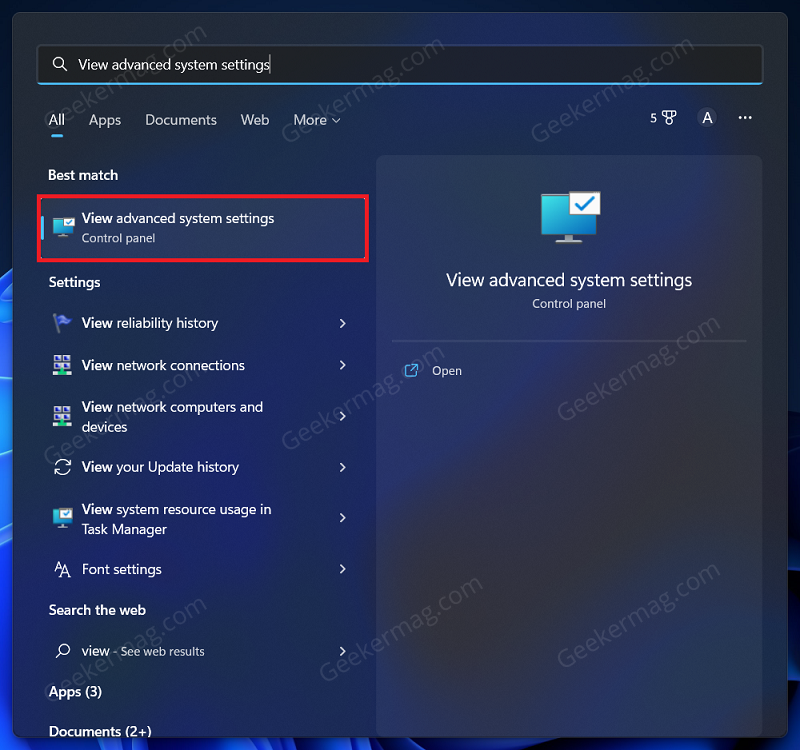
You will be headed to the Advanced tab in the System Properties window. Here, click on the Settings button under Performance.

Now on the next window that appears, select the option for Adjust for best performance.
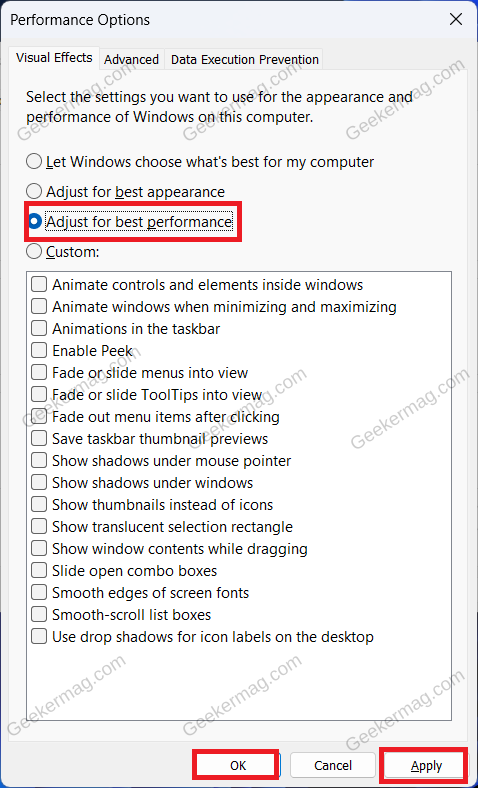
Click on Apply and then on OK to save the changes.
Scan Your PC For Virus
Many times, viruses and malware on your PC can also cause such issues. You can run an antivirus scan to scan your PC for viruses and fix issues caused due to them. If you have third-party antivirus software, then you can use it to scan your PC for the virus. If you don’t have third-party antivirus software, then Windows Security would be enough to do the job.
Press the Windows key on your keyboard, search for Windows Security and open it.
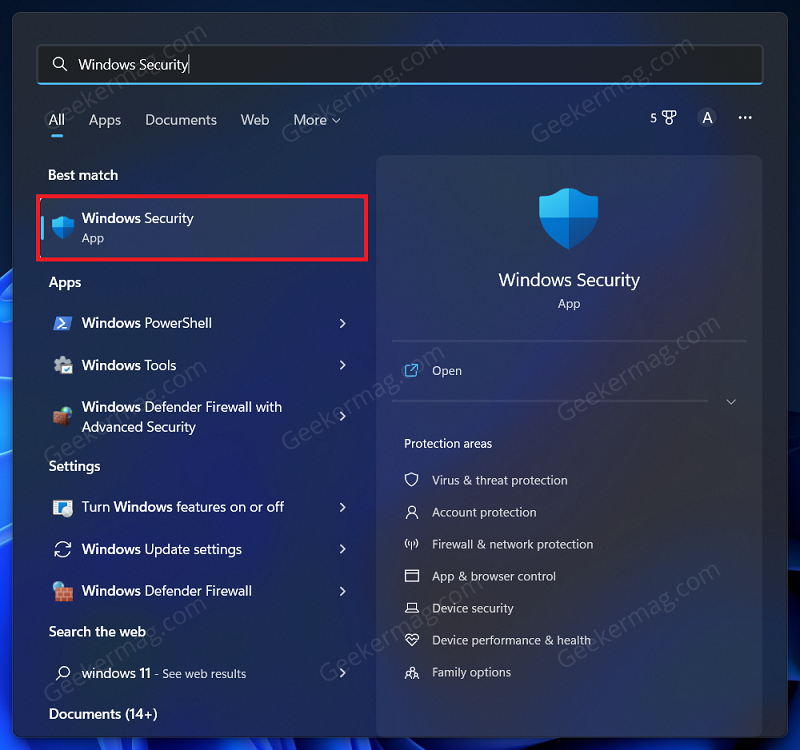
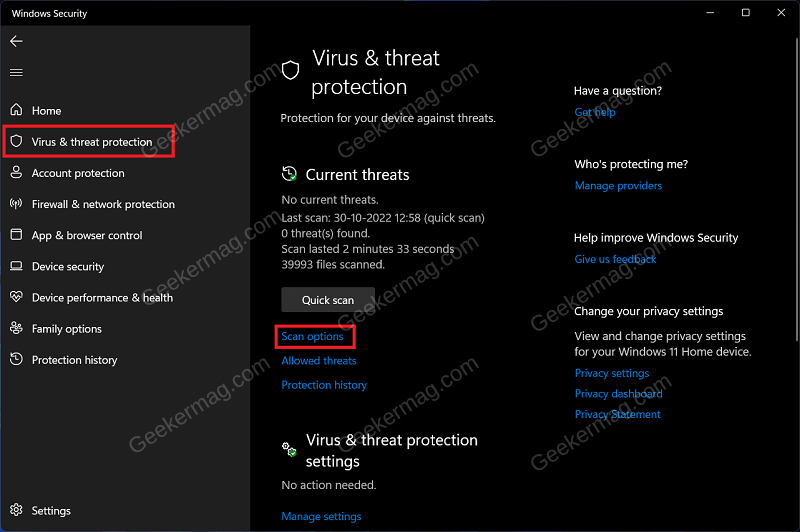
Here, on the left sidebar, click on Virus & threat protection, and on the right side, click on Scan Options.
Now, select Full Scan and click on Scan Now.
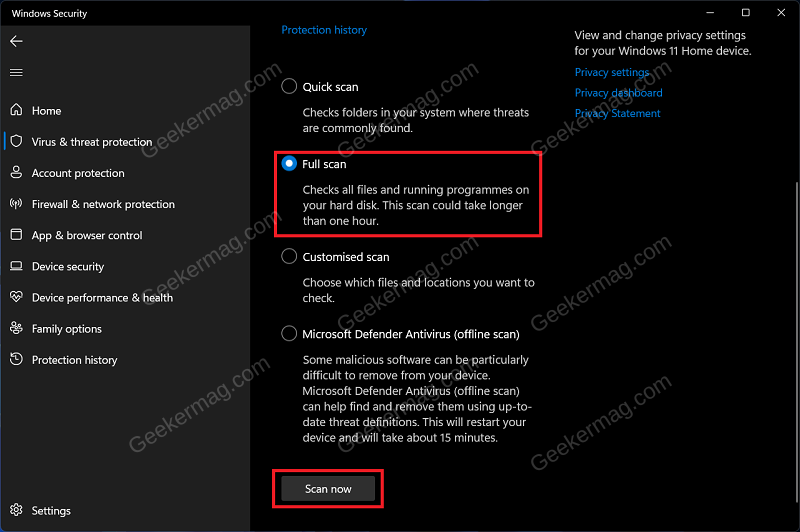
This will begin scanning your PC for viruses and fix any issues caused due to them.
Disable SysMain Service
If you are facing high memory usage issue on Windows 11 22H2, then you can try disabling SysMain Service. You can disable SysMain Service by following the steps given below-
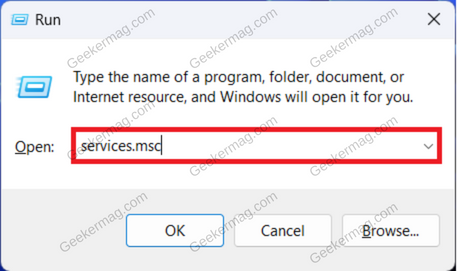
Press Windows + R key combo to open the Run Dialog box. Here, type Services.msc and press Enter.
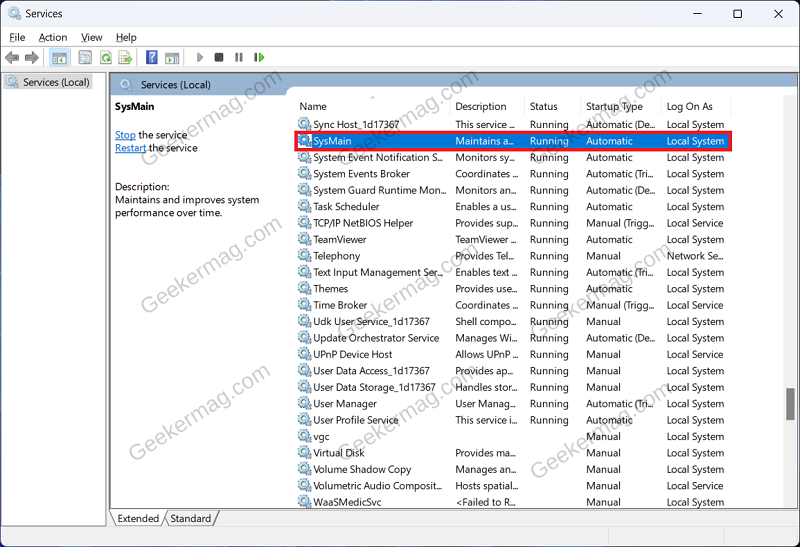
In the Services window that opens up, search for SysMain Service and double-click on it to open its Properties.
Here, set the Startup Type as Disabled.
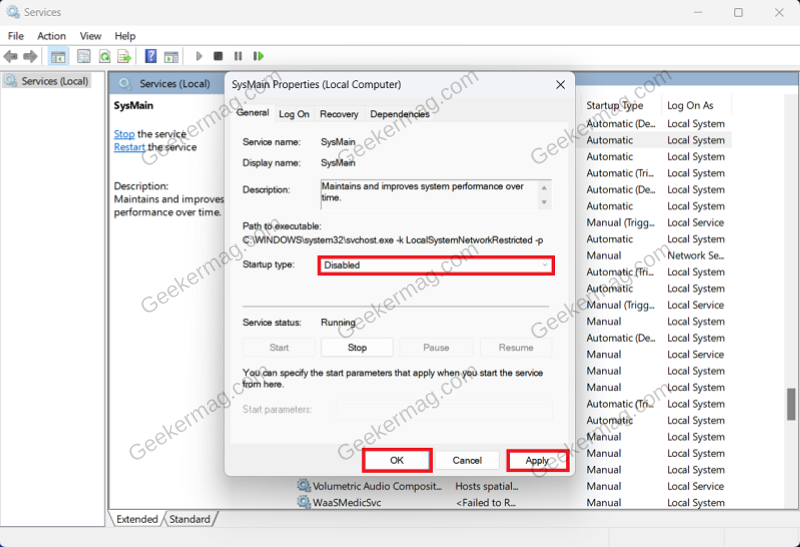
Click on Apply and then on OK.
Defragment Your Drive
If you are facing high Memory usage issues on Windows 11 22H2, then you can try defragmenting your drive. You can do so by following the steps given below-
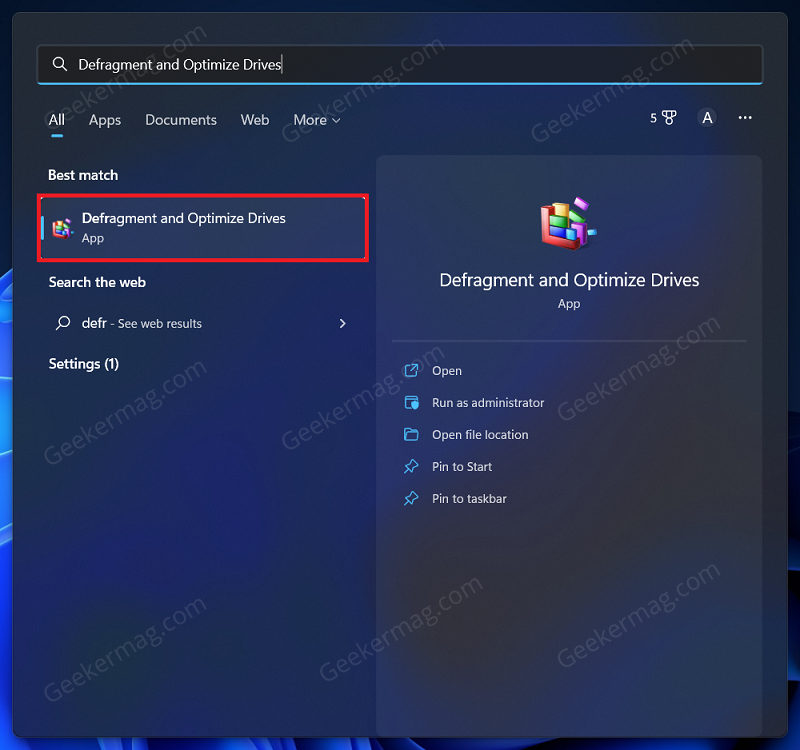
Press the Windows key, search for Defragment and Optimize Drives and open it.
Here, select your driver, click on Optimize button and wait for the drive to get defragmented.
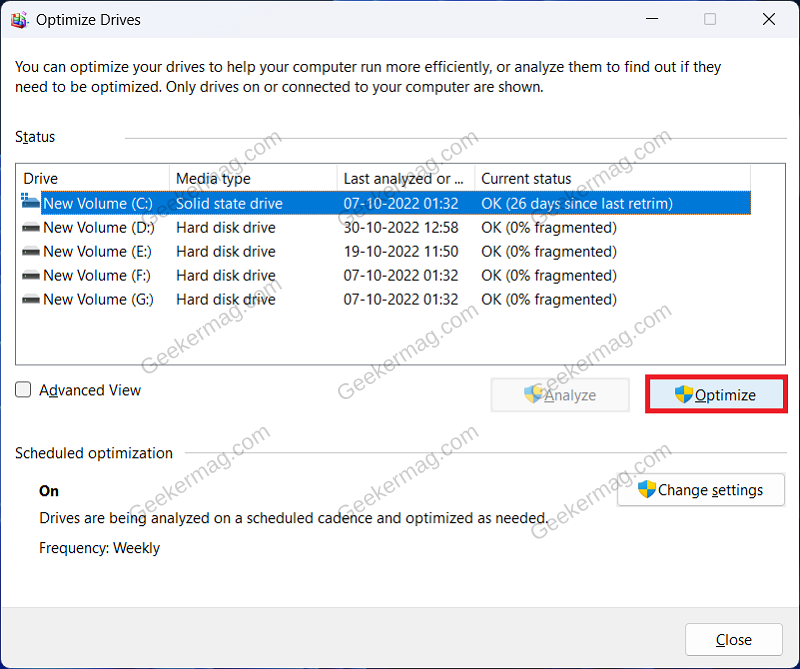
Once done, restart your device.
Is your PC under the attack of High Memory Usage issue after updating to Windows 11 22H2? Is the solution suggested in this blog post help in fixing the issue? Do you know any other solution? Let us know in the comments


