Outlook.com now supports groups, and it is an important feature update from Microsoft. So we thought it is a good time to write a tutorial on How to Create Groups in Outlook.com
The ‘Groups’ feature on Outlook.com is a handy feature, using which users can create and manage shared groups. Under the groups, you will get access to inbox having a group calendar, archived emails, and shared files.
Outlook Groups feature is all in one place for those users who want to connect, coordinate, and contribute with others for a shared purpose. The feature is handy for College students, office teammates, friends, colleagues, and others.
How to Create Groups on Outlook.com
Anyone who’s using Outlook.com as their default email service can take advantage of this new feature. The process of creating Group is super easy, here’s what you need to do:
1. Visit Outlook.com and login using your credentials.
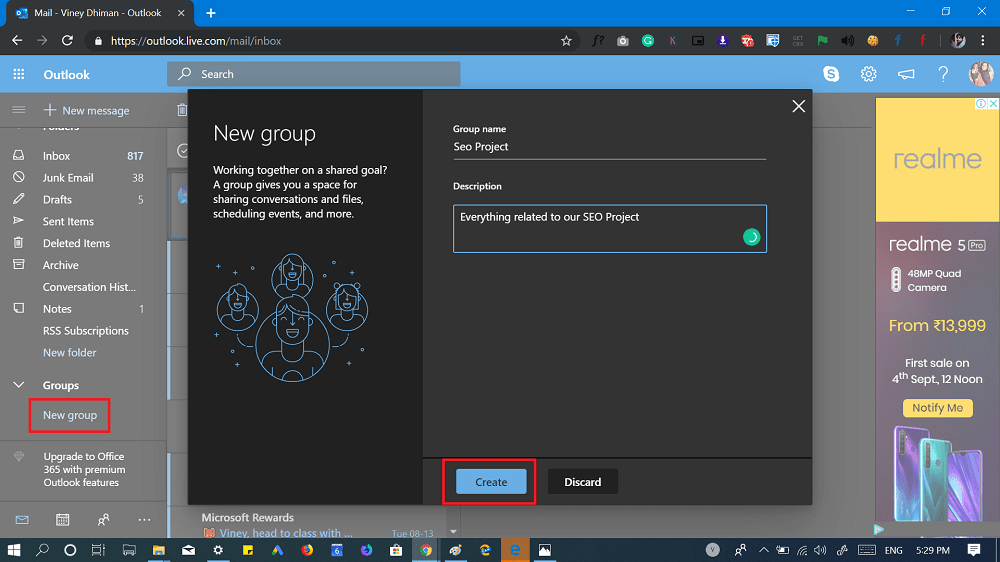
2. Next, on the left panel head over to Groups category and then click on New Group.
A ‘New Groups’ dialog box will open up, here you need to give your group a name and add purpose for the group.

3. Click on the Create button available at the bottom.
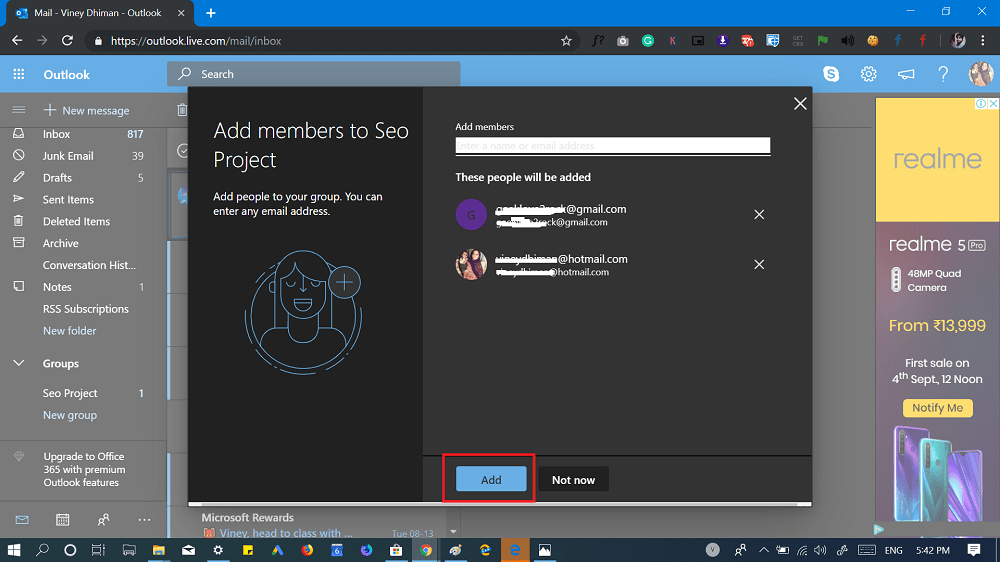
4. In the next, screen you can add members to your group. For that type the email address of the person and then click Add.

Following the same procedure, you can add as many members you want. The good thing is that you can add users with Yahoo or Gmail email address too.
Note: All the members will get the invitation about the Group you have created via Email

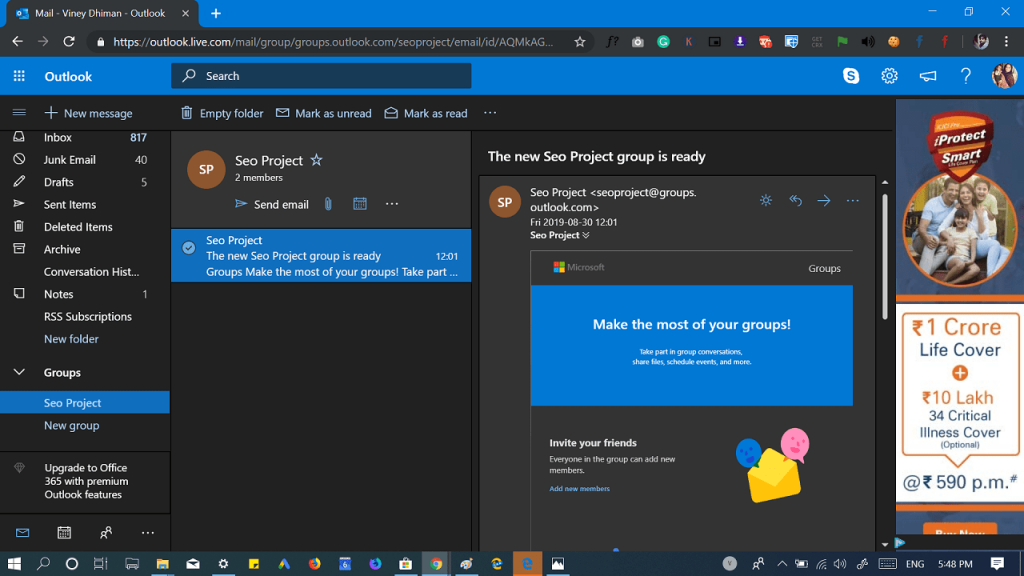
5. At last, You will be redirected to your Group Inbox. As simple as that!
Microsoft has rolled out Groups feature on Outlook.com worldwide, and all users will get access to this feature by the end of August 2019. The support for the same feature will be added to Outlook for mobile in Fall 2019.
Check out – How to Delete a Group in Outlook.com
What do you think of the Groups feature in Outlook.com? Are you going to use it? Let us know your thoughts in the comments.
Source – Microsoft Techcomunity, Via – WindowsBlogItalia


