Microsoft has added a new option named “View Wi-Fi Security key” using which users can view saved Wi-Fi passwords from the Settings app in Windows 11.
As of now, users need to open the Control panel or Command Prompt to view the wireless network password in Windows 11. But with the addition of a new option in the Network settings page of Windows 11, the process becomes easier. You don’t need to follow 5-7 steps in the Control panel or execute tough commands to view the Wi-Fi password.
Right now, the company has added the “View Wi-Fi Security key” in the Windows 11 build 23466 in the Dev channel. It is possible that Microsoft may include this feature in Windows 11 build 23H2 which is set to release in October 2023.
How to View Saved Wi-Fi Passwords from Settings app in Windows 11
In case, you’re running the same build and would like to learn how to view saved Wi-Fi Passwords in Windows 11 from Settings, then here’s how you can do that:
Launch Settings app in Windows 11 by pressing WIN + I key combination.
Switch the Network and Internet.
On the right side, if you take a look at the top, you will find the Wi-Fi connection to which your PC is connected.

To know the password of this (Currently Connected) Wireless network, click on the Properties option next to it. This will take you to the Network Properties page.
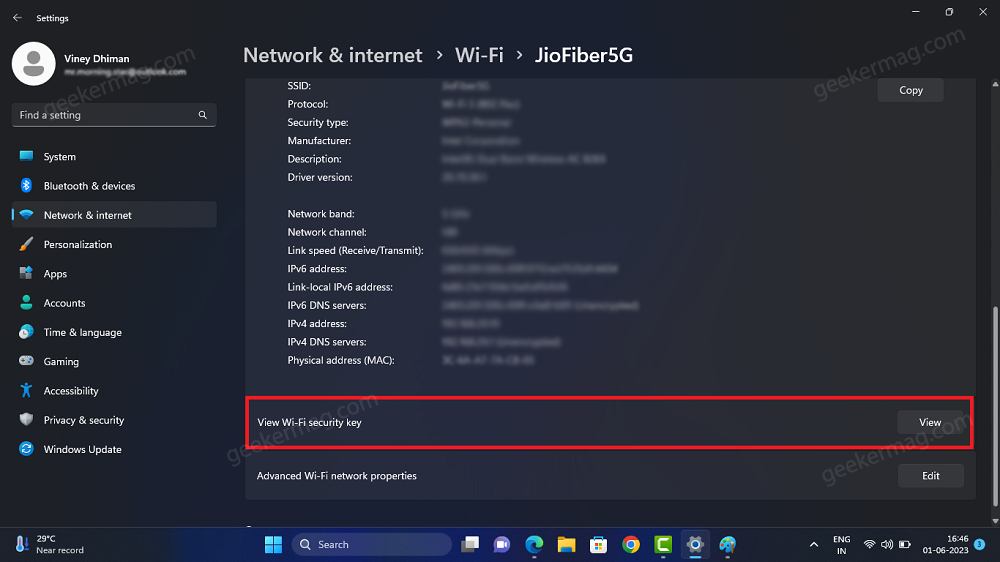
On the next page, scroll down and locate the “View Wi-Fi security key” and click on the View button next to it.
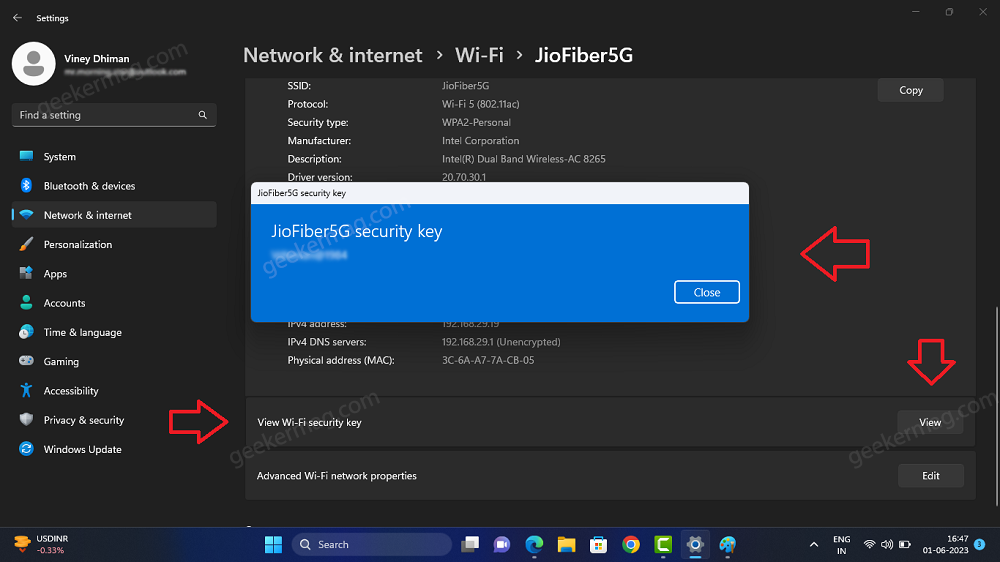
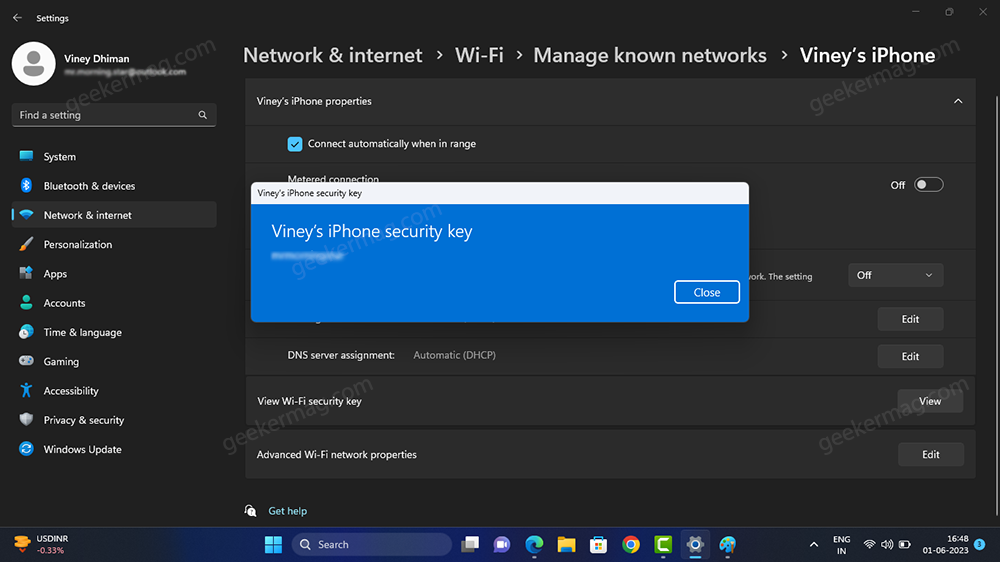
A dialog box will open that displays the network name accompanied by its password. You can select and copy it if you want.
As simple as that!
In case, you want to know the password of the Wireless network to which your PC is not connected currently, but connected earlier, then it’s also possible. Here’s what you need to do:
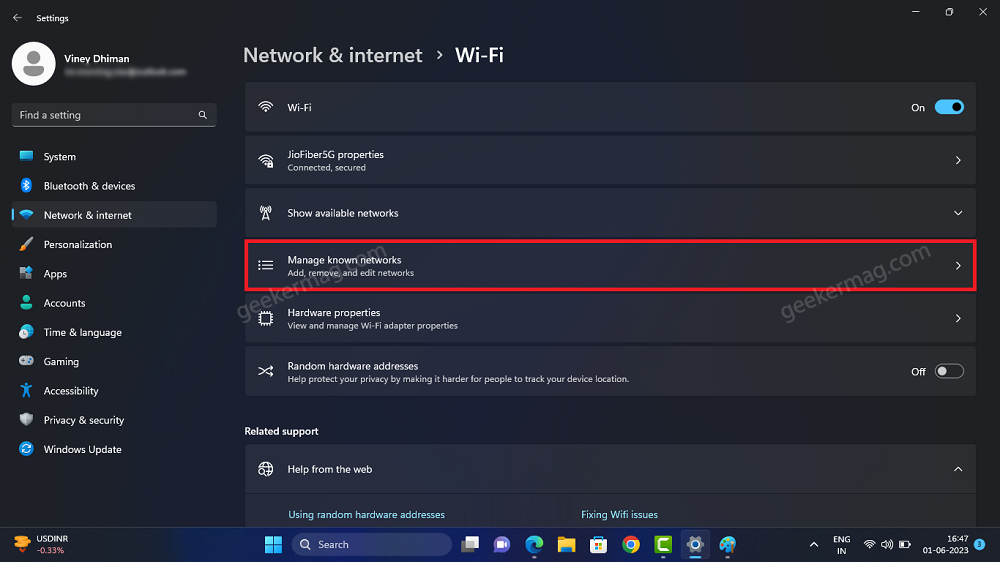
You need to go back to the Wi-Fi settings page, scroll down, and select Manage known networks.
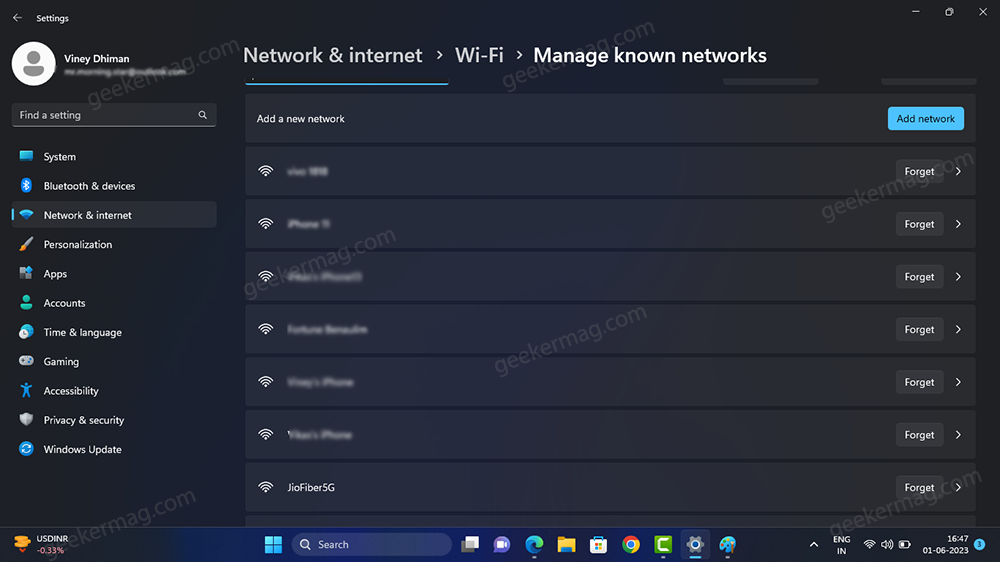
On this page, you will get a list of all the Wi-Fi networks to which your PC is connected. You need to select the one of which you want to see the password.
Again, you need to scroll down and click on the View button next to “View Wi-Fi security key“. And this will show the password of the select Wi-Fi network.
As simple as that!
View Wi-Fi security key option is missing in Windows 11 Settings
Microsoft is rolling out this feature in groups so it is possible that even if you’re running Windows 11 build 23466 in the dev channel, the “View Wi-Fi security key” option is missing in the network settings page.
In case, you can’t wait to try this option, then you can enable it manually using the vivetool. Here’s how you can do that:
Download and set up ViveTool on your Windows 11 PC.
Launch the Command prompt with admin rights. For that, click on the Search icon and type CMD, when it Command prompt appears in the search results click on Run as administrator .
When the UAC dialog box appears, click Yes to continue.
Here, you need to copy-paste this command: c:\vivetool\vivetool.exe /enable /id:44271056 and hit enter. (Thanks, PhantomOcean3 for disclosing the feature id)
Once you get the message successfully set feature configuration, you need to reboot your computer to apply the changes.
Now this will add the “View Wi-Fi security key” setting in Windows 11. Now, you can follow the instructions discussed above to view the Wireless network password.
Apart from this, Microsoft is all set to add other features in Windows 11 23H2 which includes New File Explorer, Never Combine Taskbar Button, Depth Effect, Dynamic lighting for RGB, and even more.
Following New File Explorer Header UI, Never Combine Taskbar Button, End Task in Taskbar App Jumplist, Depth Effect, and View Wifi Password from the Settings app, this feature is expected to come with Windows 11 23H2 which is set to release in September or October this year.
What is your opinion about Microsoft adding an option to View Saved Wi-Fi Passwords from the Settings app in Windows 11? Let me know in the comments.


