Waiting for the native Google Chrome notifications in Windows 10? The feature is live now. The blog post will teach you how to manage the feature.
Google Chrome is a popular modern browser available on the internet. The company is offering push notification feature for years, but the browser always used the custom notification system in Windows 10.
A week ago, a Chrome developer Petr Beverloc announced on the Twitter that they are adding support for the native notification in Chrome 68 using the Windows 10 Action Center
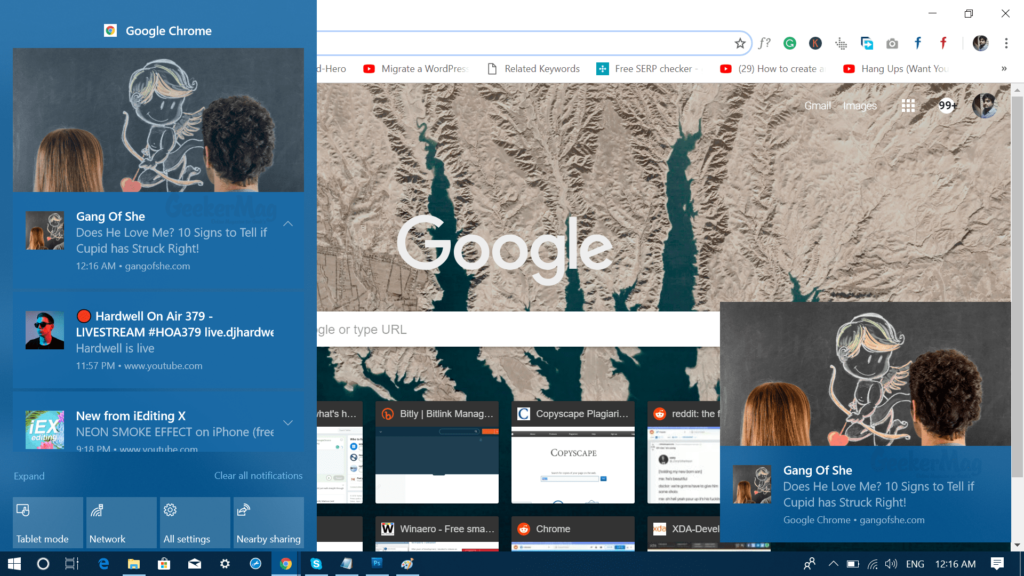
With the integration of native Google Chrome notifications in Windows 10, the company is also leading the apps to Action Center. This means that any notification displayed by the Chrome browser will now appear in the Action Center. This gives users a power to control the notification in a better way.
Like, you can use the default Focus Assist feature of Windows 10 to snooze Chrome notification when you’re doing something important or playing games.
If you’re running Chrome 68 version, the native Chrome notification feature is enabled by default. In case, you do not see the feature working on your machine; then you can enable it right now using the experimental flag.
Update 4 September 2018: Starting with Chrome 69, native Google Chrome notifications in Windows 10 is enabled out of the box. You don’t have to modify the flag to enjoy the functionality.
Manage Native Google Chrome notifications in Windows 10
Here’s what you need to do:
1. Open Google Chrome browser on Windows 10 PC.
2. In the address bar, you need to copy-paste the following address and hit enter.
chrome://flags/#enable-native-notifications
3. This will take you to the Chrome experimental flag page using which you can enable or disable the native Google Chrome notification feature in Windows 10.
Using the drop-down available next to “Enable native notifications” select Enabled. This will enable the feature.
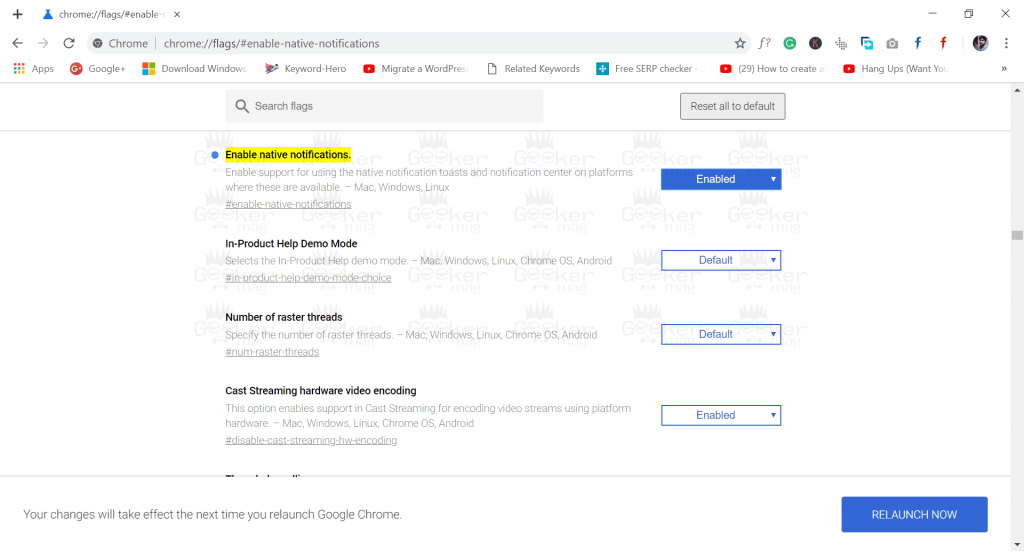
4. Click on the Relaunch Now button to apply the changes.
Now you will start receiving Google Chrome notification in Windows 10 Action Center. Here’s how the Chrome notification appears in Windows 10 Action Center:

If you missed any Chrome notification, then you can also check it in the Windows 10 Action center. For that, you need to click on Notification area icon available at the bottom right corner of the screen.
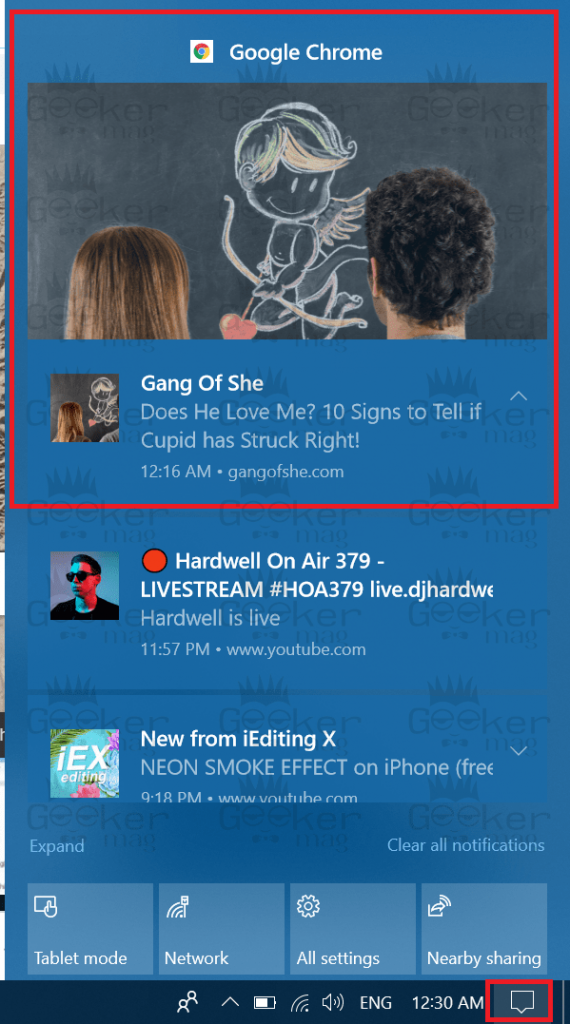
Manage Chrome Notifications in Windows 10
In case, you want to turn off the Chrome notifications; then you can also do that. For that, click on the Notification area icon. This will open the Action Center.
Here, you need to head over to the Chrome notification and then click on the Gear icon available on the right side of the notification card. This will show you more options; you need to click on “Turn Off Notification for Google Chrome.”

You can also use “Go to Chrome Notifications Settings” and “Go to Notification Settings” for further alteration.
Alternate Method
1. Launch the Settings app in Windows 10.
2. Click on System -> Notifications & Actions.
3. On the right panel, scroll down to “Get Notifications from these senders“. Here you will get a list of system apps accompanied by third-party apps supporting notifications.

4. Next, look for Google Chrome in the List. Move the slider to OFF position to turn off the Chrome notification in Windows 10 Action Center.
In case, you want to do further alteration like whether you want to see banner, notification sound, then click on the Google Chrome. This will take you Google Chrome Notification page like shown below:
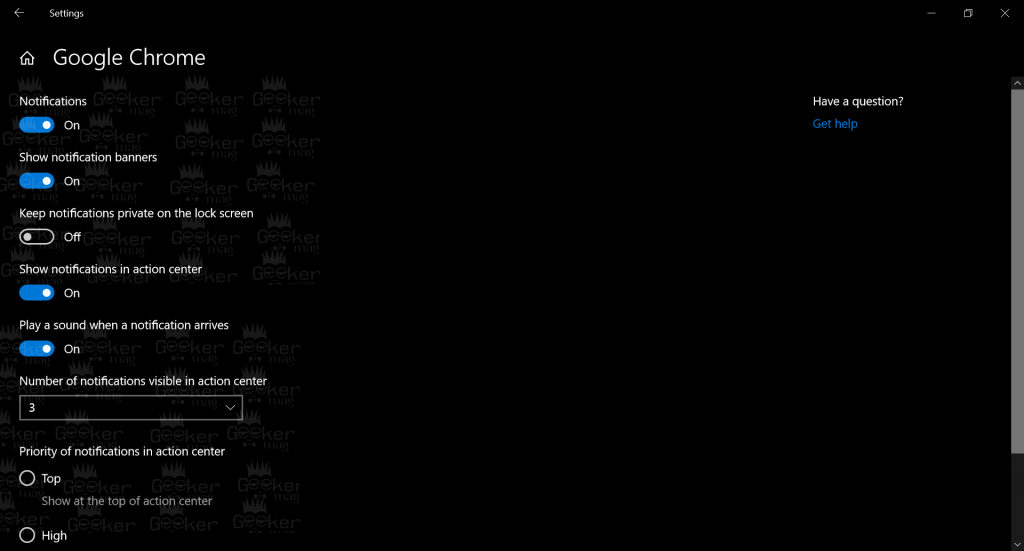
Make changes as per your requirement.
Turn Off Native Chrome Notification in Windows 10
In case, the Chrome notification feature is already working for you without enabling the experimental flags discussed above and you’re not happy with the feature, then you can also turn it off.
Using the drop-down available next to “Enable native notifications” select Disabled. This will enable the feature.

What do you think of native Google Chrome notifications in Windows 10 Action Center? I would like to read in the comments.


