The following blog post has a quick workaround on how to add sfc /scannow option in the Context Menu in Windows 10.

If Windows functions are not working properly or crashes mysteriously, the best solution is to use System File Checker tool (SFC.exe) available in the Windows OS that scan Windows and restore the files.
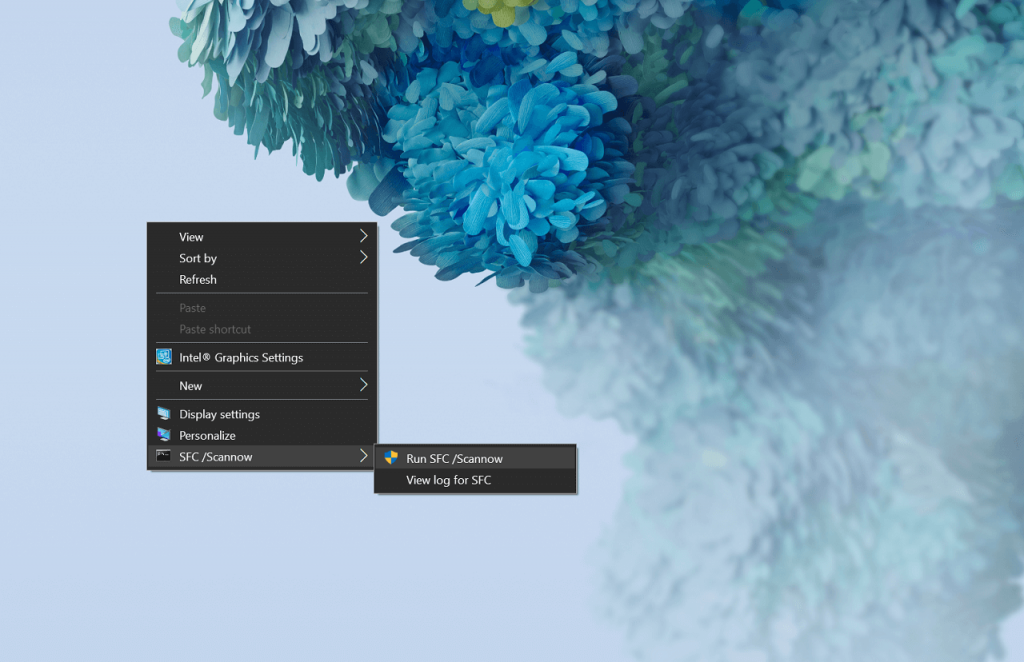
To run this tool users have to launch Elevated command prompt and execute sfc /scannow command. In case, you frequently use this tool then best thing is to add special entry to Windows 10 context menu to launch the tool by making a single click.
Add Sfc Scannow in Context Menu in Windows 10
In upcoming lines, you will learn a quick workaround using which you can add Run sfc / scannow entry to context menu in Windows 10. Here’s what you need to do:
1. Download the ZIP file using this link.
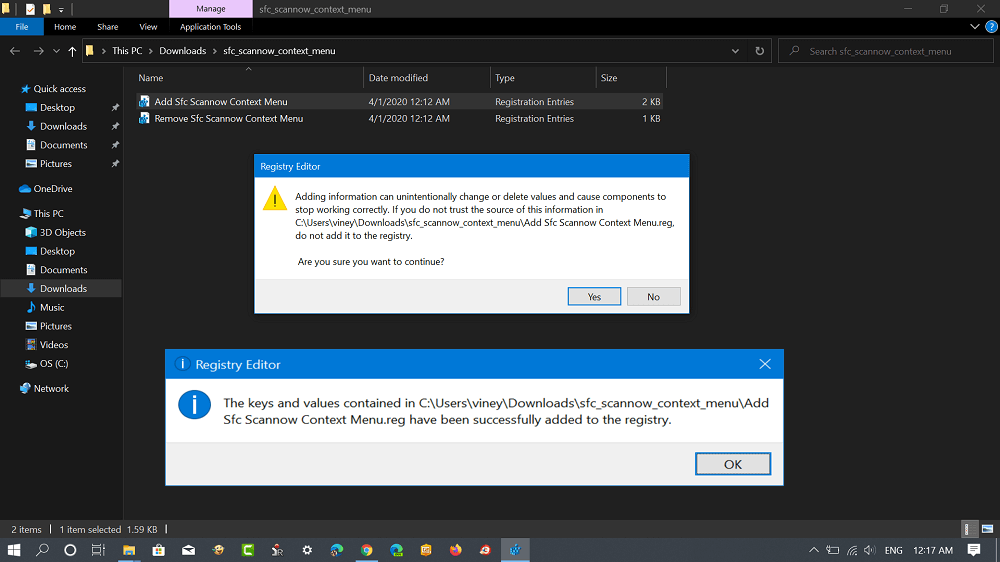
2. Extract the zip file and you will get the folder containing two .reg files:
- Add Sfc Scannow Context Menu
- Remove Sfc Scannow Context Menu
3. To enable Run /sfc Scannow option in the context menu, double click on Add Sfc Scannow Context Menu.reg.

When UAC dialog box appear, click Yes to continue. Also, when Registry Editor dialog box appear, click Yes to continue to Merge the file.
At any point, if you want to remove the entry from the context menu, then use this Remove Sfc Scannow Context Menu.reg file and follow the same procedure.
Thanks, Winaero for the tip


