Windows Sandbox is certainly one of the most interesting features introduced by the Microsoft in Windows 10 version 1903, the May 2019 Update.
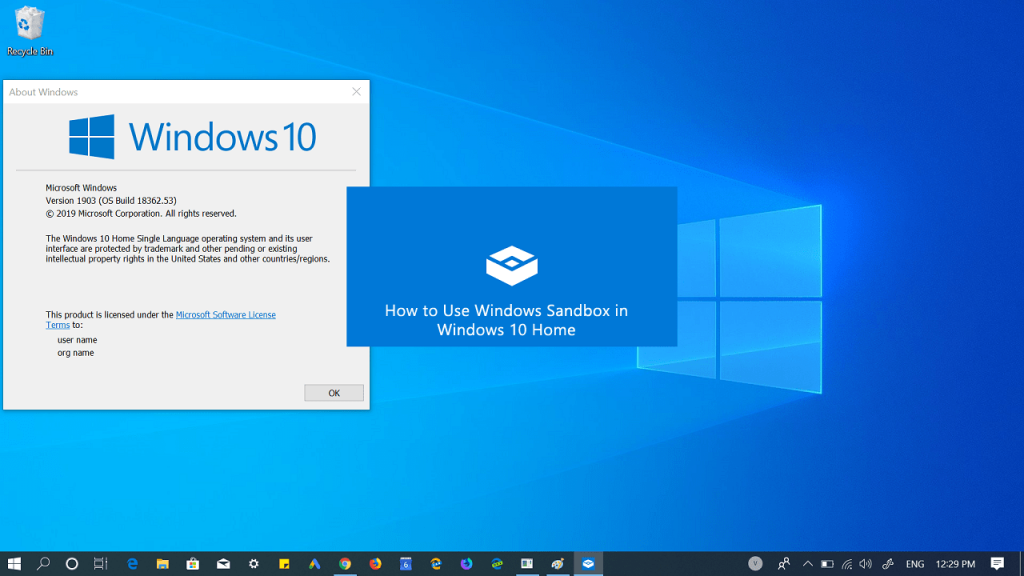
Windows Sandbox let users install and test application and programs in a secure virtualized environment within the system. Once you’re done with testing, all you have to close the Sandbox window, this will clear everything you have done in it.
It is very useful when you have to test program which are from third party and untrusted sources. You can test those program without having any impact on the PC.
Starting With Windows 10 Version 1903, the Windows Sandbox feature is officially available in Windows 10 Pro and Enterprise edition. While the users running can’t enjoy this functionality in Windows 10 Home edition as the same feature is not available in the same edition.
Fortunately, it is possible to install and activate Sandbox in Windows 10 Home edition. Thanks, Deskmodder, who have shared batch files that have the ability to enable the Windows Sandbox.
The requirements to enable the Windows Sandbox in Windows 10 Home edition are the same as those required for the Pro and Enterprise editions:
- AMD64 architecture
- Virtualization features enabled in the BIOS
- At least 4 GB of RAM (8 GB recommended)
- At least 1 GB of free disk space (SSD recommended)
- At least 2 CPU cores (4 cores with recommended hyperthreading)
Without these requirements, Windows Sandbox will not work, even after installation is complete.
Enable Windows Sandbox in Windows 10 Home
1. Download the zip file containing the batch file using this link and extract it using the default Windows 10 archiving tool.
2. You will get the folder with name Sandbox-install, open it and double click to run the Sandbox Installer.bat.
When “Windows protected your PC” dialog box comes up, click on More info and then click Run anyway. When UAC dialog box comes up, click Yes to continue.
3. The installation of Windows Sandbox feature will start in Command prompt window. It will take few seconds to complete the installation.
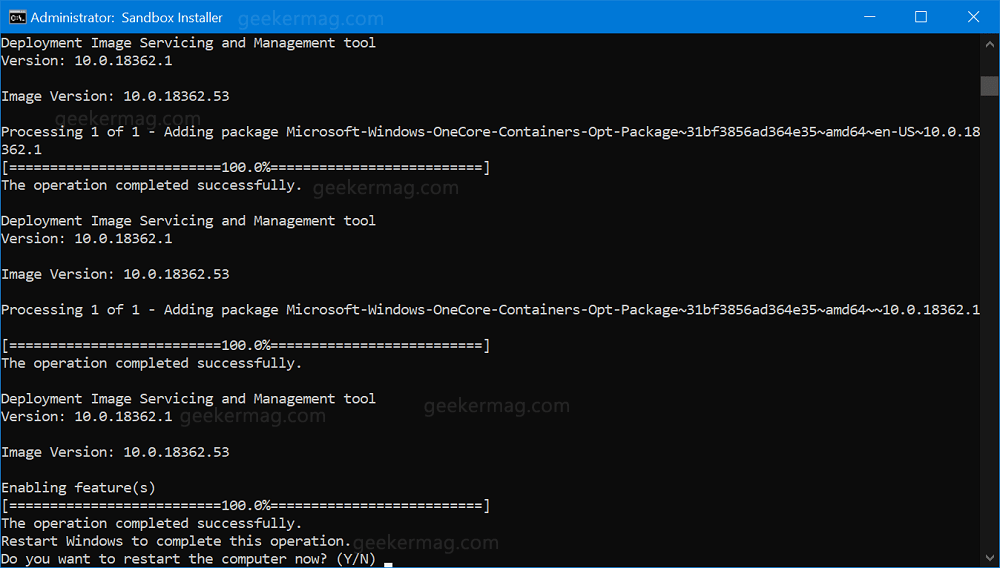
Note: Before performing below step, make sure to save all unsaved documents on your computer.
4. Once installation completes, you will get the success message accompanied by a message asking you to restart the computer. You need to Y and hit enter.
5. This will instantly reboot your computer. After a successful reboot, the installation of Windows Sandbox in Windows 10 home is completed.
6. To Enable or disable Windows Sandbox, you need to search “Turn Windows Feature ON or OFF” using the Start menu search bar and when the same result appears, click to open it.
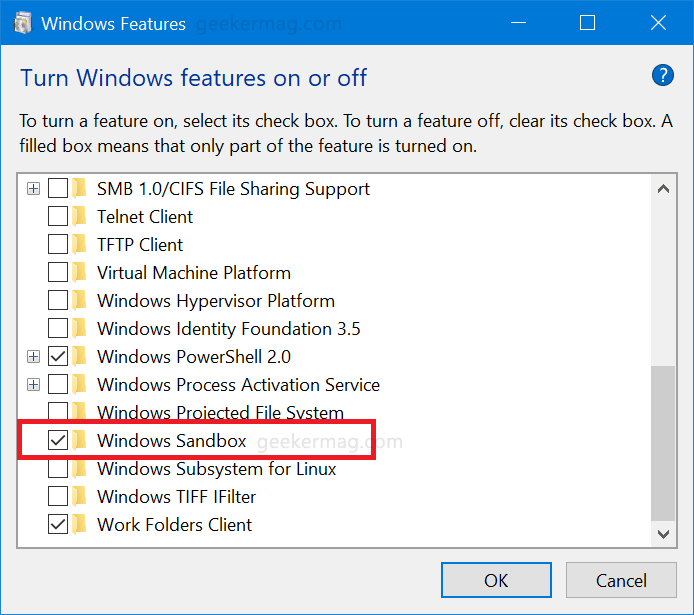
7. This will launch the Windows Feature window. In it, check the box for Windows Sandbox entry and confirm with OK.
8. You will find Windows Sandbox among other Windows programs in the Start menu, ready to be opened and used.
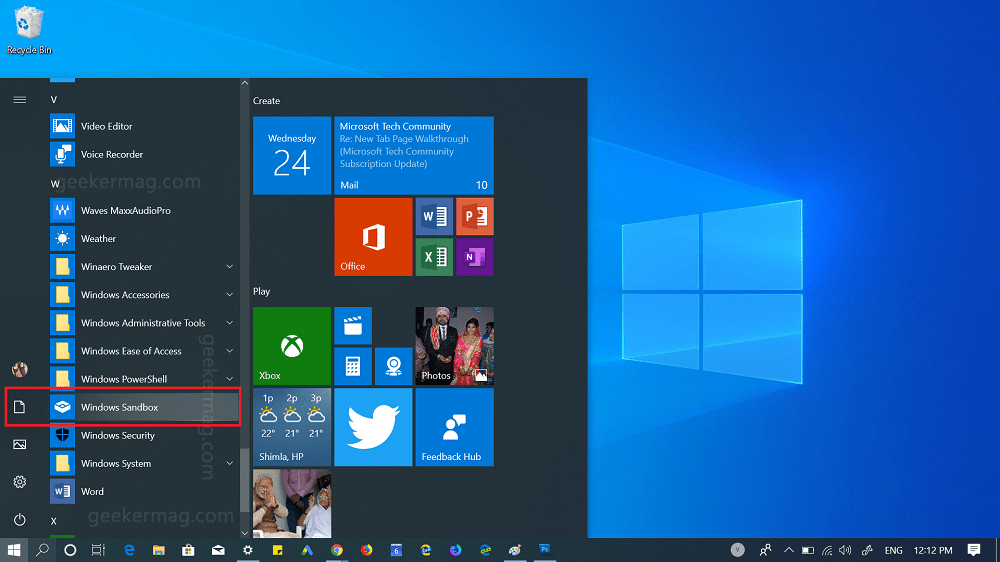
Click on the Windows Sandbox to open it. When the UAC dialog box opens up, click Yes to continue. It will take a few seconds to open it.
Related Reading – How to Install Group Policy Editor in Windows 10 Home
We hope you find this blog post handy, if you need further assistance let us know in the comments.



5 Comments
It doesn’t work. I download the file and run it. When the process of installing is complete, then I restart the pc. After restarting I check that the option of “Windows Sandbox” has come into the “Program Feature turn on/off” and it is checked. Then search for Sandbox app in start. But I don’t find this app. Please solve this problem.
After following all the above steps I tried to open Windows Sandbox. But a message came up – “The connection to the sandbox was lost. Error 0x8072746. An existing connection was forcibly closed by the remote host. Would you like to submit feedback about this issue?”
Any idea to get through this? Thanks
For all you haters out there, suck my ass. Because you are no better than anyone else.
i have the similar problem of Budd
Folowed all instructionns, Sand box app appeared in start list, but fails to initialise!