If you’re running the Home edition of Windows 11 and Windows 10 and would like to install Windows Sandbox on your PC, then this blog post is dedicated to you.
What is Windows Sandbox in Windows 11/10
Windows Sandbox is a nifty feature that creates an isolated environment to run untrusted software, test potentially harmful applications, or browse the internet securely. It creates a temporary virtual machine that runs a separate instance of Windows OS without affecting the user’s system.
Once the user finishes testing or browsing, the sandbox is closed, and all files and data created within it are deleted, ensuring no lasting impact on the system.
Windows Sandbox is an essential tool for developers, IT professionals, or anyone who wants to evaluate new software without the risk of infecting their system with malware.
Windows Sandbox is only available in the Pro, Enterprise, and Education editions of Windows 11 and Windows 10, and unavailable in the Home edition.
For Home Edition users, the only option is to upgrade to any of the supported editions to get access to Windows Sandbox, which will cost you more.
How to Install Windows Sandbox in Windows 11/10 Home Edition
What if I say it’s possible to access Windows Sandbox in Windows 11 and Windows 10 Home Edition? It will be great right? Let’s learn how to do that:
Before you start, I would like to tell you that, the solution discussed in this blog post, will only work if your PC meets the minimum requirements to Access Windows Sandbox which are as follow:
- PC must have a minimum of 4 GB RAM, although it is recommended to have 8 GB or more RAM for better performance.
- PC must have at least 1 GB of free disk space, and it is recommended to have an SSD for better performance.
- The computer’s BIOS must have virtualization enabled. Check this post on How to Check if Virtualization is enabled on PC.
- PC must have at least two CPU cores, but it is recommended to have four cores with hyperthreading for better performance.
If you made upto this part of the video, I presume that your PC meets minimum requirements to run Windows Sandbox. So lets learn the steps:
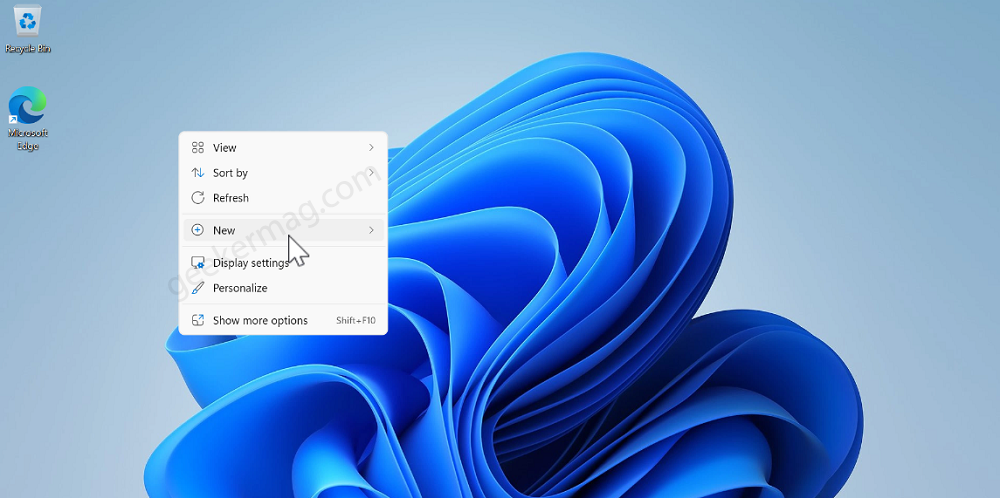
Right-click on the desktop and then select New > Text documents. The new text document will be created.
Open the text file and copy-paste this code:
@echo off

echo Checking for permissions
>nul 2>&1 "%SYSTEMROOT%\system32\cacls.exe" "%SYSTEMROOT%\system32\config\system"

echo Permission check result: %errorlevel%

REM --> If error flag set, we do not have admin.
if '%errorlevel%' NEQ '0' (
echo Requesting administrative privileges...
goto UACPrompt
) else ( goto gotAdmin )

:UACPrompt
echo Set UAC = CreateObject^("Shell.Application"^) > "%temp%\getadmin.vbs"
echo UAC.ShellExecute "%~s0", "", "", "runas", 1 >> "%temp%\getadmin.vbs"

echo Running created temporary "%temp%\getadmin.vbs"
timeout /T 2
"%temp%\getadmin.vbs"
exit /B

:gotAdmin
if exist "%temp%\getadmin.vbs" ( del "%temp%\getadmin.vbs" )
pushd "%CD%"
CD /D "%~dp0"

echo Batch was successfully started with admin privileges
echo .
cls
Title Sandbox Installer

pushd "%~dp0"

dir /b %SystemRoot%\servicing\Packages\*Containers*.mum >sandbox.txt

for /f %%i in ('findstr /i . sandbox.txt 2^>nul') do dism /online /norestart /add-package:"%SystemRoot%\servicing\Packages\%%i"

del sandbox.txt

Dism /online /enable-feature /featurename:Containers-DisposableClientVM /LimitAccess /ALL

pause
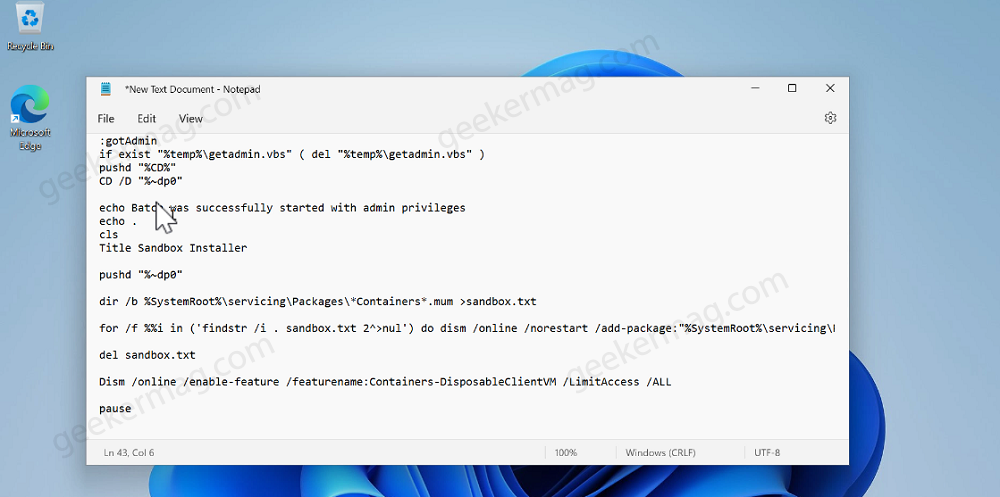
After that, click on the File and then select Save as.

Select the location where you want to save the file. Lets save it to desktop.
Now name the file Sandbox.bat. You need to save the file with .bat extension, else it will not work.
After that, click on the Save button.

Now, you will see the Bat file with name Sandbox on the location you have selected.
Right-click on it and select Run as administrator. When UAC dialog box appear, click Yes to continue.

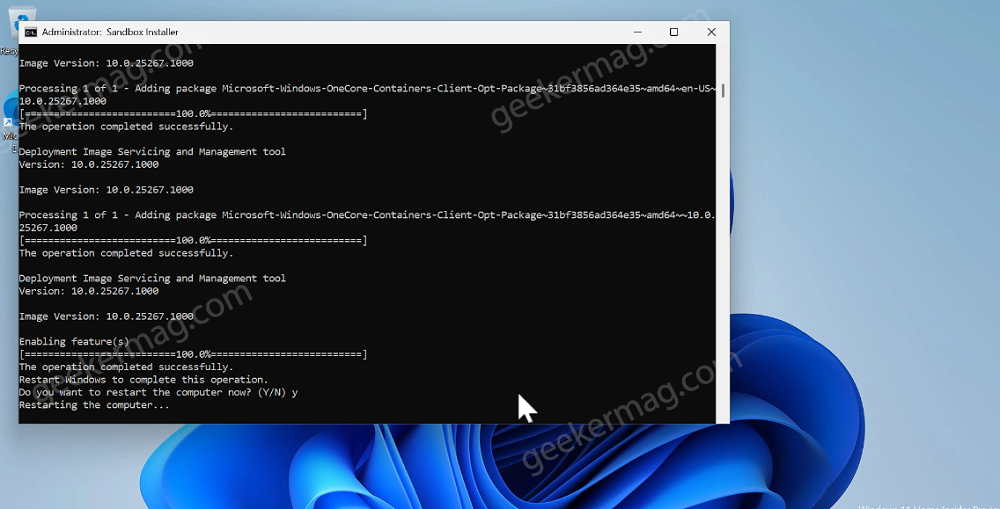
Instantly, command prompt window will open and start installing files required for the installation of the Windows sandbox feature. The process will take 5-10 minutes.
Once the process completes, you will be asked to restart your computer, type Y in the command prompt window.
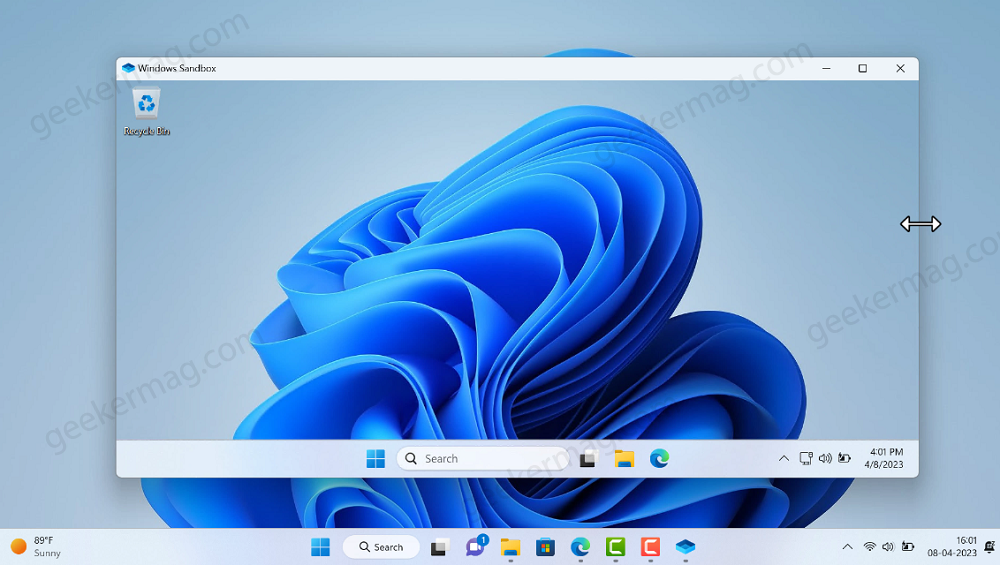
After restart, if you search Windows Sandbox, this time it will appear. You can use it the way you want.
As simple as that!
Remove Windows Sandbox from Windows 11/10
At any point you want to disable or uninstall Windows Sandbox, then here’s what you need to do:
Click on the Search icon and type Turn Windows Feature On or OFF, when it appear in results, click to open it.
In the Turn Windows Feature ON or OFF window, you need to locate “Windows Sandbox“, and uncheck the box for it.
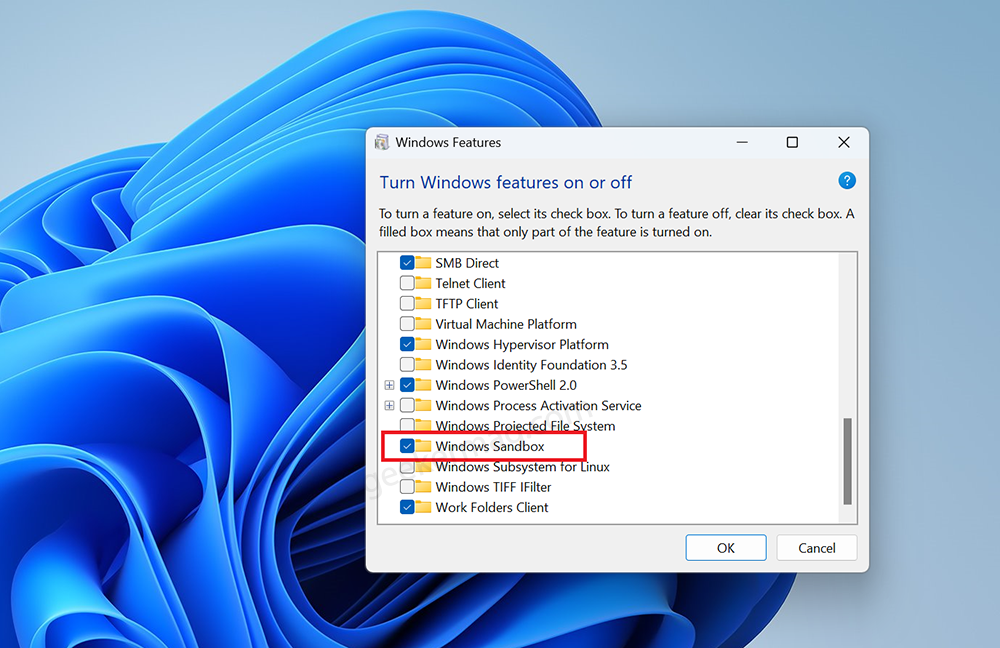
Click on OK to apply the changes.
After that restart your computer and this will remove Windows Sandbox from Windows 11. The process to remove Sandbox from Windows 10 is same.
Windows Sandbox fails to initialize error
In case, instead of opening it shows a error message i.e. Windows sandbox fails to initialize, then its highly possible that, your PC lack system requirements to run Windows Sandbox.

Unfortunately, there’s no solution available for fix the issue, if this dialog box appear, after installation of Windows Sandbox using this method.
According to various reports from the users usually this error appear when your PC lack Virtualization feature and trying to install it on virtual machine. So make sure its enabled and working properly.
Following the same procedure, you can install Windows Sandbox on Windows 10 as well.
- Create Sandbox.bat file,
- Run the bat file.
- Once installation completes, restart your computer.
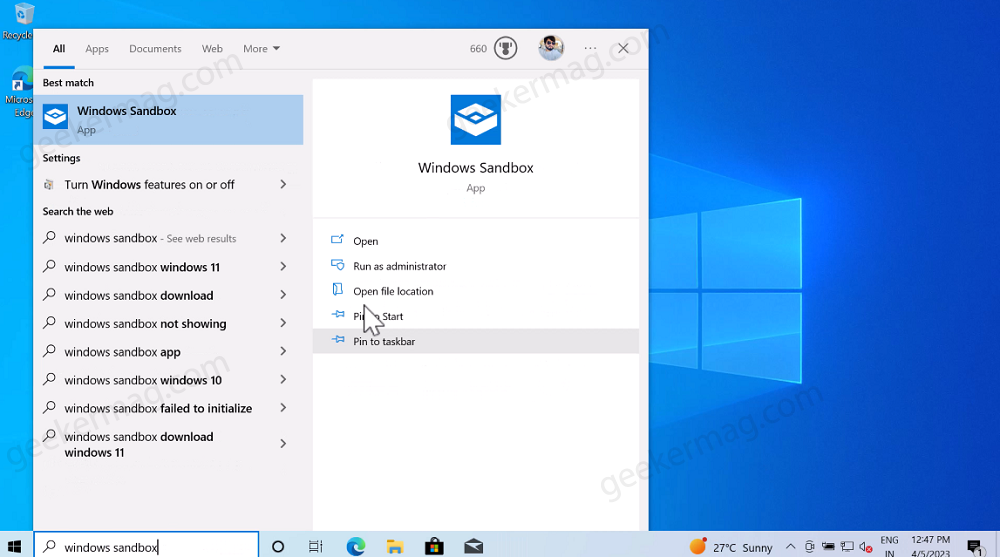
And you’re good to go.
By following the steps outlined in this blog post, you can easily enable and set up Windows Sandbox on your Windows 11 and Windows 10 PC. If you have any query feel free to share in the comments.




1 Comment
Taking into account your skills, interest and experience, decide which category and level is appropriate for you