If you’re a professional who has to demonstrate the various programs to colleagues or own a YouTube channel about tutorials, then Screen recording is a feature that helps you in achieving this.
The Internet is full of the best screen recording tools some of them are paid, while others are freemium with limitations. What if I say that Windows 11 comes with a hidden screen recording tool? It will be great, isn’t it?
How to Screen Record on Windows 11
In today’s blog post, we will share with you how you can record gameplay, presentation, or anything on your Windows 11 PC without using a third-party screen recorder app.
Xbox Game Bar is an application dedicated to gamers that come preinstalled in Windows 11. The app allows you to easily record the screen on the PC. Here is how to open and use Xbox Game Bar.
Use Xbox Game Bar to Record Screen in Windows 11
Click on the Search icon and type Xbox Game Bar and when it appears in search results, click to open it.

Alternatively, you can use WIN + G key combination.
On the Xbox Game Bar, click on the Capture icon to open a new capture window.
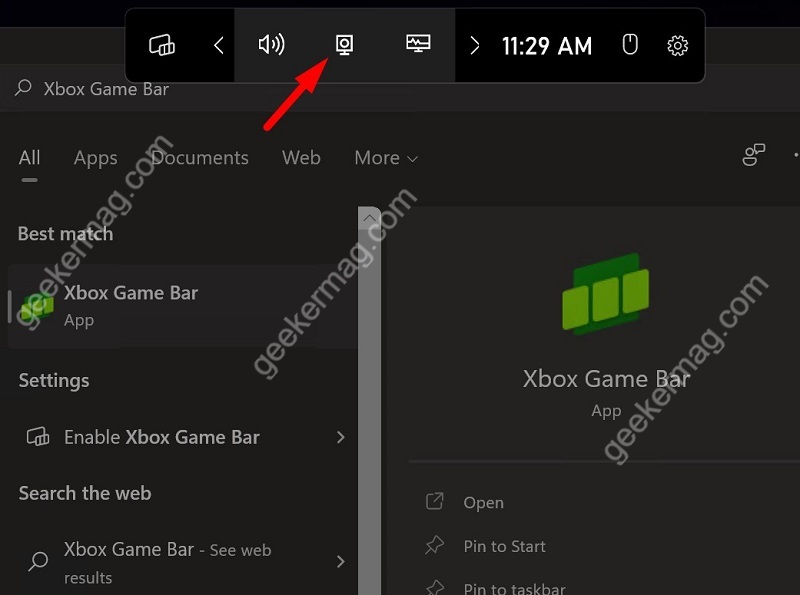
In the Capture window, you need to click on the Record button (solid circle button) and this will start the recording. In the same window, you can also enable or disable the mic.
Note – The Screen recording feature only works for apps and games, so if you try to record desktop or File explorer, you will get the message “Gaming features arne’t available for Windows Desktop and File Explorer”
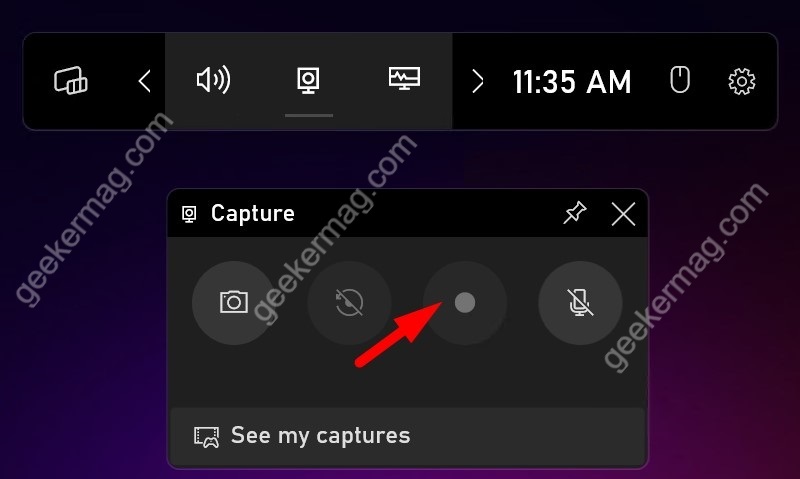
As discussed above, when you click on the Record button, it will start recording, now perform a task that you want to record. Once done, click on the same button to stop recording.
Once you click on the record button, it will start recording your screen. Perform the task that you want to record and once done, click on the stop button (solid square button).
To check your recording, click on the see my captures button or visit here: C:\Users\Username\Videos\Captures
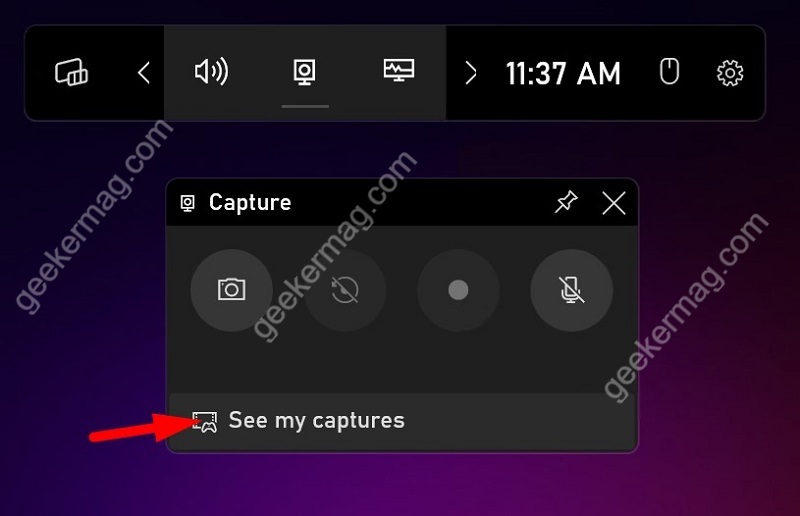
As simple as that!
Use Microsoft PowerPoint to Record Screen in Windows 11
If you’re looking for the answer to the question i.e. How to screen record on windows 11 without a game bar, then this method is for you.
This is not a native method but this is another simple method to record screens on Windows 11 and is only valid if you have installed the Microsoft Office suite, especially the Microsoft PowerPoint app.
For this method, you will need a PowerPoint app. If you have installed Microsoft office then you don’t need to worry as PowerPoint is a part of MS Office or Office 365.
Click on the Window Search icon on the Taskbar and type PowerPoint, when it appears in the results, click to open it and create a new document.
In the PowerPoint toolbar, you need to switch to the Insert tab.
Take a look at the right side of the toolbar, under the Media section, you will find an option ‘Screen Recording, click on it to open the recording tool.
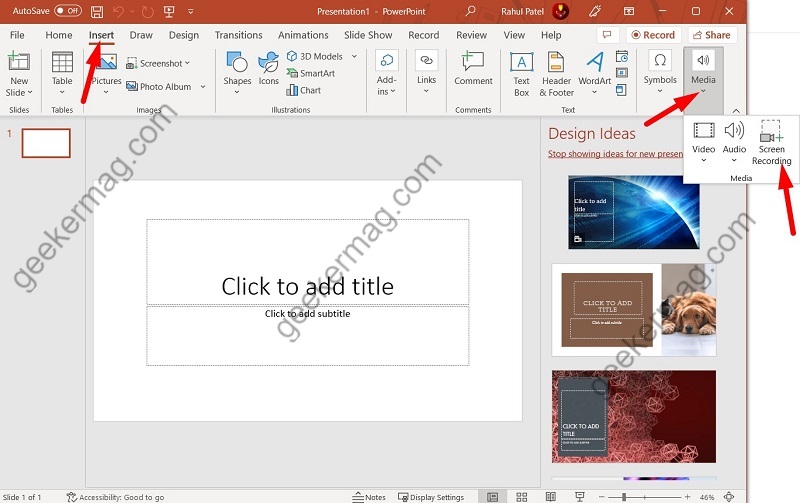
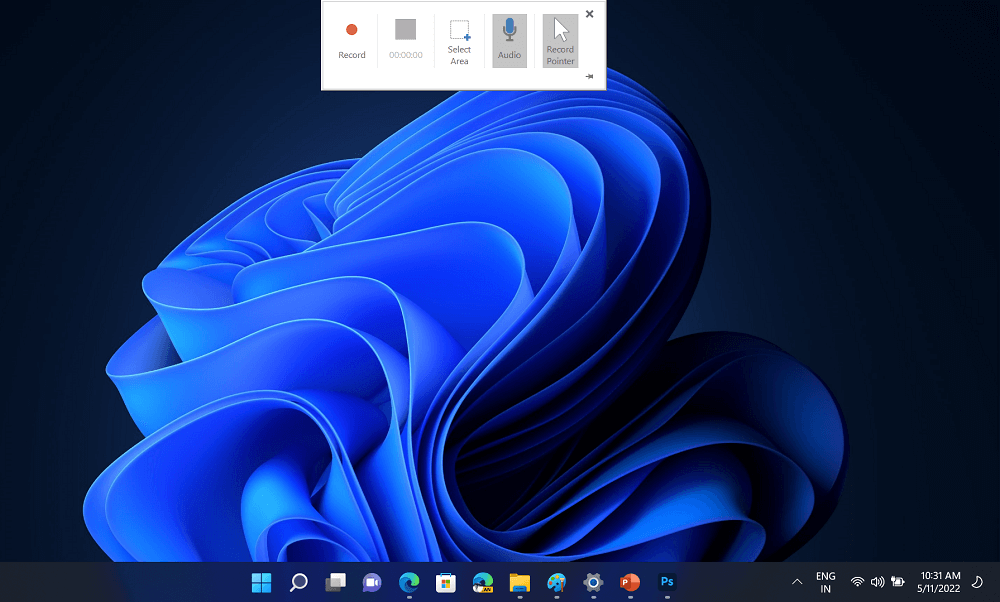
When you click on the Screen Recording option, the PowerPoint will disappear and you will see recording options.

Here, you need to select the area of the screen that you want to record using the PowerPoint Recording tool and then click on the Record button. This will start the recording.
- If you want to pause the recording, then click on the Pause button in the menu bar.
- To end the Screen recording, click on the Stop button.

Once done, the recording will be inserted into the PowerPoint document that you’ve created.
There’s no direct way to save the recording to a particular directory so you need to save the recording from the PP document to the desired location manually. Here’s how you can do that:
Right-click on the recording and choose Save Media As.
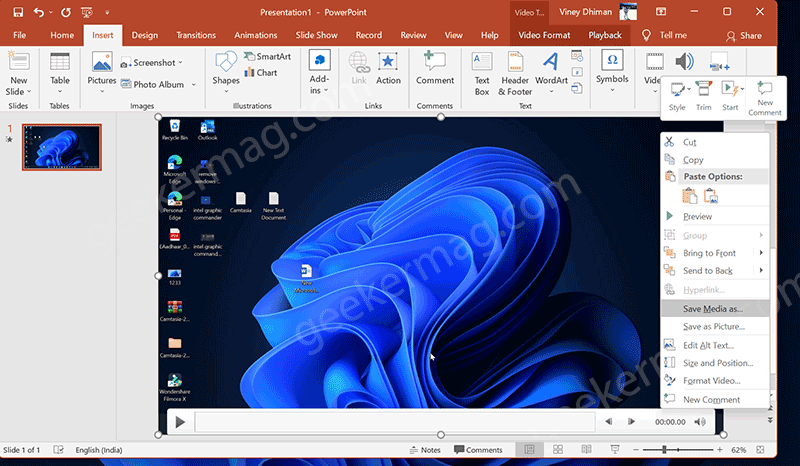
When the Save media as dialog box appear, give you recording a name and select the location where you want to save it and then hit the Save button.
Both method i.e. Screen recording using Xbox Game Bar and Microsoft PowerPoint works in Windows 10 as well.
Editor Note
So these are two nifty ways using which you can do screen recording without using third-party tools. Although, you need to keep in mind that these methods offer basic screen recording and lack editing options after the recording is done.
In case, you’re seeking those functionalities, then you need to take the help of a third-party screen recording tool.
That’s all about this blog post, why don’t you try these methods and let us know which method you find useful. Also, if you know any other method, then feel free to share with other readers in the comments.

