Subscribe to Updates

    Get the latest creative news from FooBar about art, design and business.

    What's Hot

    How to Enable Option to Receive Windows 11 Feature Updates Quickly

    March 21, 2023

    Upgrading from Windows 7 to Windows 10: How to Keep Your Data Safe‍

    March 20, 2023

    Use Show Basic Toolbar in Edge to Cleanup Toolbar & Titlebar

    March 17, 2023
    What's Hot

    How to Enable Option to Receive Windows 11 Feature Updates Quickly

    March 21, 2023

    Upgrading from Windows 7 to Windows 10: How to Keep Your Data Safe‍

    March 20, 2023

    Use Show Basic Toolbar in Edge to Cleanup Toolbar & Titlebar

    March 17, 2023
    Facebook Twitter Instagram
    GeekerMag
    • Home
    • Windows
      1. Windows 11
      2. Windows 10
      3. View All

      How to Enable Option to Receive Windows 11 Feature Updates Quickly

      March 21, 2023

      How to Get Microsoft Giving Free USB Drives to Windows Insider

      March 16, 2023

      Show/Hide Recommended Tips, Apps & Shortcuts in Windows 11 Start Menu

      March 7, 2023

      Use AI-Based Depth Effect for Desktop Background in Windows 11 (Leaked)

      March 6, 2023

      How to Disable New ‘Bing Search Bar’ on Windows 10 Desktop

      March 17, 2023

      How to Stop Internet Explorer Open/Redirect to Microsoft Edge in Windows 10

      March 6, 2023

      How to Download & Install Intel Unison on Windows 10 PC (Workaround)

      February 21, 2023

      Fix – Microsoft Store Error Code 0xC002001B in Windows 10 While Installing Apps

      May 21, 2022

      How to Enable Option to Receive Windows 11 Feature Updates Quickly

      March 21, 2023

      Upgrading from Windows 7 to Windows 10: How to Keep Your Data Safe‍

      March 20, 2023

      Use Show Basic Toolbar in Edge to Cleanup Toolbar & Titlebar

      March 17, 2023

      How to Disable New ‘Bing Search Bar’ on Windows 10 Desktop

      March 17, 2023
    • Browser
      1. Microsoft Edge
      2. Google Chrome
      3. Firefox
      4. View All

      Use Show Basic Toolbar in Edge to Cleanup Toolbar & Titlebar

      March 17, 2023

      How to Remove Discover Bing button in Microsoft Edge Toolbar

      March 16, 2023

      How to Uninstall Microsoft Edge from Windows 11/10 in 2023

      March 13, 2023

      Use Action Center to Track New Rewards in Microsoft Edge

      March 11, 2023

      How to Use New Bing Chat Mode in Google Chrome

      March 15, 2023

      How to Disable Windows 10 Upgrade Prompt in Google Chrome – 2023 Guide

      February 2, 2023

      Stop Chrome, Edge Spell Check feature from leaking Passwords

      September 20, 2022

      How to Take Full Page Screenshot in Chrome without Extension

      May 5, 2022

      How to Automatically Reject All Cookies Banner on Sites in Firefox

      December 23, 2022

      How to Install Firefox v100 in Windows 7

      April 9, 2022

      How to Enable Close Tab Warning in Firefox 94

      October 27, 2021

      How to Restore Missing View Image Info Option in Firefox

      September 2, 2021

      How to Enable Option to Receive Windows 11 Feature Updates Quickly

      March 21, 2023

      Upgrading from Windows 7 to Windows 10: How to Keep Your Data Safe‍

      March 20, 2023

      Use Show Basic Toolbar in Edge to Cleanup Toolbar & Titlebar

      March 17, 2023

      How to Disable New ‘Bing Search Bar’ on Windows 10 Desktop

      March 17, 2023
    • Gaming

      5 Cool Puzzle and Brain Teaser Games

      November 24, 2022

      4 Alternatives to Microsoft Solitaire You Should Try 

      June 29, 2022

      5 Best Equipment to Stream Your Game Live [Logitech, Tonor & so on..]

      April 6, 2022

      Twitch Set to Offer Income Incentives to Help Level the Playing Field

      March 9, 2022

      How to Stream Xbox One Games to a Windows 11 & 10 PC

      October 25, 2021
    • Best Of

      How to Teach your Child to Program in Python

      January 30, 2023

      What Should You Look at Before Choosing Automatic Captioning Software?

      April 20, 2022

      10 Best Windows 11 Laptop to Buy in 2022

      March 16, 2022

      5 Best Logo Maker Sites to Create a Logo in 2022

      January 9, 2022

      9 Best Apps to Track Your Habits & More Productive

      November 11, 2021
    • How to

      Upgrading from Windows 7 to Windows 10: How to Keep Your Data Safe‍

      March 20, 2023

      How to Make Coding Fun

      May 25, 2022

      How to Add Captions and Subtitles to Your YouTube Video

      April 25, 2022

      How to Enable or Disable New Gmail 2022 User Interface

      March 5, 2022

      Fix – Stop Edge from Hijacking/Opening PDF Files – (Workaround)

      February 21, 2022
    GeekerMag
    Home»How to»How to Install Windows 10 on Raspberry Pi 4 (Tutorial)
    How to

    How to Install Windows 10 on Raspberry Pi 4 (Tutorial)

    By Viney DhimanJuly 25, 2020Updated:July 25, 2020No Comments5 Mins Read
    Facebook Twitter Pinterest LinkedIn Tumblr Email
    Share
    Facebook Twitter LinkedIn Pinterest Email

    Windows 10 is coming to ARM platforms which includes Samsung Exynos and Qualcomm Snapdragon. Raspberry Pi 4 is also a ARM device and very popular among users. Even some users want to try Windows 10 and its default apps on the same device.
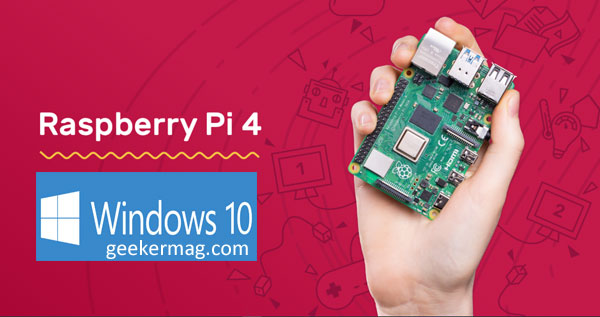
    How to Install Windows 10 on Raspberry Pi 4

    Fortunately, there are various methods to install and run Windows 10 Operating System on a Raspberry Pi. Interested users who want to try Windows 10 on Raspberry Pi device can install Windows 10 IoT, which is a smallest version of Windows 10 Edition. But there’s a catch, the company want users to use this edition for prototyping and not for enjoy fully fledged desktop experience.

    So officially, Microsoft doesn’t want users to install and run real edition of Windows 10 on dual-display, desktop computer called Raspberry Pi 4 and take most out of it.

    You might be interested in – Purchase Raspberry Pi 4 at Price of $35 from Amazon

    No worries, there are various tech project available on the internet that make it possible for the users to install and run Windows 10 on Raspberry device.

    In this blog post, we will discuss with you step by step instructions on how to Install Windows 10 on Raspberry device.

    What You’ll Require

    • Raspberry Pi 4 backed by 4GB of RAM. (You can purchase it from Amazon at Price of $60.70). On this page, you will get option to purchase Raspberry PI 4GB and 8GB of RAM. For this project, we need minimum of 3GB of RAM.
    • 32GB or higher microSD card. We recommend you class A1 or A2, because faster is better for the installation. If you don’t have purchase it from Amazon at price of $8.39
    • Ethernet or Wi-Fi Dongle
    • Monitor, Keyboard, and Mouse which we usually have all the time.

    You might be interested in reading – Fix – DLG_FLAGS_INVALID_CA Error

    How to Install Windows 10 on Raspberry Pi 4

    1. Download latest version of Windows on Raspberry (WoR) tool from this link and extract the file using archiving tool.

    2. Using this link visit Windows on Raspberry Pi (WoR) Discord group and download the latest version of Windows 10. You will find the download link on the left pane.

    You can also download UUP image of Windows 10 and convert it manually to ISO image. Windows 10 v2004, v1909, and v1903 are working fine.

    3. Launch WoR Alpha tool on your device and select your language depending on your region.

    4. Insert your Micro SD Card into the desktop and Select the drive. Make sure, Raspberry Pi 4 [ARM64] is selected.

    5. Select Windows 10 image for ARM device.

    6. In Select the Drivers screen, Select “latest package of drivers from the server“.

    7. Select Use the latest UEFI firmware available.

    8. In Select the UEFI firmware screen, you need to select the option “Use the latest UEFI firmware available on the server“.

    9. In Configuration screen, you need to switch to Advanced tab and change memory limit to 8192 MB. If you don’t do that, your device will automatically locked to 1GB RAM.

    After doing this, back to main screen and check configuration and if all good, click on the Next button.

    10. In Installation overview, you will get quick preview of your selection to perform the installation. Double-check it and once its all good, click on the Install button.

    11. Doing this will start the installation of Windows 10 on Raspberry Pi 4 device. The installation will take 2-3 hours depending on how fast is your microSD card.

    12. Again visit (link discussed above) Windows on Raspberry Pi Discord server and download the RAM fix file for Raspberry Pi 4, and extract the files.

    13. Copy and paste winpatch.exe file to root i.e. C:drive

    14. Launch File Explorer and find out in which drive of your ARM device Windows 10 is installed. You need to remember the name of drive.

    15. Launch Elevated Command and then execute following command to go to C: drive:

    cd:\

    16. To enable the USB ports on Raspberry Pi 4 device, you need to Patch USB drive. For that, you need to execute following command:

    winpatch X:\Windows\System32\drivers\USBXHCI.SYS 910063E8370000EA 910063E8360000EA 3700010AD5033F9F 3600010AD5033F9F

    In above command, you need to replace X: drive with drive letter that matches your installation.

    17. Close everything and remove microSD card.

    18. Insert microSD card into Raspberry Pi 4 device.

    19, After that, Connect Keyboard and Mouse to your device and turn it ON.

    20. Now perform the standard procedure to setup Windows 10, like you install it on other devices. Wait for few seconds and you’re ready to use Windows 10 on your Raspberry Pi 4 device.

    21. Launch Task Manager and check how much memory is installed. If its 1GB, then you need to enable 3GB RAM. For that, you need to execute following command in elevated command prompt window:

    bcdedit /deletevalue {default} truncatememory

    22. At last, reboot your Raspberry Pi 4 device to apply the changes.

    23. To access internet on your device, you can use compatible WI-Fi dongle or USB to Ethernet

    24. To install Microsoft Edge browser on your device, you need to double-click on the icon available on the desktop. (Google Chrome doesn’t support ARM device)

    25. The process to install software on Windows 10 is similar like you do in generally.

    Now its your turn to try these steps to install and start using Windows 10 on your Raspberry device.

    Important – the steps we would like to tell you that its unofficial results and we don’t guarantee anything mentioned in this post is legitimate. So follow the steps at your own will.

    Don’t forget to tell us your experience with us in the comments.

    Donate on Paypal or Buy us a coffee or Join Patreon if you find the information shared in this blog post useful. Mention ‘Coffee’ in the Subject. So that I can thank you

    Raspberry Pi 4 Windows 10
    Share. Facebook Twitter Pinterest LinkedIn Tumblr Email
    Viney Dhiman
    • Website
    • Facebook
    • Twitter
    • Instagram
    • LinkedIn

    Himachali, Mechanical Engineer, Snooker Lover, Avid drinker of Scotch, Traveler, and Webmaster.

    Related Posts

    Upgrading from Windows 7 to Windows 10: How to Keep Your Data Safe‍

    March 20, 2023

    How to Make Coding Fun

    May 25, 2022

    How to Add Captions and Subtitles to Your YouTube Video

    April 25, 2022

    How to Enable or Disable New Gmail 2022 User Interface

    March 5, 2022
    Add A Comment

    Leave A Reply Cancel Reply

    This site uses Akismet to reduce spam. Learn how your comment data is processed.

    Use Microsoft’s New Bing Search AI Chatbot Powered by ChatGPT
    https://www.youtube.com/watch?v=NKOWg1UlXUM
    Our Picks

    How to Enable Option to Receive Windows 11 Feature Updates Quickly

    March 21, 2023

    How to Get Microsoft Giving Free USB Drives to Windows Insider

    March 16, 2023

    Show/Hide Recommended Tips, Apps & Shortcuts in Windows 11 Start Menu

    March 7, 2023

    Use AI-Based Depth Effect for Desktop Background in Windows 11 (Leaked)

    March 6, 2023
    • Facebook
    • Twitter
    • Pinterest
    • Instagram
    • YouTube

    Subscribe to Updates

    Get the latest creative news from FooBar about art, design and business.

    Need Support?

    Please do not hesitate to Contact me on Twitter if you want assistance with issue related to Windows 11, Windows 10, and Edge browser. I will try my best to assist you ASAP. (Follow me first and then PM your issue on Twitter)

    Help Us Grow!

    Donate on Paypal or Buy us a coffee or Join Patreon if you find the information shared in this blog post useful. Mention ‘Coffee’ in the Subject. So that I can thank you

    Do you find the information shared on our blog useful? You might want to check Hot Deals on Amazon for your next purchase. With this, you support our site and the prices will remain the same for you ( you don't need to pay any extra amount) We appreciate your support, Thank you!

    Facebook Twitter Instagram Pinterest Vimeo YouTube
    • About
    • Contact
    • Privacy Policy
    • TOC
    © 2023 All Rights Reserved | GeekerMag

    Type above and press Enter to search. Press Esc to cancel.