Some users reporting weird issue where their Windows 11 PC won’t go into sleep mode. So what actually happens is when they try to enter PC in Sleep mode from the Power options available in the Start menu.
- Nothing happens and PC is awake
- Fan and background process keep running and just display turn off
Apart from that, different users reports about different scenarios. Unfortunately, there’s no exact reason behind what blocks Sleep mode in Windows 11 from working properly.
If you made upto this blog post then it is highly possible that the PC is not going to sleep mode properly in Windows 11 PC.
Related reading – Fix – Windows 11 PC Won’t Wake Up from Sleep Mode
How to Fix Windows 11 Sleep Mode not working
To help you out, we decided to cover this blog post featuring possible troubleshooting that you can apply to solve Windows 11 sleep mode not working issue. Let’s start with the first method:
Before you start following any method, make sure the charger is not connected to your laptop. Sometimes due to Windows 11 power settings, your computer won’t go into sleep mode when the charger is connected. So first confirm it.
Method 1: Confirm Sleep Settings
Launch Settings app by pressing WIN + I key combination.
Next, you need to go to System > Power > Power & Battery.
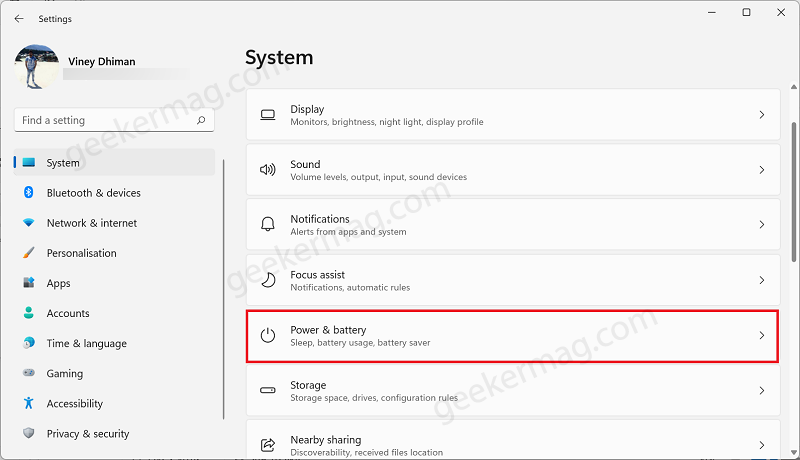
Here under Power section, you need to select Screen and sleep. Here, you will find two options:
- On Battery power, put my device to sleep after
- When plugged in, put my device to sleep after
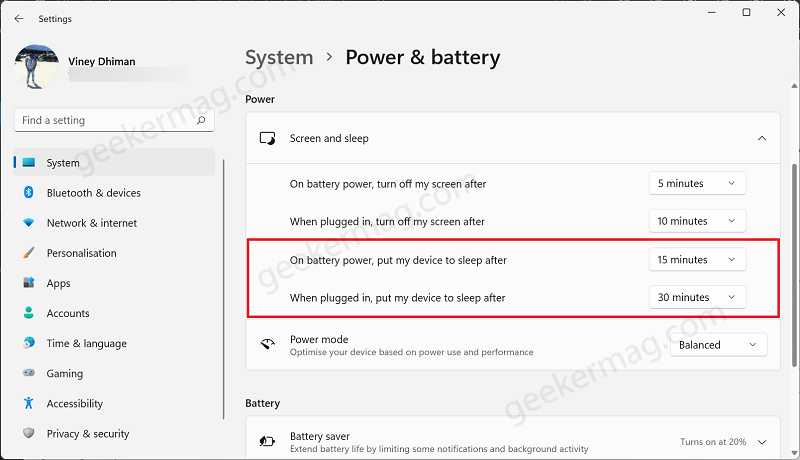
Here, you need to make sure that both options are not set to Never. If yes, then you need to select particular time period depending on your requirement.
Method 2: Check Sensitivity settings of Mouse
In case, you’re using Mouse on your device, then it is highly possible that it is super-sensitive mouse. And due a slight vibration happening in the mouse, your PC won’t go in sleep mode.
According to various reports from user, decreasing the sensitivity helps in fixing the issue. Here’s how you can do that:
Launch Settings app in Windows 11 by pressing WIN + I key combination.

Select Bluetooth & devices > Mouse.
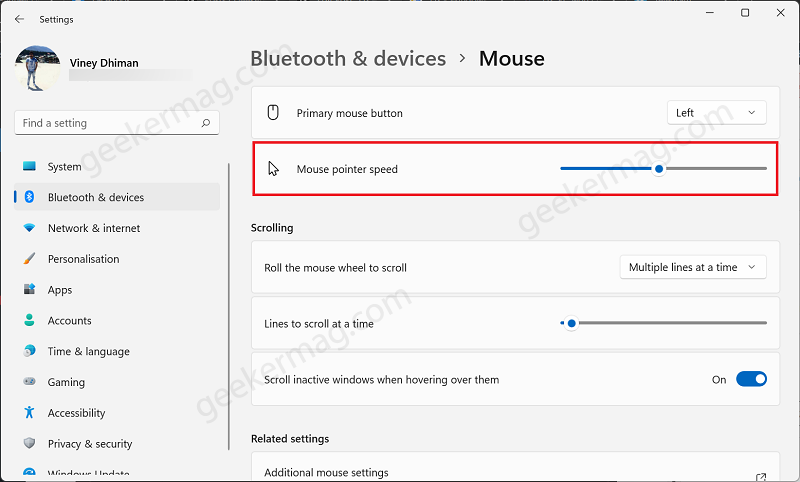
On this settings page, you need to “Mouse pointer speed” decrease the pointer settings.
Method 3: Change Sleep Mode Settings
Make sure that sleep settings are correct. Sometimes, 3rd party apps will interfere and change sleep mode settings. To change the power settings to default, follow these steps.
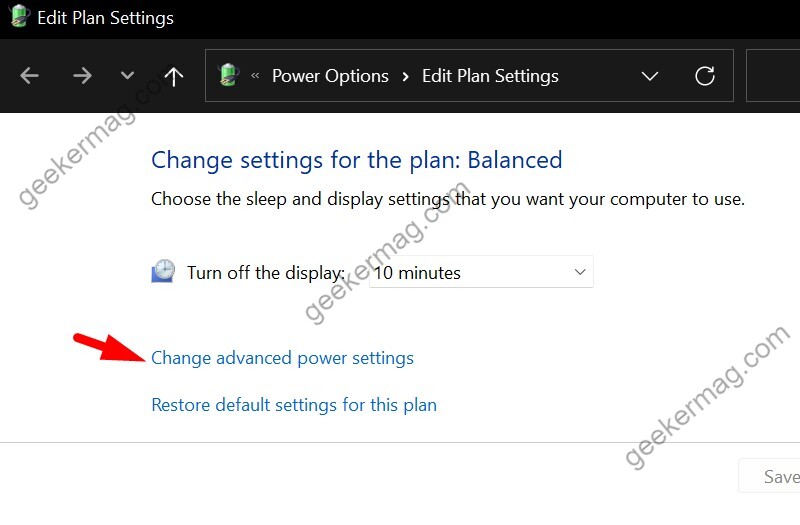
First, open the start menu and then search for “Edit power plan” and open it.

Then click on Change advanced power settings option.
In the new window, click on Restore plan defaults.
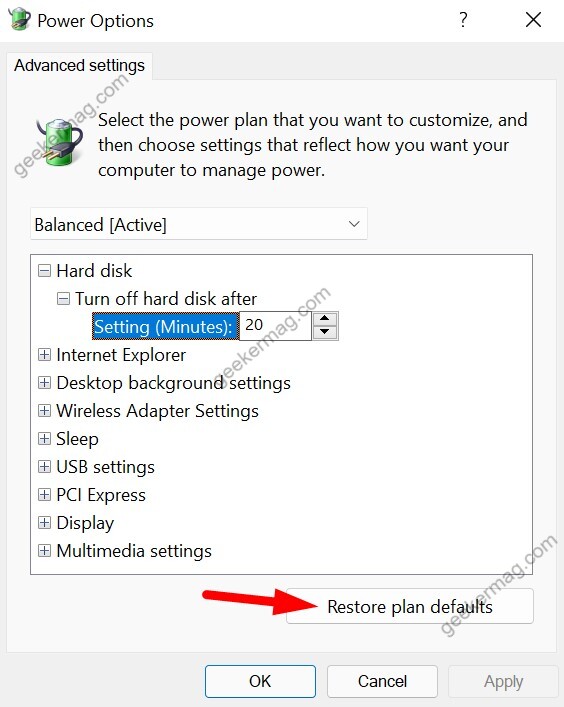
Once done, go to Power options and Expand multimedia settings and then expand When sharing media option.
Select Allow the computer to sleep option for On battery and Plugged in option.
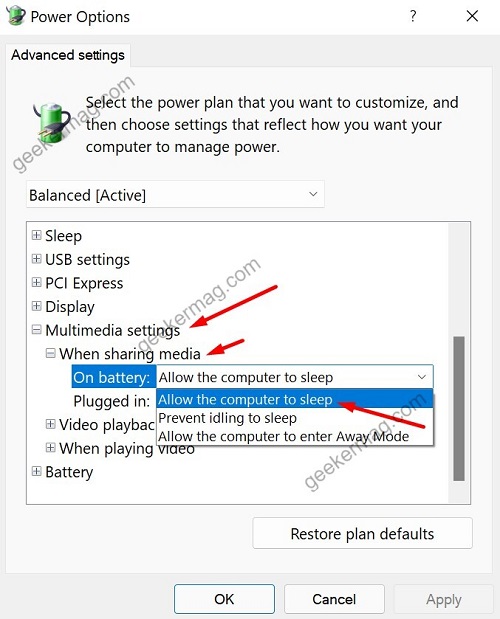
Click on Apply > OK > Restart.
Method 4: Use Windows Troubleshooter
Windows 11 comes with built-in troubleshooters that allow you to fix Windows 11 issues. For sleep mode, you can use a power troubleshooter. Follow these steps:
First, open the start menu and then search for “troubleshoot“.
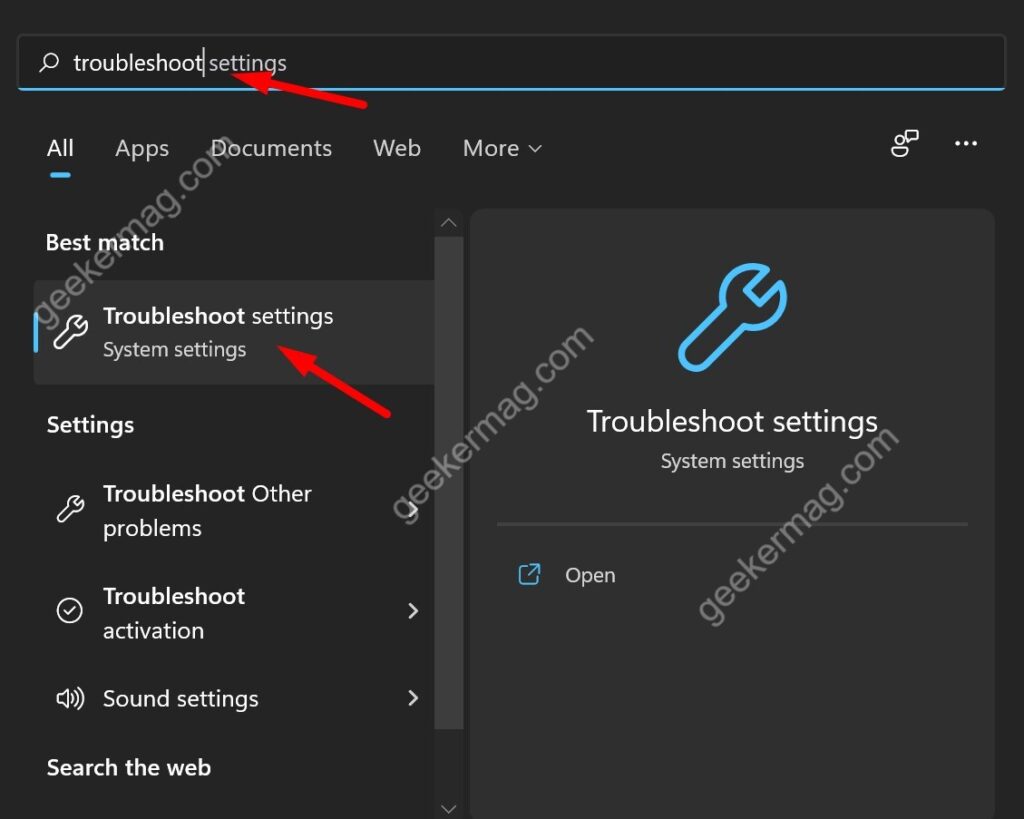
Click on troubleshoot settings from the list.
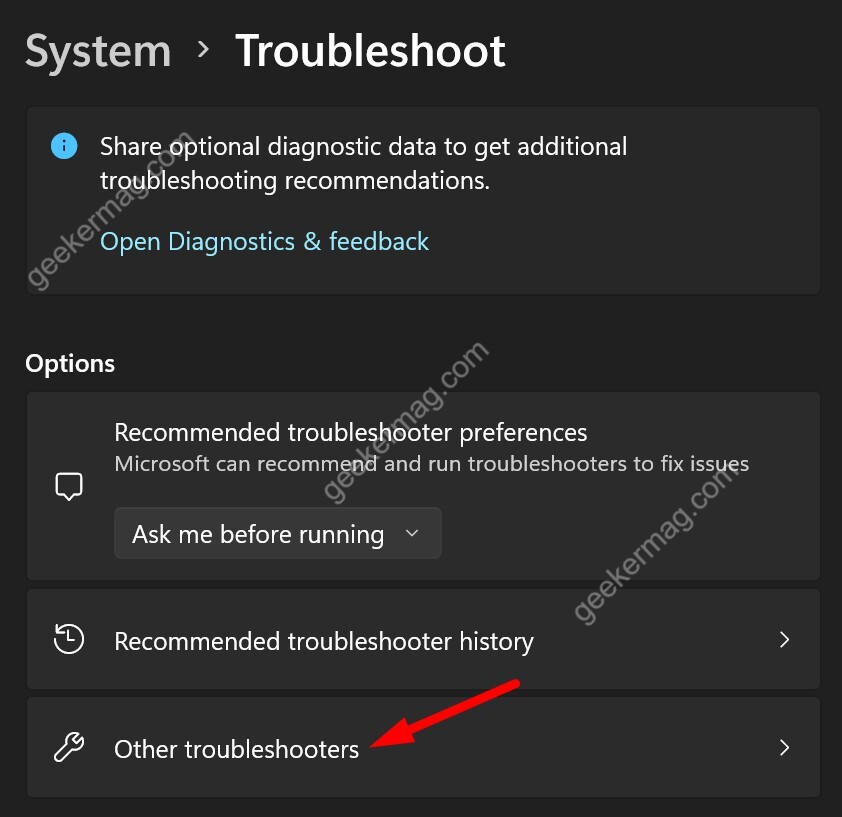
In the Troubleshoot settings, scroll down and click on other Troubleshooter.
Find power and click on Run to start the troubleshooter. Wait for the result.
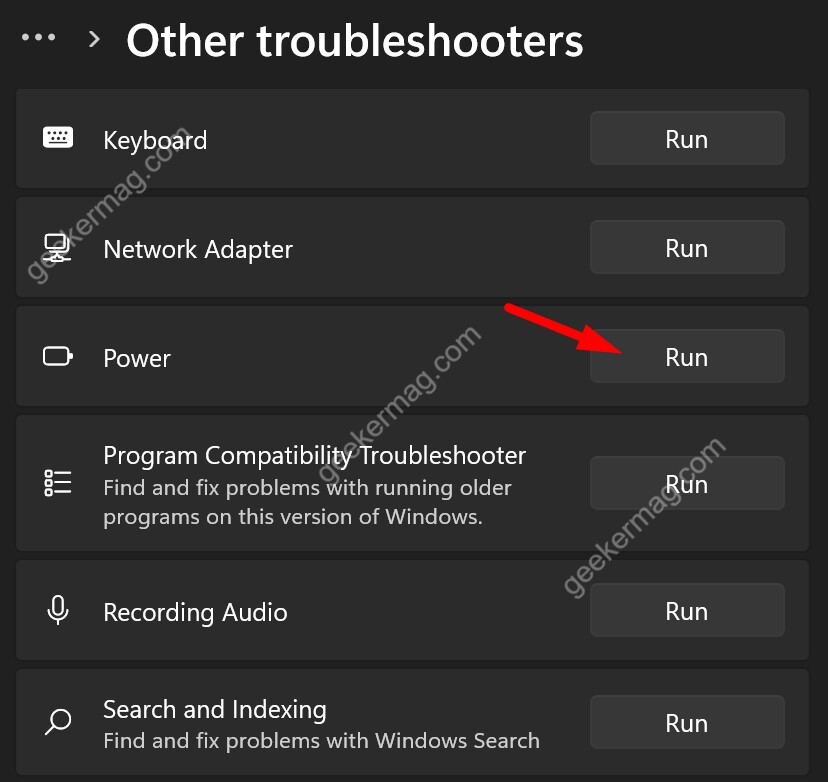
Method 5: Scan your computer for virus or malware
As mentioned, 3rd party apps or viruses can cause the sleep mode not working issue on Windows 11. You can scan your PC using Windows defender or other 3rd party antivirus or antimalware apps.
We will update the article with more methods. We have shared all working methods above to fix Windows 11 sleep mode issue.
In case, you know any other solution that helps in fixing Windows 11 PC Won’t Go Into Sleep mode, then feel free to share with us in the comments.

