Microsoft has announced its upcoming version of Windows OS i.e. Windows 11 which is due for Fall 2021. The first build of Windows 11 in the dev channel is available for insiders. Although it’s working fine, the company wants to make sure that it’s perfect and will add more stuff before releasing the stable for everyone.
There are some users who want to install Windows 11 but keep in mind that it’s not stable they want to use Windows 10 sidewise. If you made upto this blog post, then you’re one out of them for sure.
Fortunately, you can dual-boot Windows 11 with Windows 10. The good thing about this is that you can use Windows 11 without saying goodbye to Windows 10. Apart from that, Windows 11 is new so it will take some for users to adopt it.
Dual Boot Windows 10 and Windows 11
In this blog post, we will cover one of the easiest ways to dual-boot Windows 10 and Windows 11 on your device.
Before continuing with the process, ensure you have created a bootable USB drive of Windows 11. If you don’t have one, download Windows 11 ISO image and then create it.
(THIS IS AN OPTIONAL STEP) Ensure you have more than two partitions on your PC. You will need one partition for Windows 10, and the other partition for Windows 11. You can shrink an existing partition to create a new partition using disk management. To create the partition, follow the steps given below.
Boot into Windows 10
In the Start menu search type Disk Management, when “Create and Format hard disk partition” appears in search results, click to open it.
Now select the disk you want to shrink. Right-click on it, and then click on Shrink volume. You will be asked to enter the amount of space you need to shrink in MB. Once done, click on Shrink.
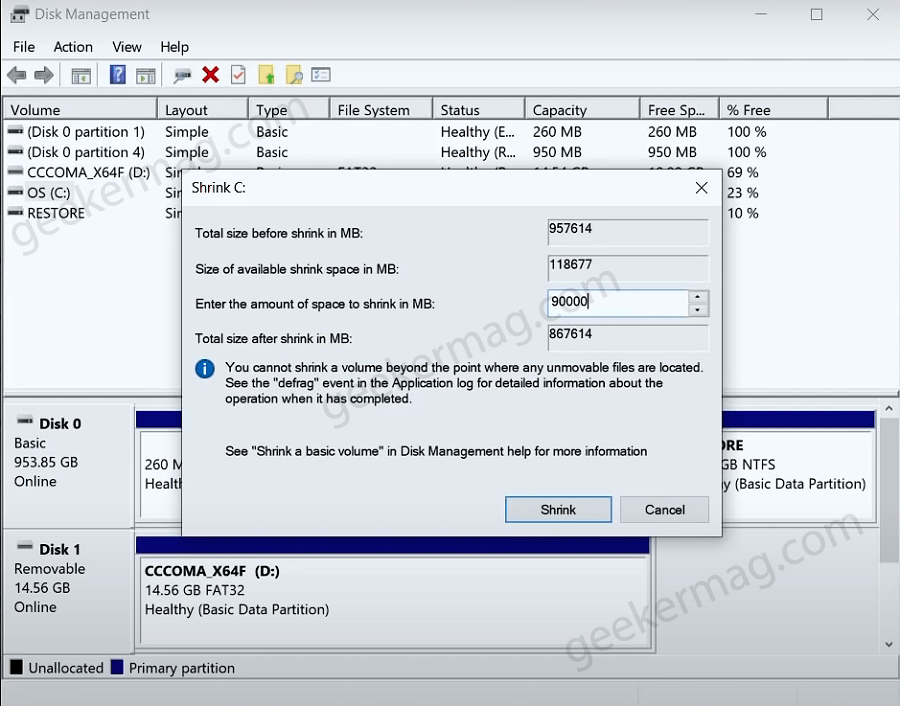
Note – You need to create a partition of 64 GB or greater (recommended by Microsoft) for installing Windows 11 and name it Windows 11. If want to install the latest updates, then create a large partition.
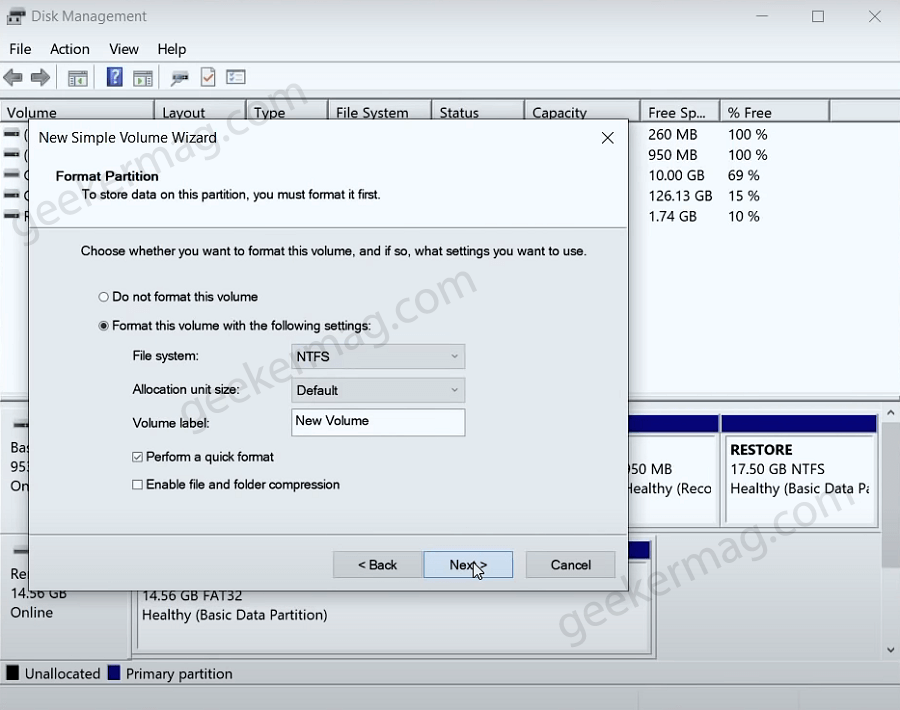
This will create unallocated space on your system. Right-click on the select New Simple Volume. This will open New Simple Volume Wizard follow on-screen instructions and assign drive and name to drive and finish the process.
If you don’t want to give it a name, then leave it untouched, and we will deal with it in the later part of the process.
Turn off your computer, and plug in the USB drive with Windows 11.
Now press the power button, and access the boot menu on your PC. The different devices have different keys to bring Boot Options Menu. You can try any of these: Esc, F9, F12, F10, etc.

When the boot menu appears on the screen, select your Windows 11 bootable USB drive from the list and hit enter.
This will take you to Windows 11 Setup screen. Select the Language, Time and currency format, and Keyboard layout. Once done, click on next.

Click on Install Now to continue with the installation process. If you are asked for the key for Windows 11, then click on I don’t have product key to continue ahead.
Next, select the edition of Windows 11 you want to install. After selecting the Windows 11 edition, click on Next.
You will be asked to agree to the ‘Applicable notices and license terms.’ Agree to it, click on Next.
In the next window, you will see two options- Upgrade, and Custom. Simply select the Custom: Install Windows Only (Advanced) option.

Now you will be asked to select the partition on which you want to select Windows 11. The separate drive for installation of Windows 11 or Select the unallocated space that was created earlier.
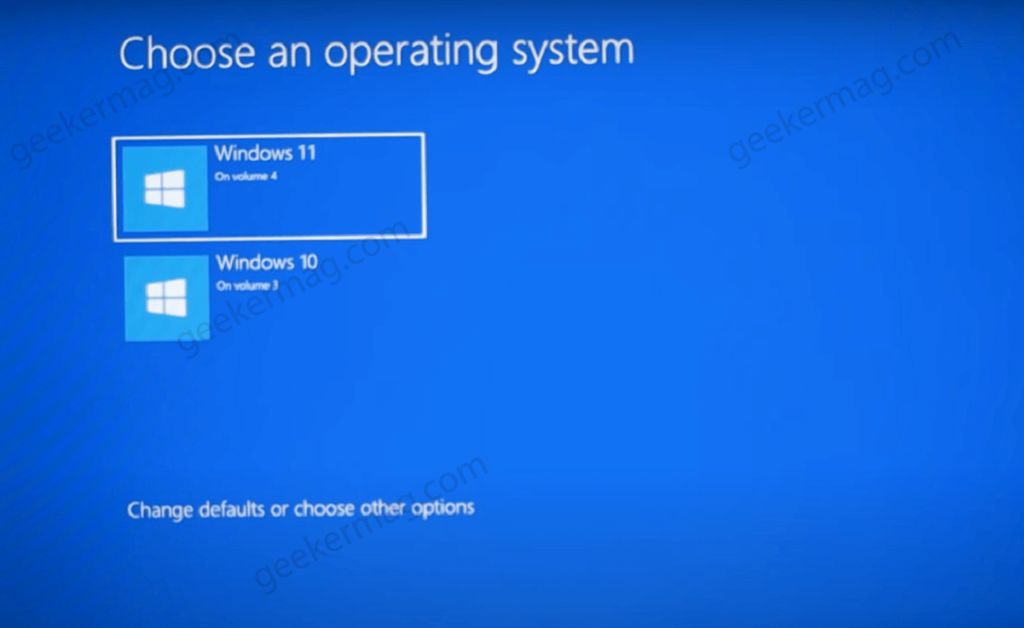
The process of installing Windows 11 on your PC will begin. Your computer may restart several times during this process. Whenever your computer restarts, you may be asked to select Windows to continue with. You might see two Windows 10 options. Select the top Windows 10 options because that is Windows 11.
After the installation process is completed, you will have to set up Windows 11.
Once you are done with the setup of Windows 11, you will have successfully dual-booted Windows 10 and Windows 11.
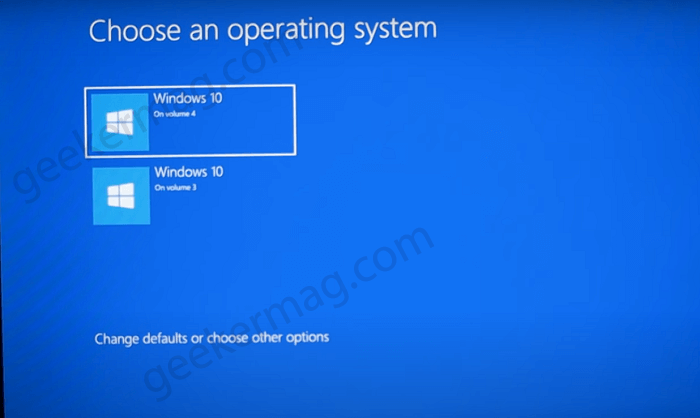
From now onwards whenever you restart your PC now, you will have the option to either continue with Windows 10 or with Windows 11.
Note – As of writing this blog post, the option to load Windows 11 is also labeled as Windows 10 because Windows 11 isn’t officially available for download at the moment. Once it’s available for the public you will not see this issue. So you need to keep in mind the volume in which you have installed Windows 11 to continue.

